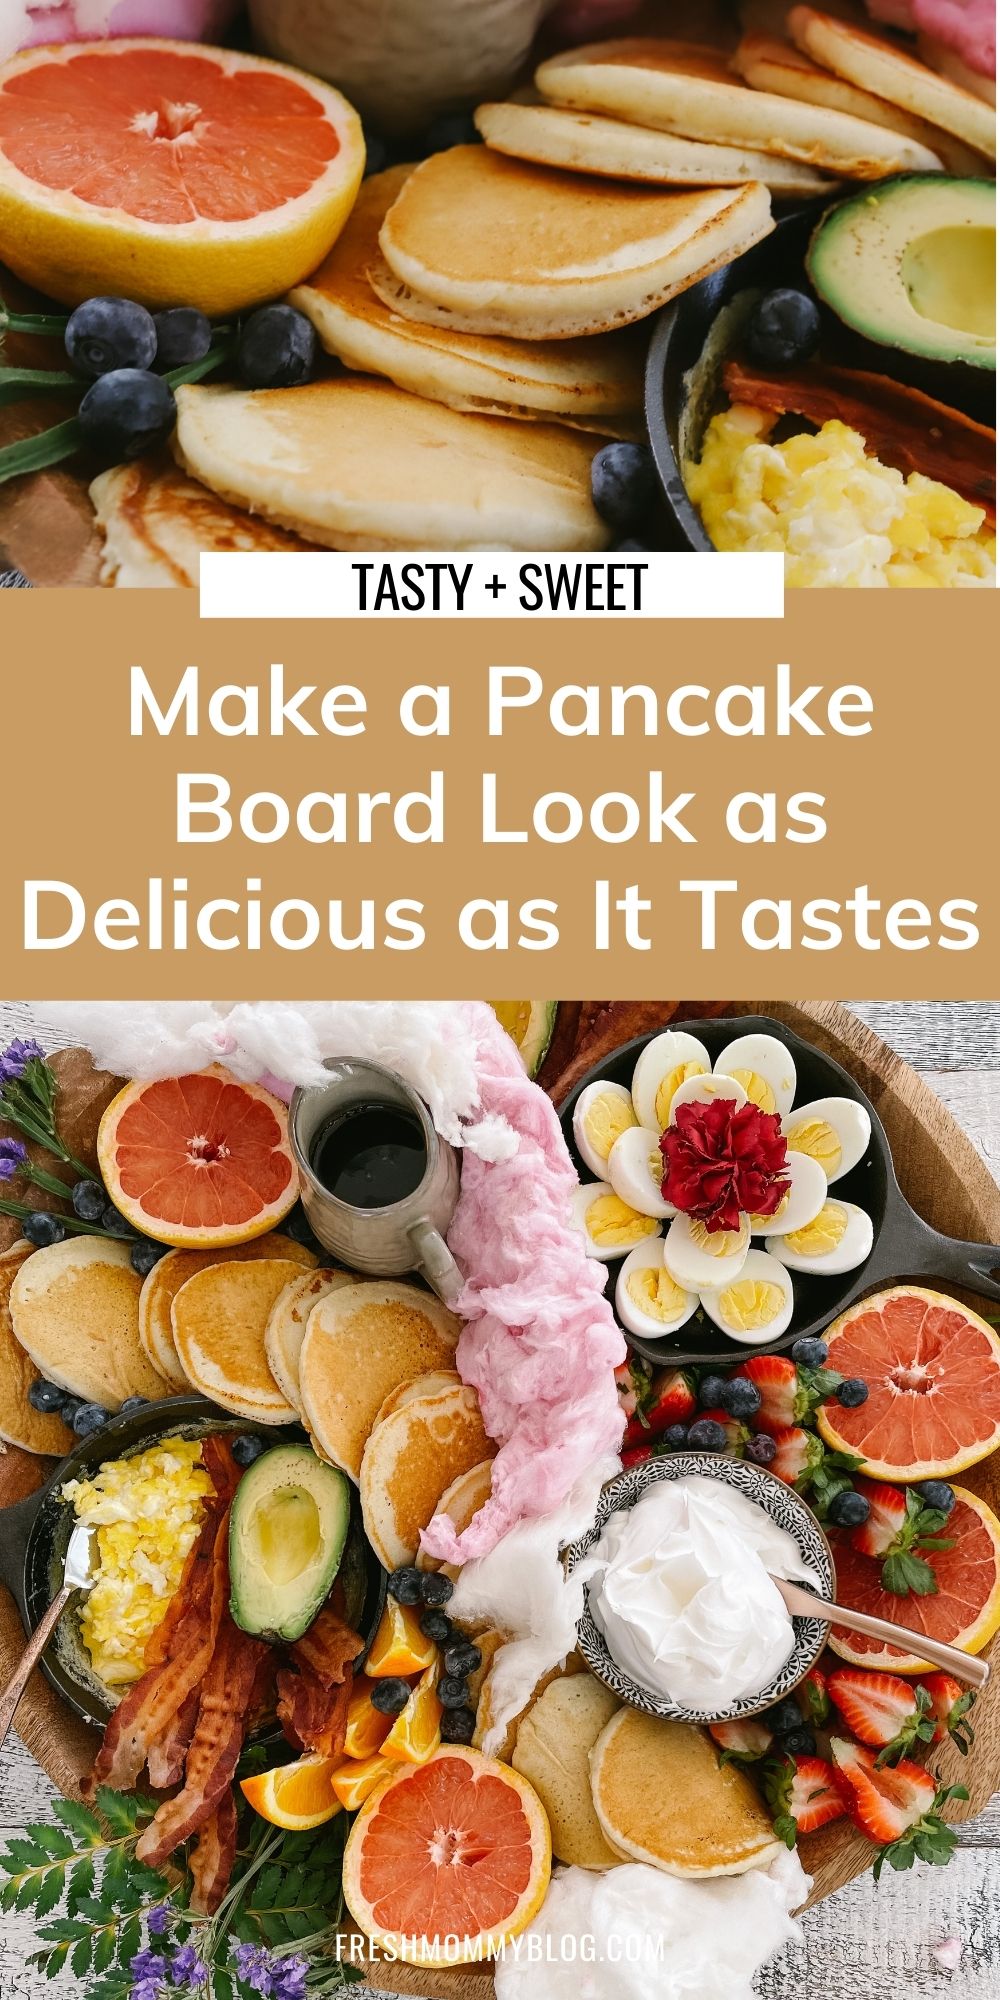
Have you seen these amazing-looking breakfast charcuterie boards? They look delicious, but you’re left wondering how to make a pancake board at home. Today we’re sharing just how to make a pancake board that looks as delicious as it tastes making it the perfect spring brunch, lunch, dinner or Easter breakfast board!
You know, it’s kind of like getting a haircut. Your stylist does a great job, but you have a hard time recreating it the next day on your own.
Well, don’t worry. You can totally design a Pinterest-worthy pancake board of your own with a few easy steps.
Over the years of blogging, I’ve become a pretty fair designer, stager, and photographer. The same tips and tricks I use to create my post images (particularly food) can be used by you to make your pancake board look spectacular. Photo optional.
Keep reading for my best tips on how to make a pancake board that looks as delicious as it tastes.
And we know it’ll taste delicious because I’ll walk you through just what we use for our pancake boards, and a ton of options that will satisfy every taste! Plus, I’ll show you how to get perfect pancakes every time.
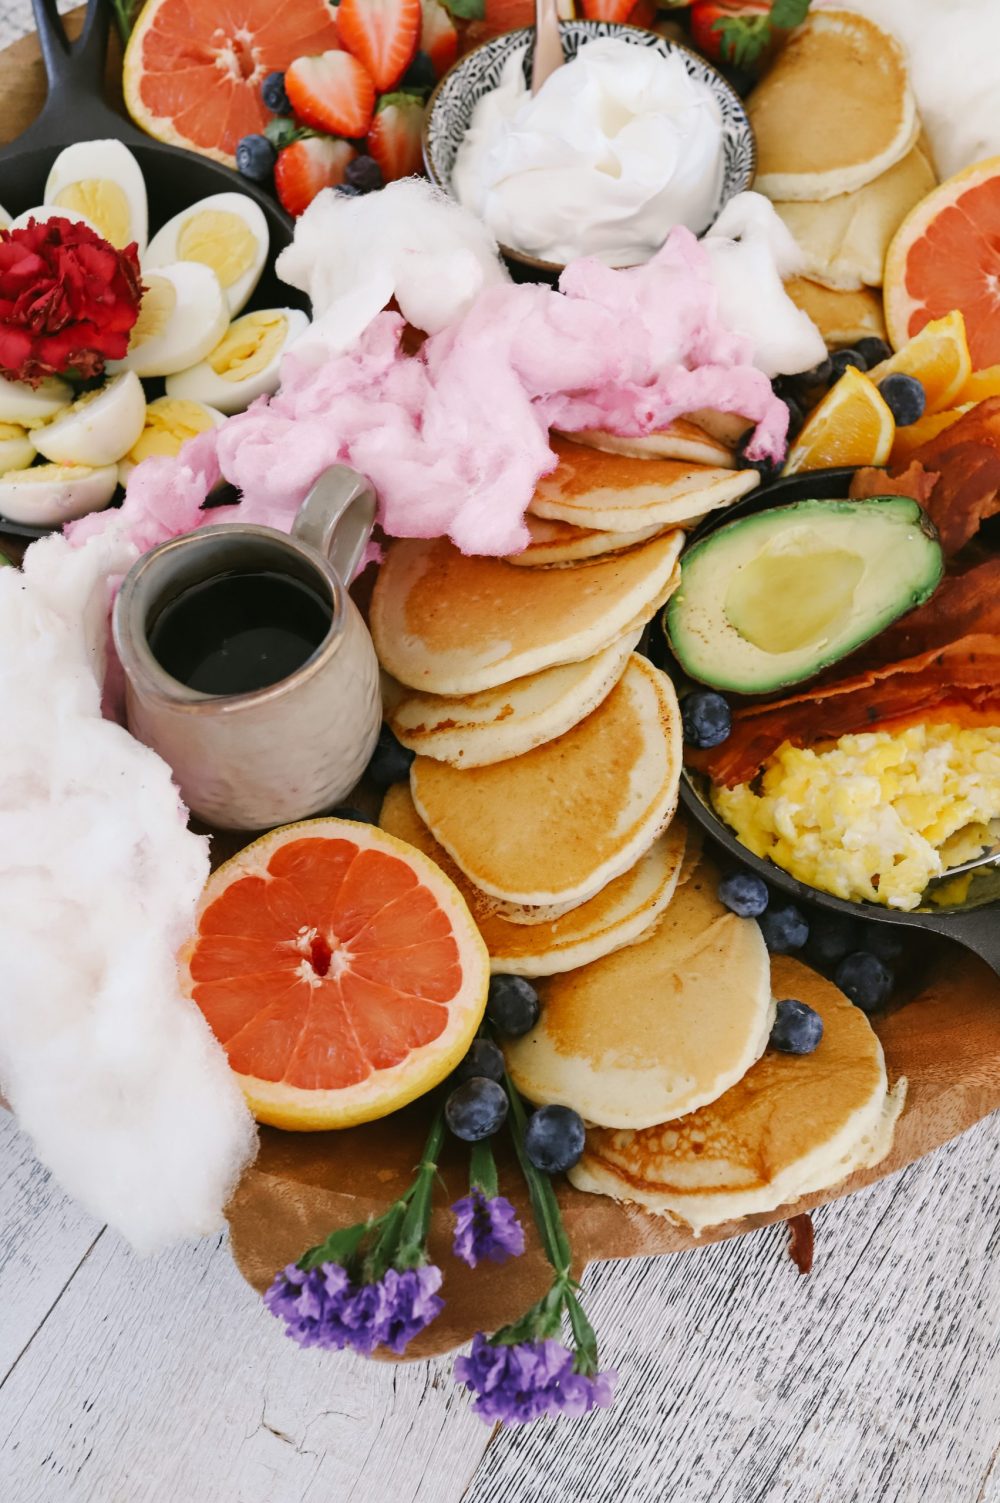

Table of Contents
How to Make a Pancake Board
You’re wondering how to make a pancake board, but first, we need to get you into the right frame of mind.
You need to think of your pancake board as if it is a sculpture. It’s a 3-dimensional artwork that can be viewed from all sides. So, let’s take you through building your board from the bottom up.
Pick Out the Perfect Board
The base of your sculpture, I mean the pancake board, is the board itself. The pancake board acts as a frame or backdrop for the food. I like the rich color and texture of a wood board.
You’ll want a pancake board with an area larger than the average cutting board. Here’s the caveat, large boards can get pricey. But don’t worry, we’ve got some ideas for you!
For a large family like ours, you can simply get away with a cutting board, IF it’s large enough. I have to say though, there are a lot of beautiful readymade charcuterie boards out there (I’ll link to a few of my favorites down below), but if you need to make your pancake board on a budget here are a few ideas:
- Get a 2′ pine wood round from your home improvement store. You’ll need to treat it with oil or a food-safe finish. Add drawer pulls for handles and it looks like it’s store-bought.
- Alternatively, you can go to a salvage store. They often have large butcher block-like pieces of wood at discount prices. Just be sure to give it a good scrub with hot soapy water before using it.
- If you are in a real pinch you could use multiple smaller boards if you have them, but if you need to purchase them that will just add up to the price of one larger board.
- Another option? Lay down a few sheets of wax paper onto a clean table and load the food right ON the table! Your kids will think you’ve lost it… and that’s kind of what makes it fun.
Items for the perfect breakfast board:
Variety and color make for an impressive pancake board, so I created a list to get your creative juices going.
- pancakes
- waffles
- muffins
- scones
- mini donuts
- crumb cake
- bagels
- croissants
- potatoes
- bacon
- sausage
- hard boiled eggs
- scrambled eggs (or cooked different ways and served in a mini skillet)
- berries
- grapes
- nuts
- trail mix
- granola
- raisins
- yogurt
- whip topping
- flavored syrups
- peanut butter
- chocolate chips
- jams
- bananas
- melon
- orange slices
- grapefruit rounds

Add Seasonal Touches to Your Pancake Board
My favorite way to make a pancake board feel special EVERY time, switch it up for the seasons!
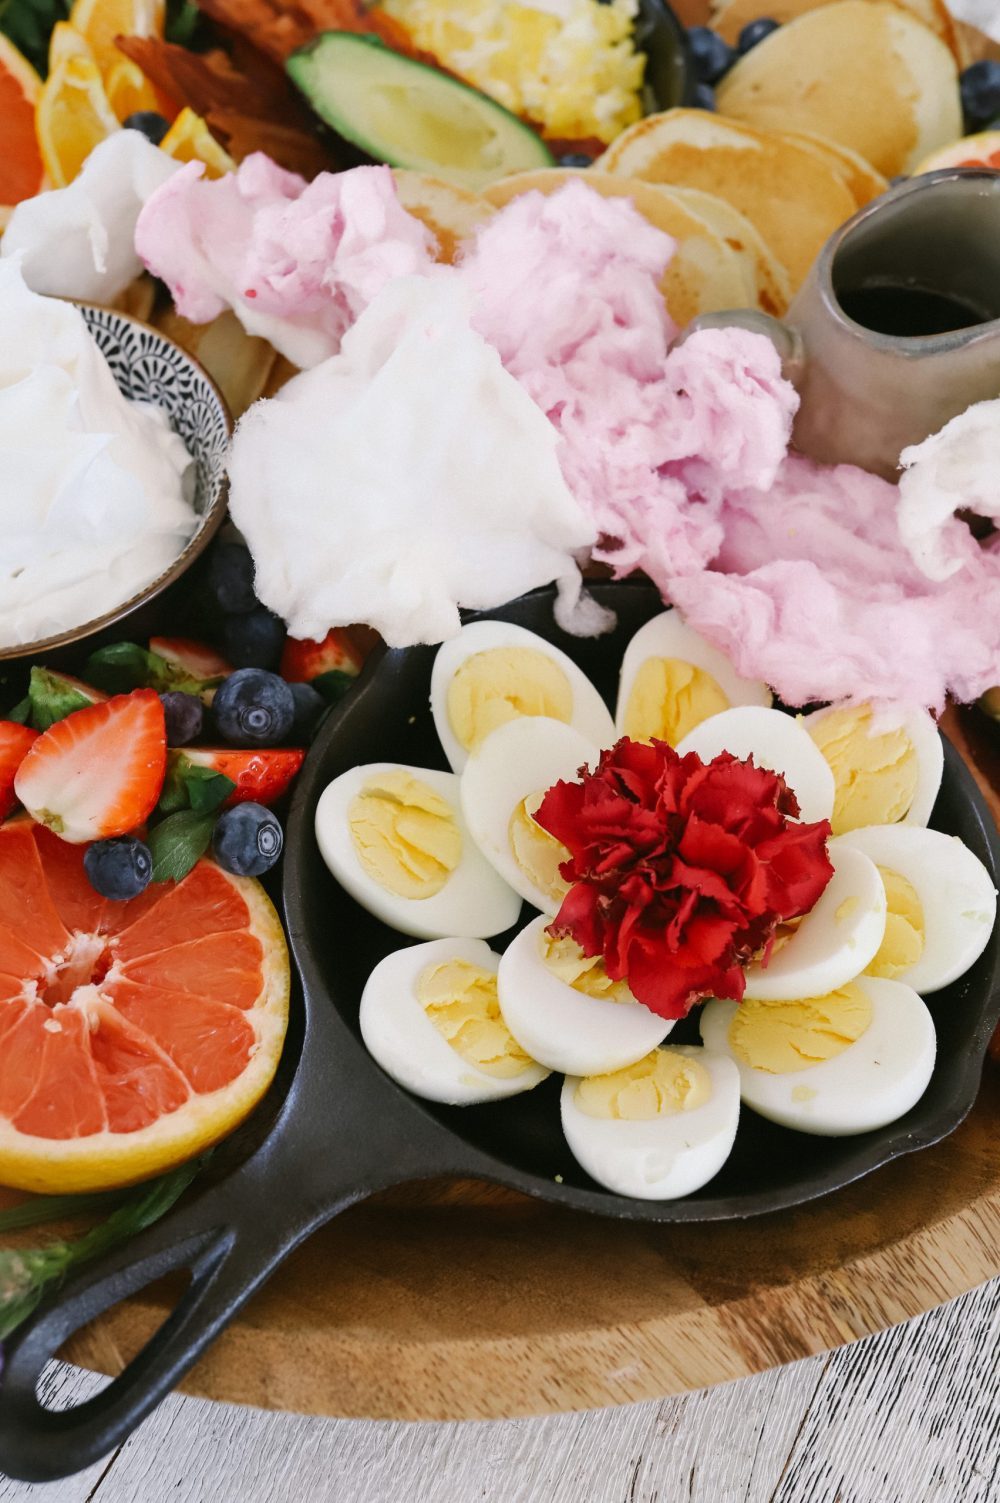
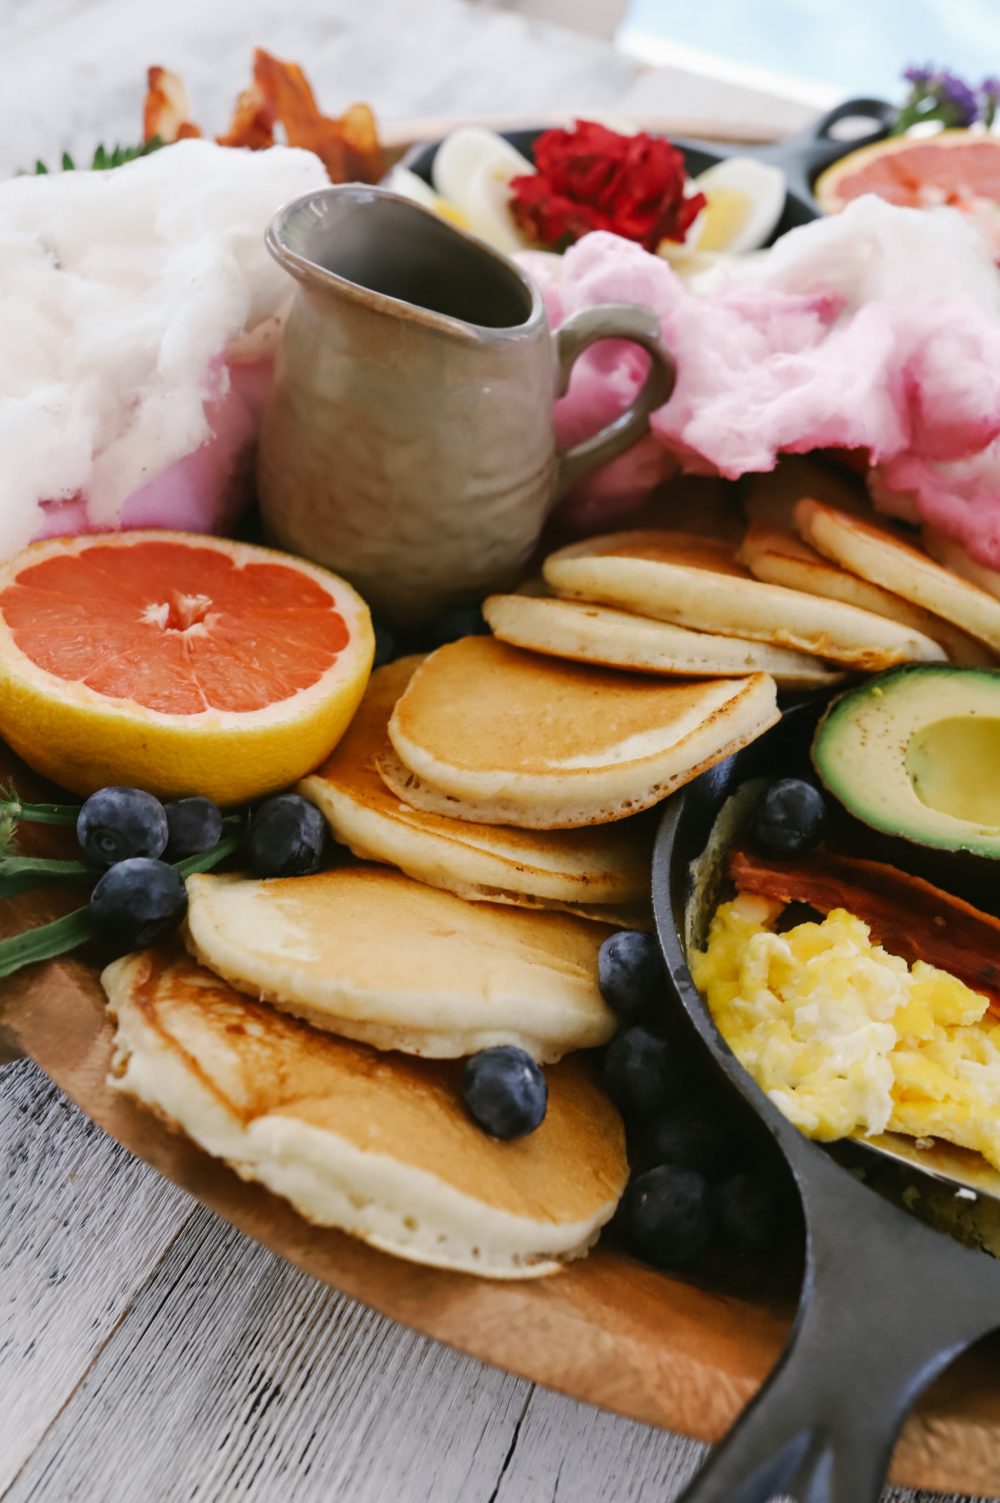
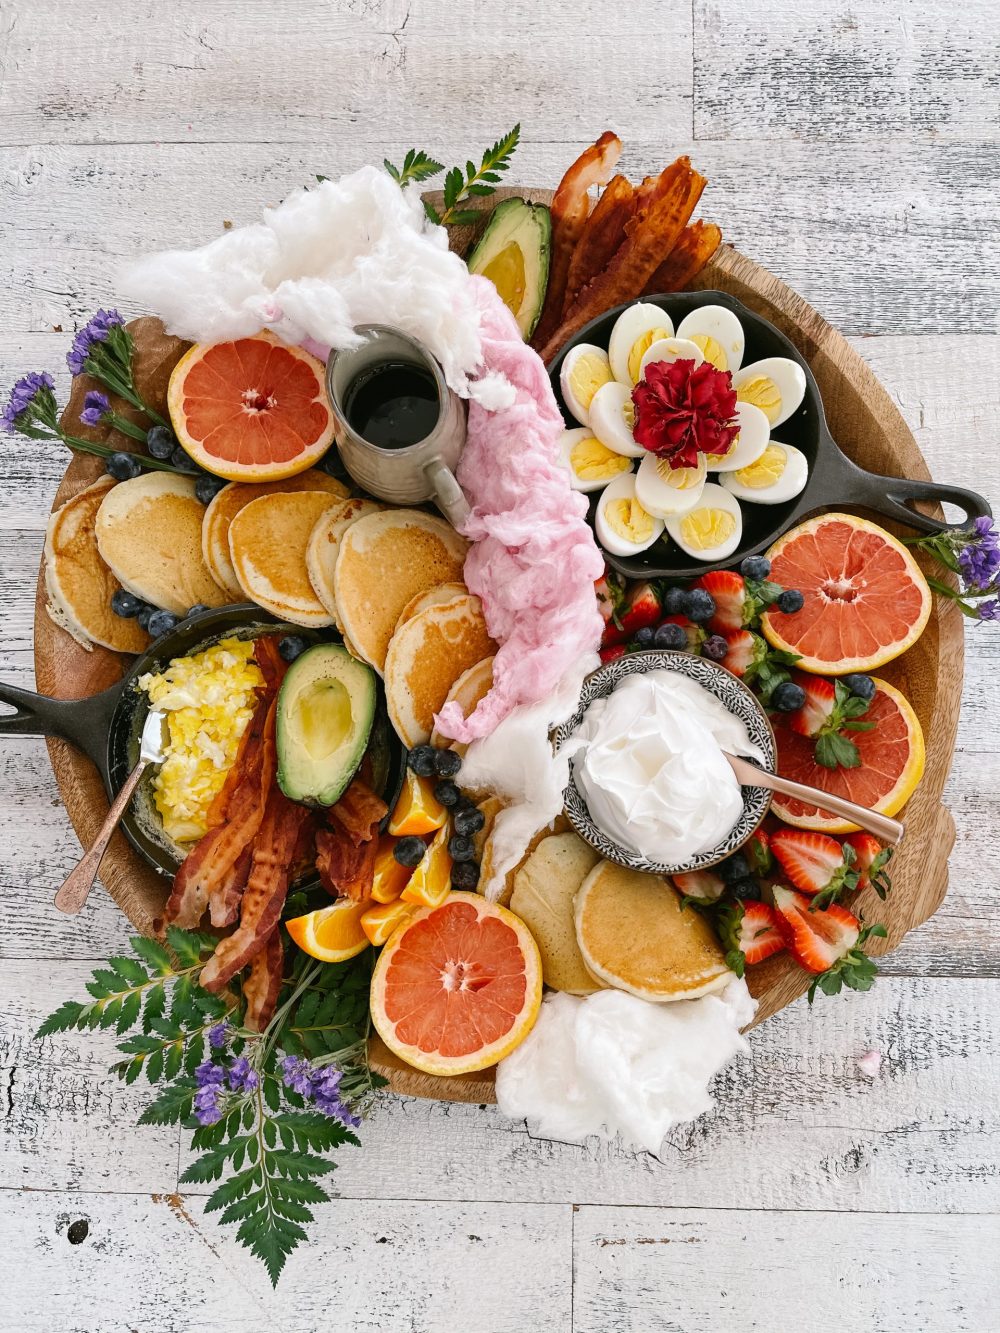
For our Spring pancake board, I used flowers that we had in the house, fruit that reflected the season (like halved grapefruit), and even arranged sliced hard-boiled eggs into a shape of a flower. You could make deviled eggs too for an Easter brunch pancake board!
For a little indulgence, you could add spring/Easter candies as well. I used cotton candy for a fun, festive touch.

Step-by-Step on How to Make a Pancake Board
1) Plan out your pancake board. It’s important to make sure you have all of the items you want for your pancake board ahead of time. There’s nothing worse than realizing you’re missing something the morning you’re trying to assemble.
Pull out any dishes or serving utensils you may use on the board to create your design.
2) Get started by making hot items. Cook your meats, potatoes and hard boiled eggs first and then place them in the oven at 200 degrees to stay warm (except for the hard boiled eggs). Hold off on the pancakes.
3) Start with the larger items. Before adding the food to the board, I’ll usually place a couple of empty bowls, a small skillet, or however I’m going to serve the food items to get an idea of placement. I always start with larger items and end with the smallest.
4) Arrange the cold items on your board. While your pancake griddle is heating start arranging the cold items that will keep well out of the fridge. These would be things like your fruit, syrup, and jams. If you slice pears, apples, or bananas, dip them in lemon water so they don’t turn brown.
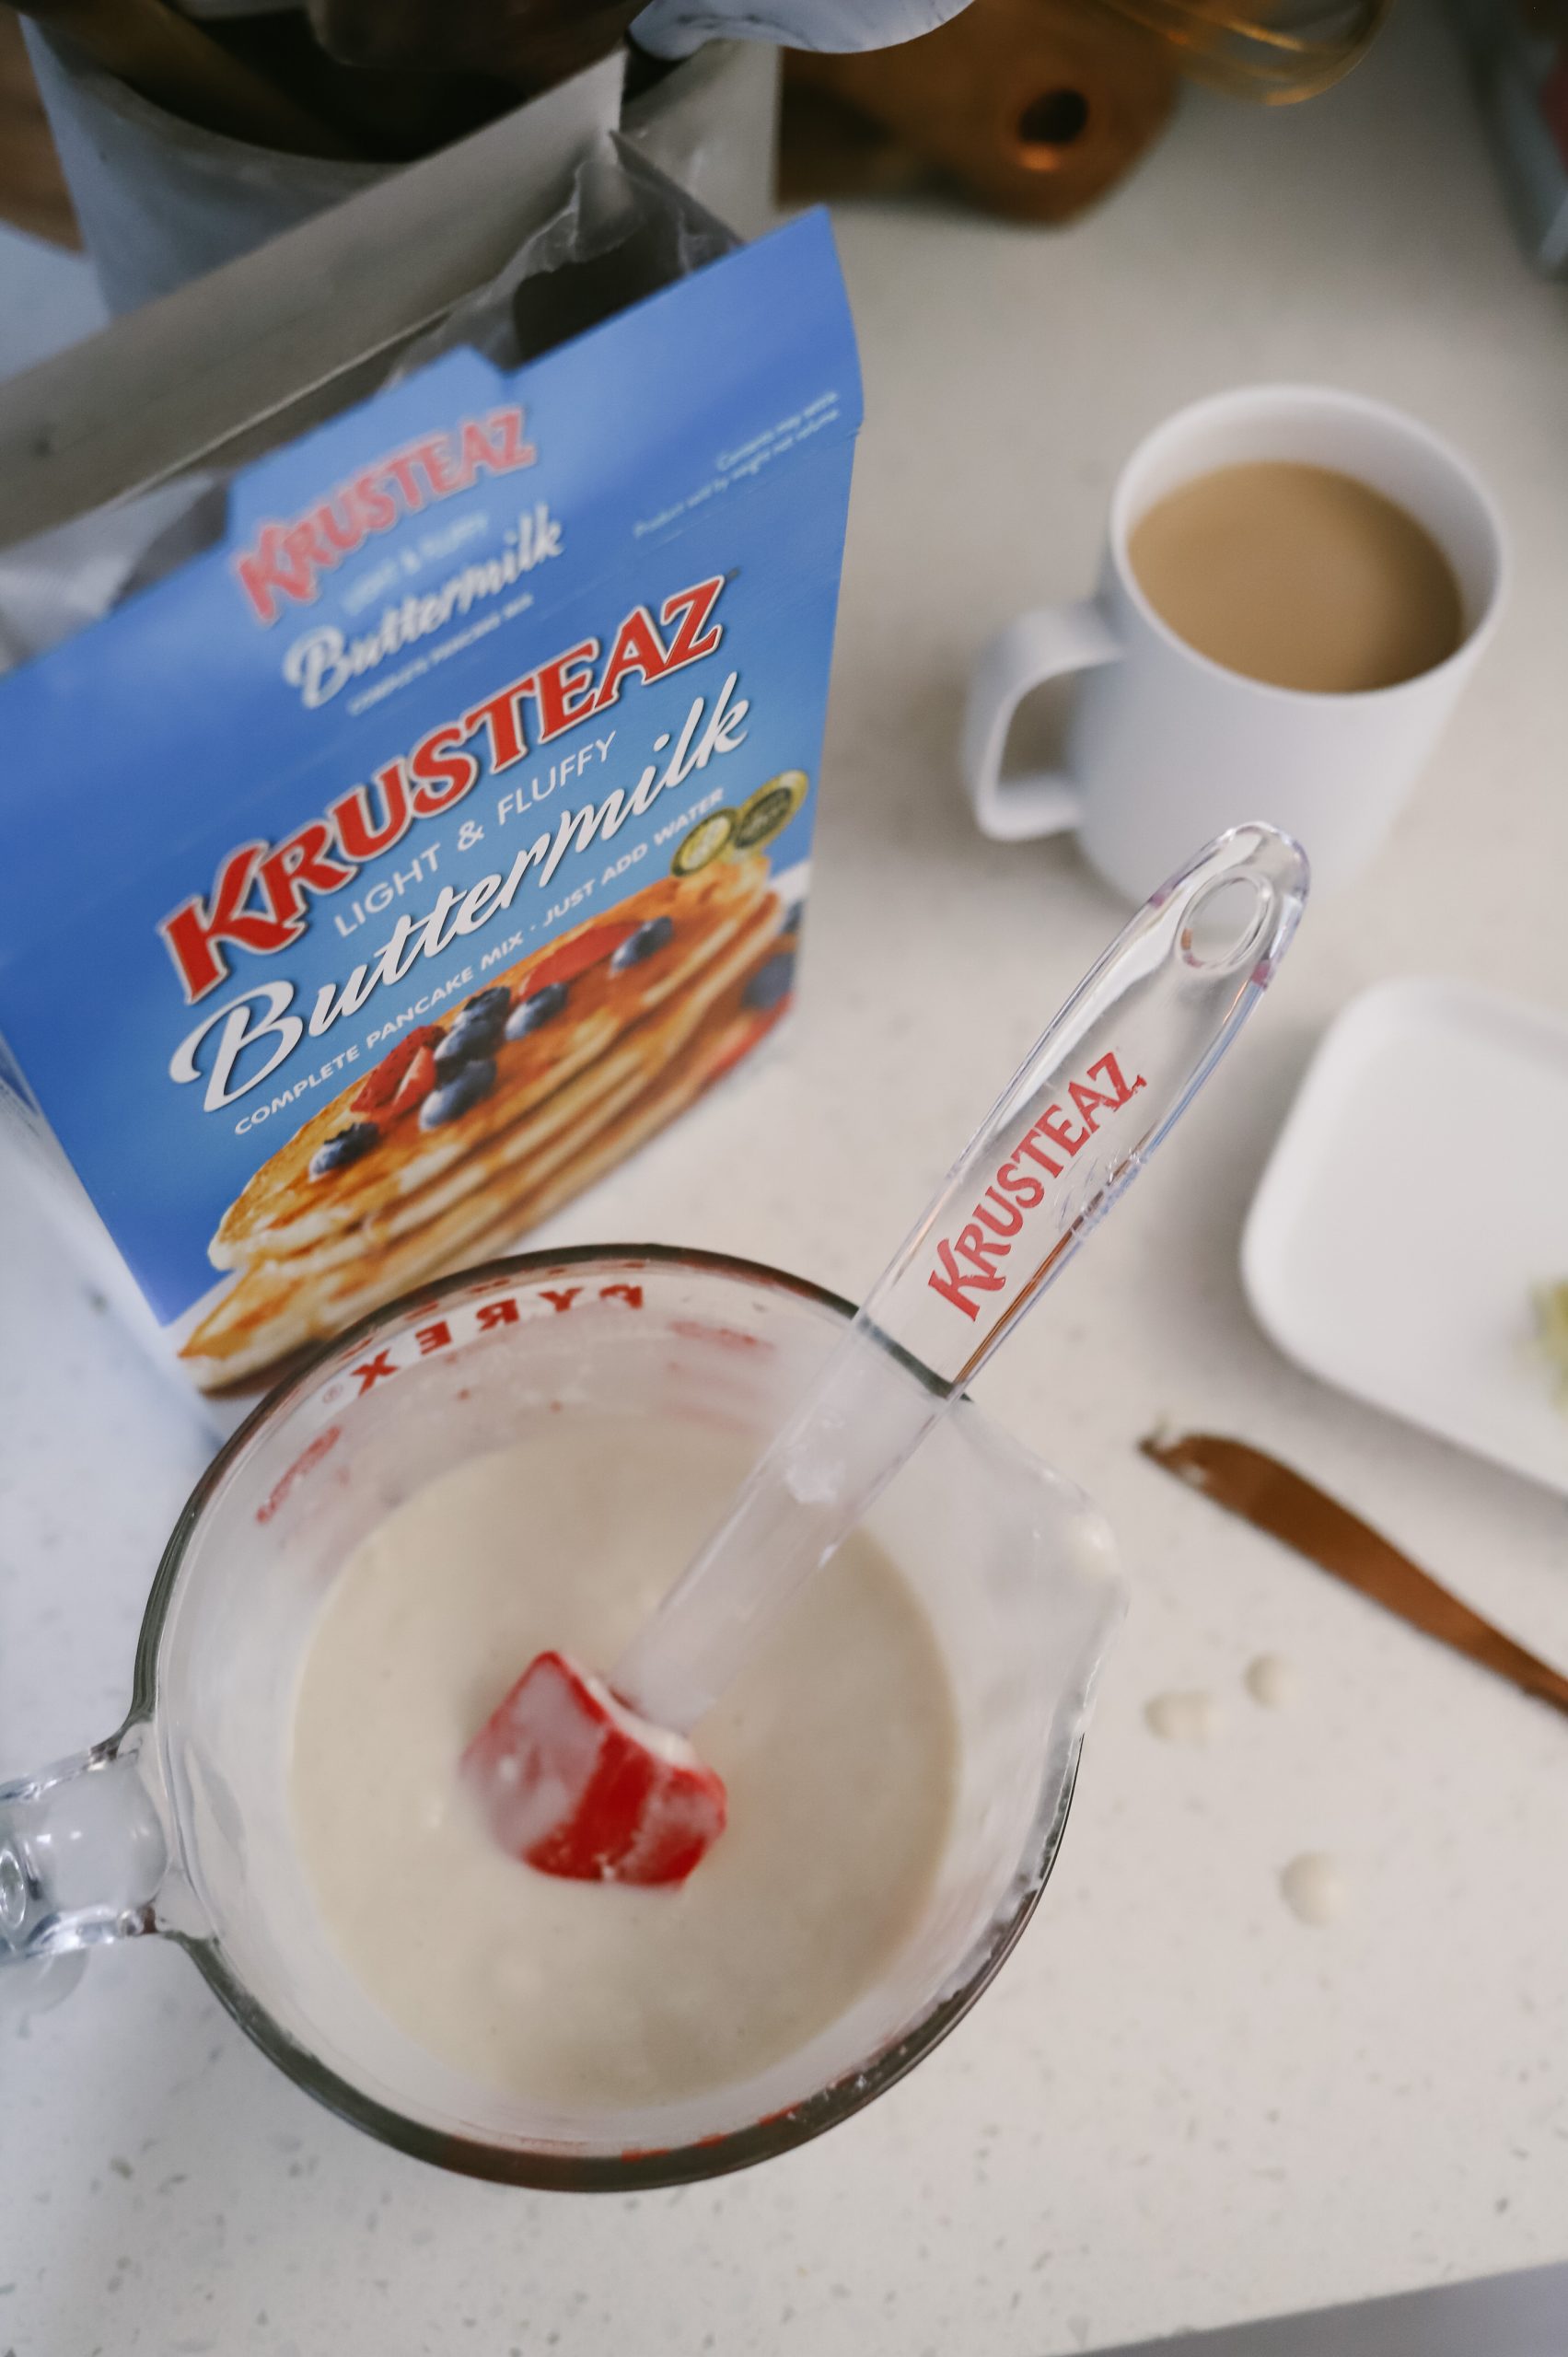
5) Make the pancakes the same size. If you want your pancake board to be truly Pinterest-worth be sure to use a scoop, ladle, or measuring cup to make all of the pancakes the same size. This makes them seem more professional.
It definitely helps to have an easy-to-use mix that gives you light and fluffy results every time. We keep Krusteaz buttermilk pancake mix (both traditional and protein) on hand, because it’s quality ingredients, with no artificial colors, flavors, or preservatives.
Pro-tip: place your pancakes in a single layer on a lightly greased sheet pan in the oven for up to 20 minutes to keep them warm.
6) Place the final items on your board. Now is the time to pull out any remaining cold items such as yogurt or whip cream. Take the potatoes and meat out of the oven and arrange them on the board. And finally, take out and arrange the pancakes on your board.

How to Make Your Pancake Board Pretty
I realize I’ve told you the process, but I didn’t really tell you how to make your pancake board look delicious. Well, remember how I was comparing your pancake board to art? In a sense, it will be a work of art by the time you are done, and using some artistic concepts will help make your food look as delicious as it tastes.
1) Emphasis
Start thinking about what may take up the most space on your board and will draw people’s attention. This will probably be the pancakes, but could also include a big bowl of yogurt, mini cast iron skillets, large selections of fruit, or maybe some scones.

2) Balance
If you place a big pile of pancakes on one side of the board you will want to balance it with something big on the opposite side like that bowl of yogurt we were talking about. You could also use your pancakes to run right along the center in a curved line like a river.
3) Movement
Creating your pancake board is kind of a game. You are playing with the shapes and colors to make it look more pleasing and appetizing.
The best tip I can give you is to use the color of your fruit to create visual movement. So, although you may make a pile of strawberries in one area you can add sliced strawberries on top of your yogurt and strategically place some in smaller bunches along an imaginary line.
This color placement will subconsciously entice the viewer to follow the line through the pancake board.
4) Texture
Create more visual interest by sprinkling other berries, chocolate chips, or granola around the board. This not only can create more movement the varying colors and textures look exciting.
Final Thought on How to Make a Pancake Board
I hope these tips on how to make a pancake board give you a great place to start on your own breakfast charcuterie creation. If you are still having a hard time visualizing what your board should become, it can be helpful to look at pictures. Take a peek at the images here or head on over to Pinterest for a bunch of examples.
And I think you will also like this post on surprising tips for making brunch easier.

Delicious Brunch Recipe Ideas!


Easy Homemade Waffle Recipe
Easy Homemade, Family-Favorite Waffle Recipe for an Amazing Breakfast for Dinner Family Night. Create a Fun Chicken and Waffles Breakfast Board!

Clone of a Cinnabon: Easy Bread Machine Cinnamon Rolls
Easy bread machine cinnamon rolls dough. The best gooey sticky buns and clone of a Cinnabon roll icing! NO waiting overnight. Check out the recipe and how-to video for fluffy cinnamon rolls homemade with a bread maker machine! Use all purpose flour or make them gluten free.


Why We Love
Essential Oils
Did you know that the first prescription ever recorded was for Frankincense Oil? The second was for Peppermint Oil. There is so much natural medicine at our disposal, we just have to know where to look.
Learn More


Leave a Reply