If you’re ready to increase the life and curb appeal of your home, think of a budget-friendly idea like dressing up the windows!
When it comes to renovating your home on a budget, the key is to not take on too much at one time. Work project to project – start small and save for the larger ones.
Here’s the good news, giving the exterior of your home a face lift doesn’t always require a huge change, sometimes all you need to do is change a little landscaping and just like that you’ve got a brand new look.
My family has been renovating our home for the last year and over that course of time I’ve learned a few tips that I’ll share with you today…
YouTube is an amazing educational resource. There are millions of people (professional tradesman, carpenters, plumbers, electricians, crazy talented creatives.) sharing their skills on this platform. If you have an idea you want to try or want to learn how to do something yourself, YouTube is a great tool to prepare you for the job.
Most big box home stores (Home Depot, Lowes, even Ace) host different in-person classes or have educational videos on their sites! If you aren’t naturally handy, going to a few of these classes will give you a chance to practice some projects, hands-on, with a professional before you take on your own projects at home.
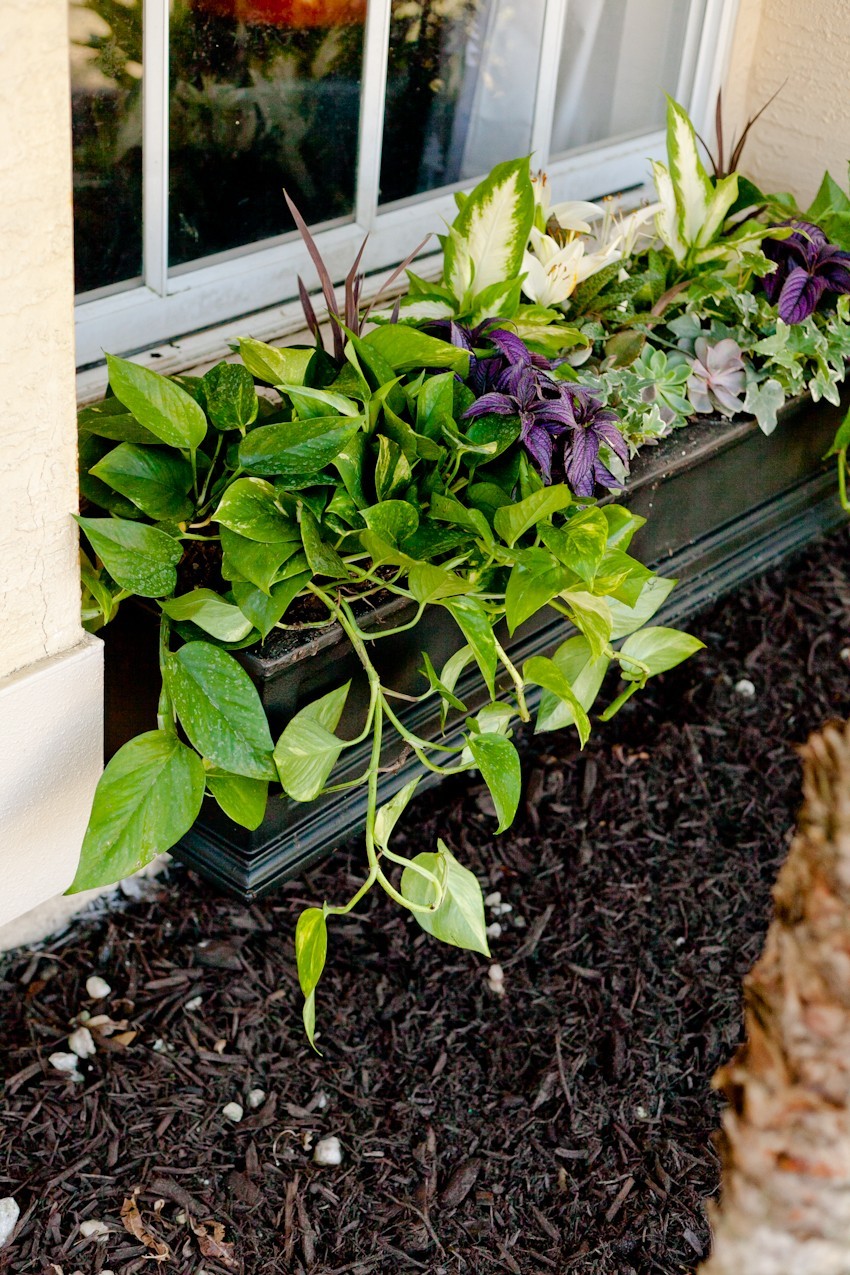
Plants are the accessories to your home’s exterior. Sometimes all it takes to elevate your look is the right piece… the same goes for your home. Recently for us it was as simple as cleaning out some old, over-grown landscaping and adding a flower box to the front window of our home. Getting our hands dirty while cleaning stuff out instantly upped our curb appeal. Then we chose to go one extra step and add a bit of “Jewelry” with the a flower box. It was incredibly easy to install and with just a fews screws and a little sweat, we brought a little more depth and character to the exterior of our home… before we even get to painting it (which is on the list!!).

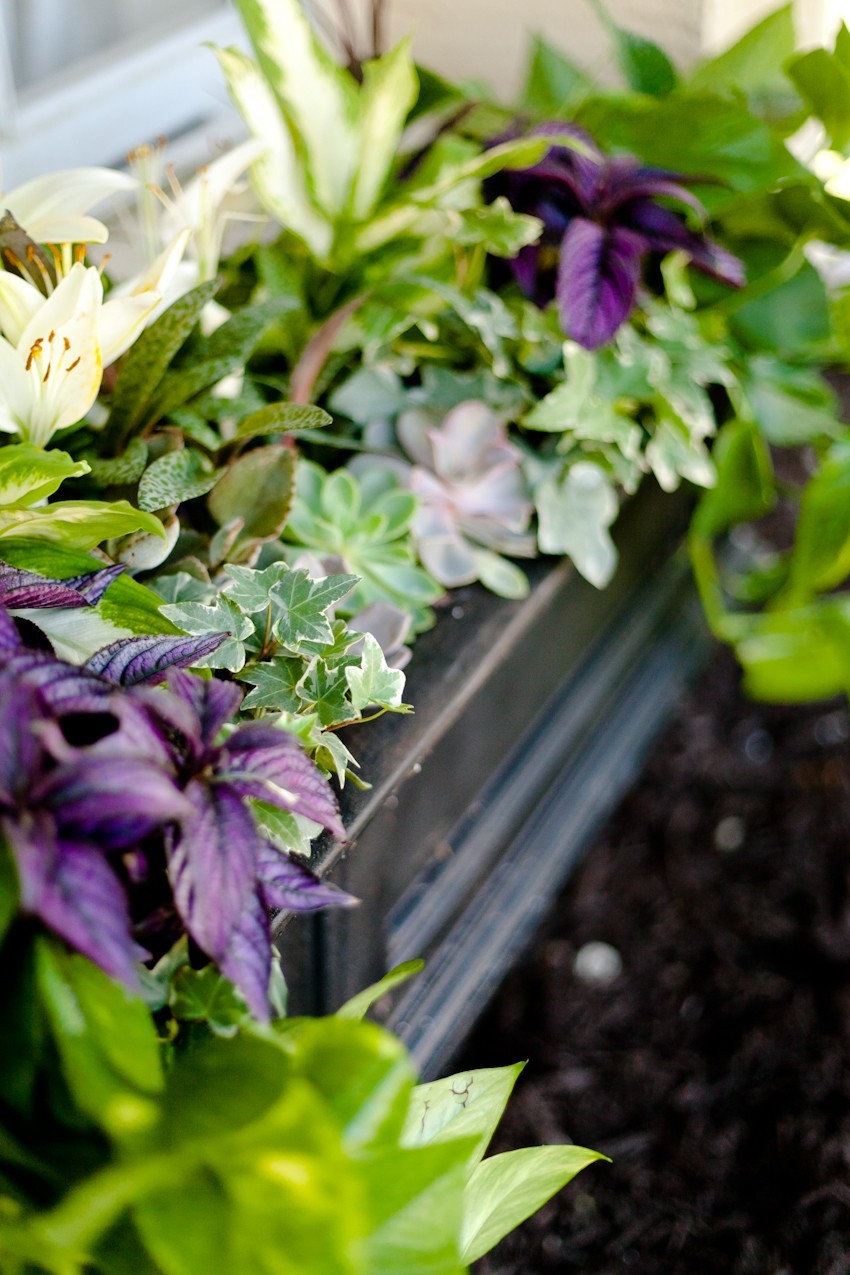
Table of Contents
Today we’re sharing 5 tips for creating that perfect DIY window box display and getting your home ready for all the sunshine in this beautiful season ahead.
1. Choose the right box.
For the window box, you can DIY one simply enough or find one that’s ready to go for you. We only have one window in the front of our house, so it was easy for me to go with a pre-made version, especially since it was so quick and easy to install! There’s a right option for every window and every home, whether you’re purchasing or making one… so go with what suits your home and style.
Our house is in the process of being painted white, with black trimmings and a few wood accents, so having the option to choose a black window box was a perfect match for us, but I’m still totally swooning over some of these wood options.

2. Start with good soil.
You really want to give your blooms a great base and that begins with adding a good potting mix in your boxes. The great thing here is that you won’t need to totally refill them every summer, because there is usually a lot of good soil left in them at the end of the season. One large bag of a good potting soil was enough for our 4’ box (and there was some leftover for other projects as well! Next season, we’ll just churn up the old soil and add in a little new to give it a good mix.


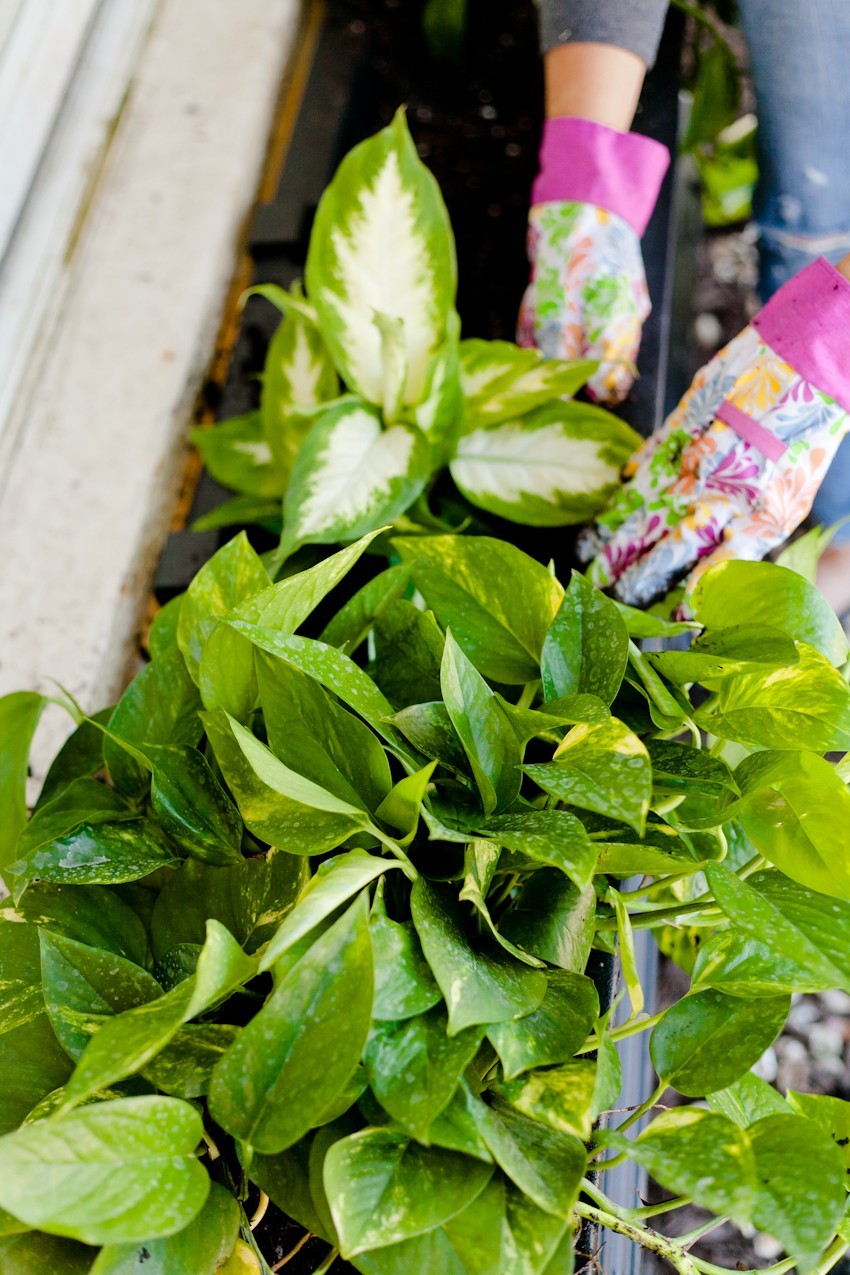

3. Fill those boxes up!
No one wants lonely looking flower boxes and having them under-filled definitely gives the lonely vibe. Ignore the advice of all the flower pot tags with suggestions on how far apart to space the plants and go with your gut on this one… it will help to avoid your flower boxes looking skimpy.
4. Plant the right flowers for your space and choose a color theme.
It’s important to think about where your windows are located on your home – sun vs. shade, colors palette, etc.
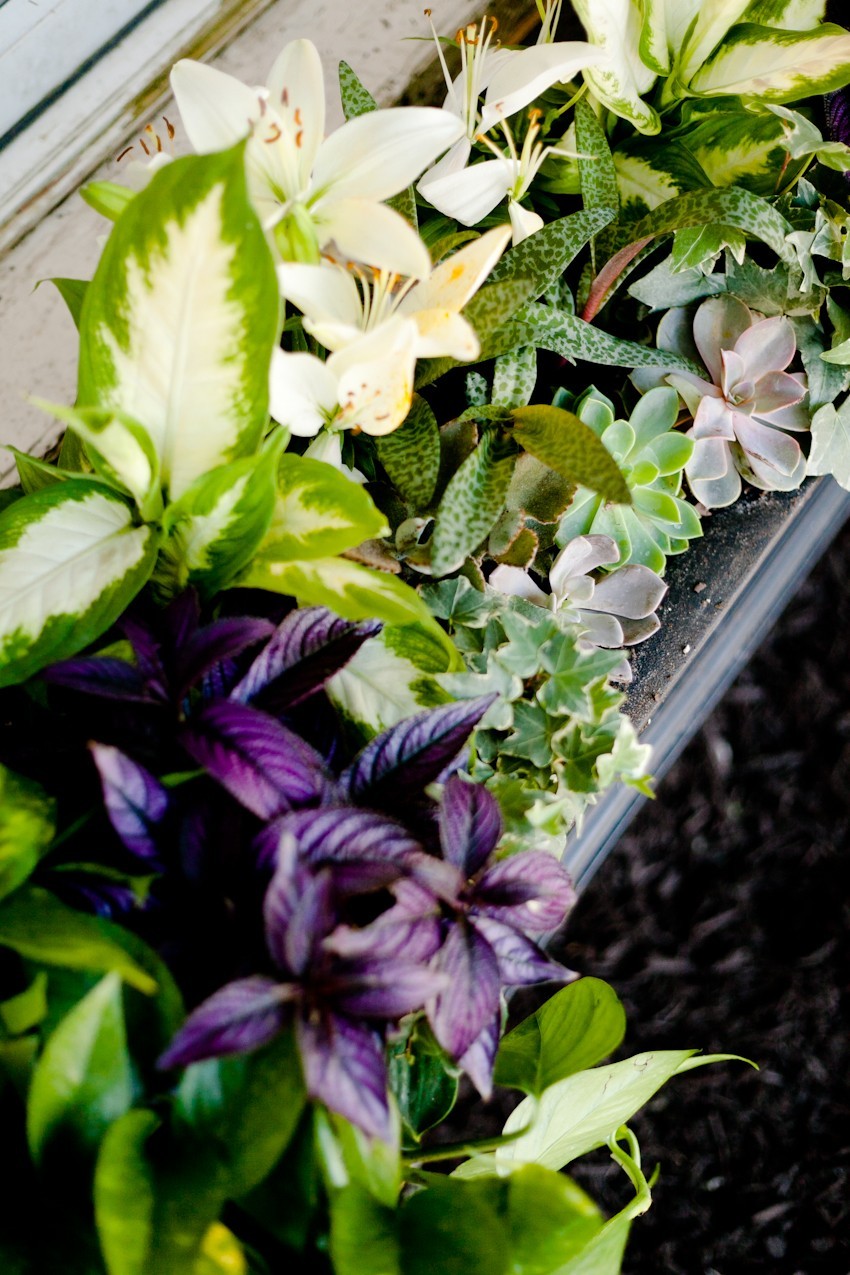
My favorite flower boxes are ones that follow a bit of a color pattern. You don’t have to be crazy strict here, just select a range of colors that you like and try and stick to that color range… Adding in plenty of greens as well.
A good recipe for plant selection is to use a main plant that will be in the background such as Geraniums, Peony or Angelonia (sun), New Guinea Impatiens (part sun) or Begonias (shade). If you’re not sure where to start, head to your local floral center and based on whether you need plants for sun or for shade, take a look and see what catches your eye! Usually this is how I begin my process. For a 2′ DIY window box, choose 2-3 main (taller) plants, for a 3′ DIY window box use 3-4.
Around the main plants, put in a filler plants and greens. For our flower box in the shade, I added some Hostas. Compact Verbenas, Flowering Vinca or Petunias are good here too.
In front of your main plants you can place some trailing plants or vines! Vinca Vine, Ivies, Trailing Verbena or Ivy Geraniums are great choices, and I love adding in some Succulents as well for that compact color.
5. Water and fertilize.
If your window boxes are in the sun, or they are in a spot that is difficult to water, you may want to add water storing crystals to the soil while you’re mixing it up. The help retain water by absorbing it and then slowly release as needed, making the need for your watering chores much less often.
While you’re at it, fertilize! This is something you’ll want to do every week or two to keep your flowers and plants nice and full… and happy!


Elaine says
Great tips – your boxes look beautiful! I’ve been thinking about putting window boxes on the front of our house. This might be enough motivation to make it a weekend project 😉 Thank you!
Krystin says
Wow, this is the prettiest window box I’ve ever seen! I need to upgrade mine haha!
Holly says
Gorgeous pictures! I love how the window boxes turned out! They look great! I wish we could have some but I don’t think they are HOA approved where I live. Oh well, maybe in our next house! I’ll have to come back for your tutorial 😉
Keating says
This is adorable!! I love window boxes. They add so much character to a home.
Jennifer Maune says
Love these tips, and love how the box looks. Love trying out different ways of planting to maximize the yard space!
-Jennifer
https://maunelegacy.com
Marlynn | UrbanBlissLife says
This is darling! It adds so much character to the window!
Sara @ A Mom and her momtourage says
I love your window box, it is super cute!! I am hoping to be able to do this outside my kitchen with some fresh herbs!!
jessica says
love this idea and just planted food in mine last week. it’s such a great way to save space which i’m terribly limited on.
Aria | Blogs by Aria says
love the window box it looks great!
Sharon Chen says
Oh yes these lovely plants are a great addition for summer. Very refreshing to the eyes 🙂
Leila says
This is gorgeous! Thanks for tips.
Alexis says
What a gorgeous window box! I’m hoping our next house I’ll be able to put window boxes out. They’re just so pretty to look at
Bridgid | @HeyBougieMama says
Even though we’re in a rental right now I’ve still been dying to dress it up outside and increase the curb appeal because, why not haha. This looks great. I can’t keep up with plants but I would love to put some pretty succulents out front by the windows or lining the walk-way to our door.
Kathi says
Love your window box – beautiful colors!
Tabitha Blue says
Thank you!!
Reginne Kelly says
This looks great. I can’t keep up with plants but I would love to put some pretty succulents out front by the windows or lining the walk-way to our door. Just Click Here for more details
Belaa Hezal says
Thank you so much for the post you do. I like your post and all you share with us is up to date and quite informative, I would like to bookmark the page so I can come here again to read you, as you have done a wonderful job.