We’ve been working on a small outdoor project this summer, and I think it’s my new favorite! Okay, don’t I say that about every project we take on? Seriously though, this DIY outdoor shower has me feeling like we’re on vacation… when in fact, we’ haven’t left our backyard!


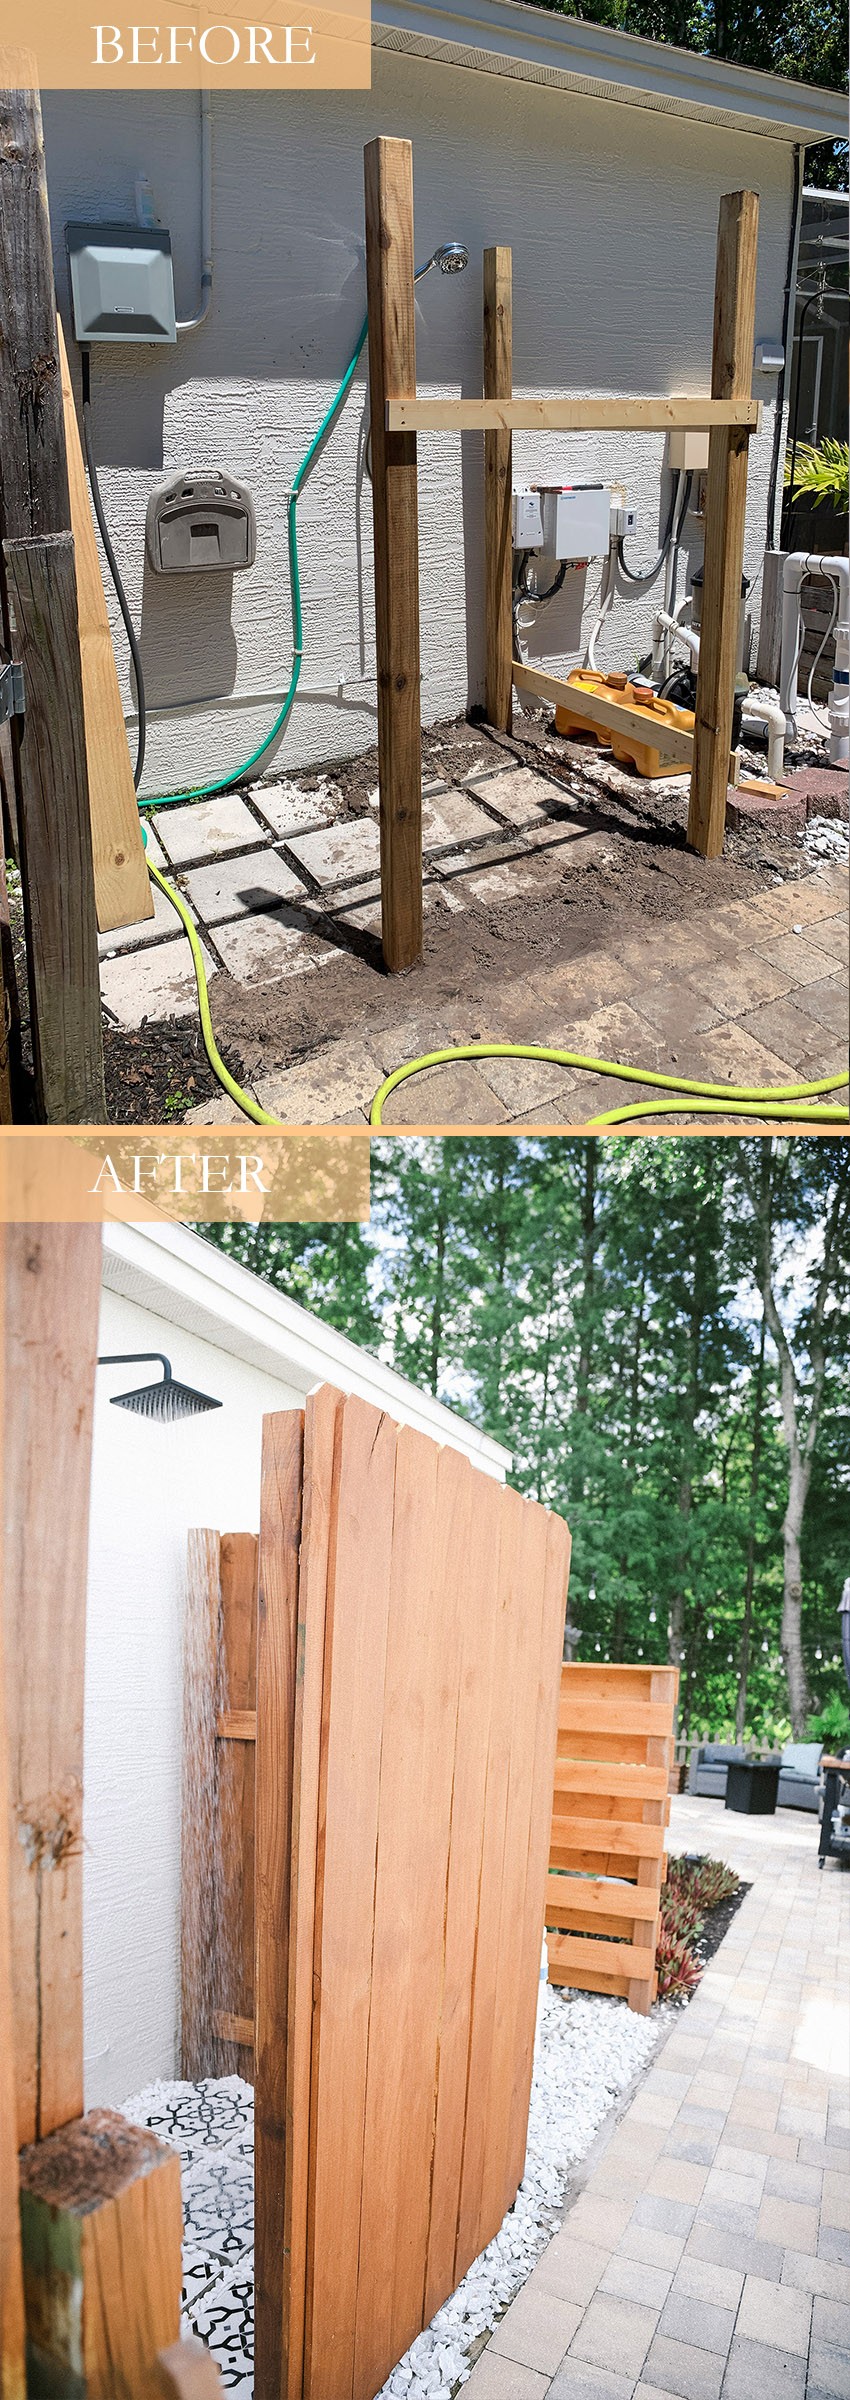
Between our kids jumping on the trampoline, feeding turtles from the dock, playing in the sandbox, or just running around being kids, we needed a place for them to rinse off – especially when covered in sand and before jumping into the pool.
Even with that, a good shower after splashing in the pool is something I look forward too. There’s just something about a spa or resort when you can shower off in that warm, open air.
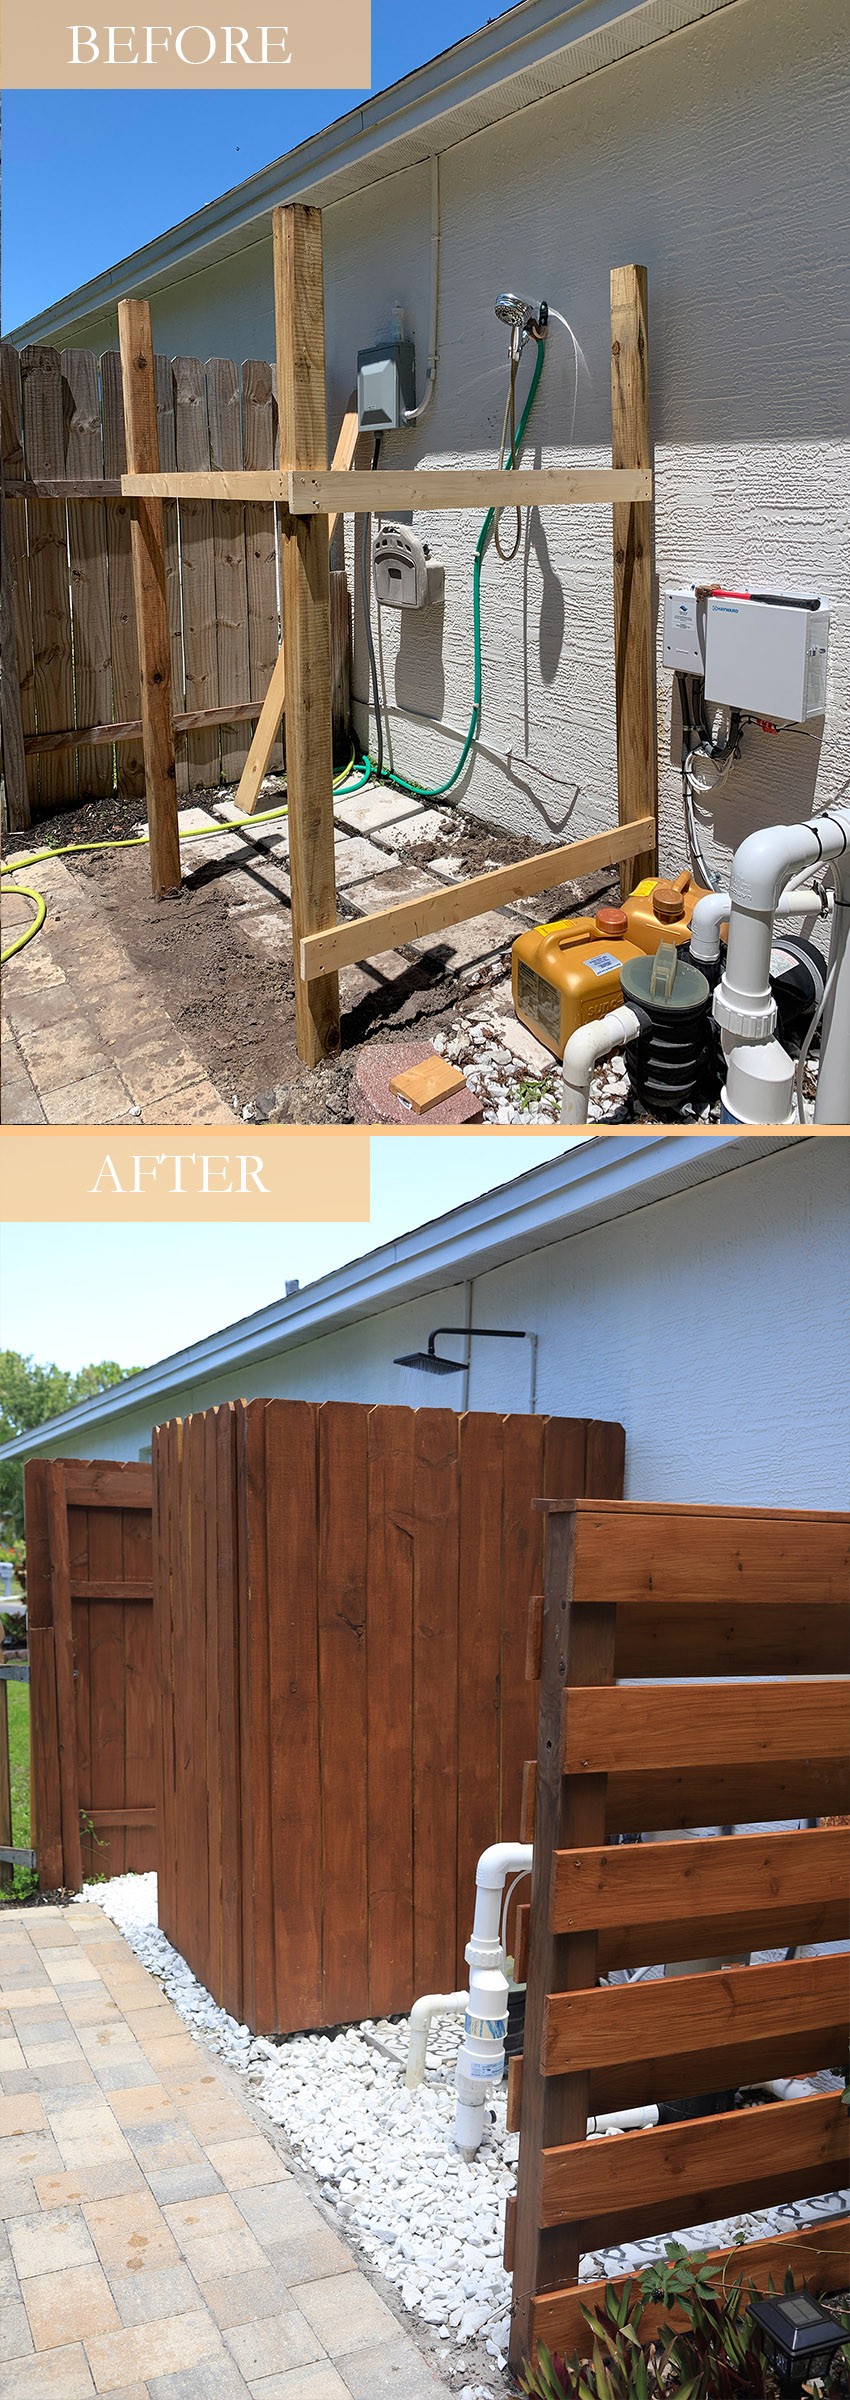
When we first bought our home, Chris installed a showerhead that we hooked up to our garden hose… but we definitely didn’t do anything fancy with it. It wasn’t blocked off for privacy and it was on the side of the house with all of the utilities, including the pool utilities. Though it was a walkthrough to our backyard oasis, this was a side of the house typically avoided.
This time though? We were ready to make even the outdoor shower an oasis.
Table of Contents
DIY Outdoor Shower Ideas on our List for the Ultimate Backyard Oasis:
- Add fencing to create privacy.
- Paint walls, hose, and utilities to blend in.
- Add rain showerhead.
- Create “flooring” with painted tiles and drainage with stones.
- Include storage with shower caddy and DIY hooks.

Transform your everyday garden hose into an immaculate shower experience… outdoors!
Items needed to create an outdoor shower with a garden hose:

How to DIY an outdoor shower with a garden hose:
Connect the showerhead to the showerhead extension arm. Where the arm would attach to the wall, instead thread to the (elbow). Use to prevent leaking when threading the showerhead to arm and arm to female push-to-connect.
Using a 1/2” copper pipe (cut to height, if desired, and sanded) connect with the elbow at the top. At the bottom of the copper pipe, connect to the Brass Garden Valve with Drop Ear.
Attach this copper pipe and showerhead to your outside wall (you could attach to a fence or post, as well) with one-hole straps.
Connect your garden hose to the Brass Garden Valve with Drop Ear and test!
Once water is running fine and there aren’t any leaks, paint it all to match the wall, if desired.

How to DIY Stencil Paint Patio Stones to Create Outdoor “Tile”
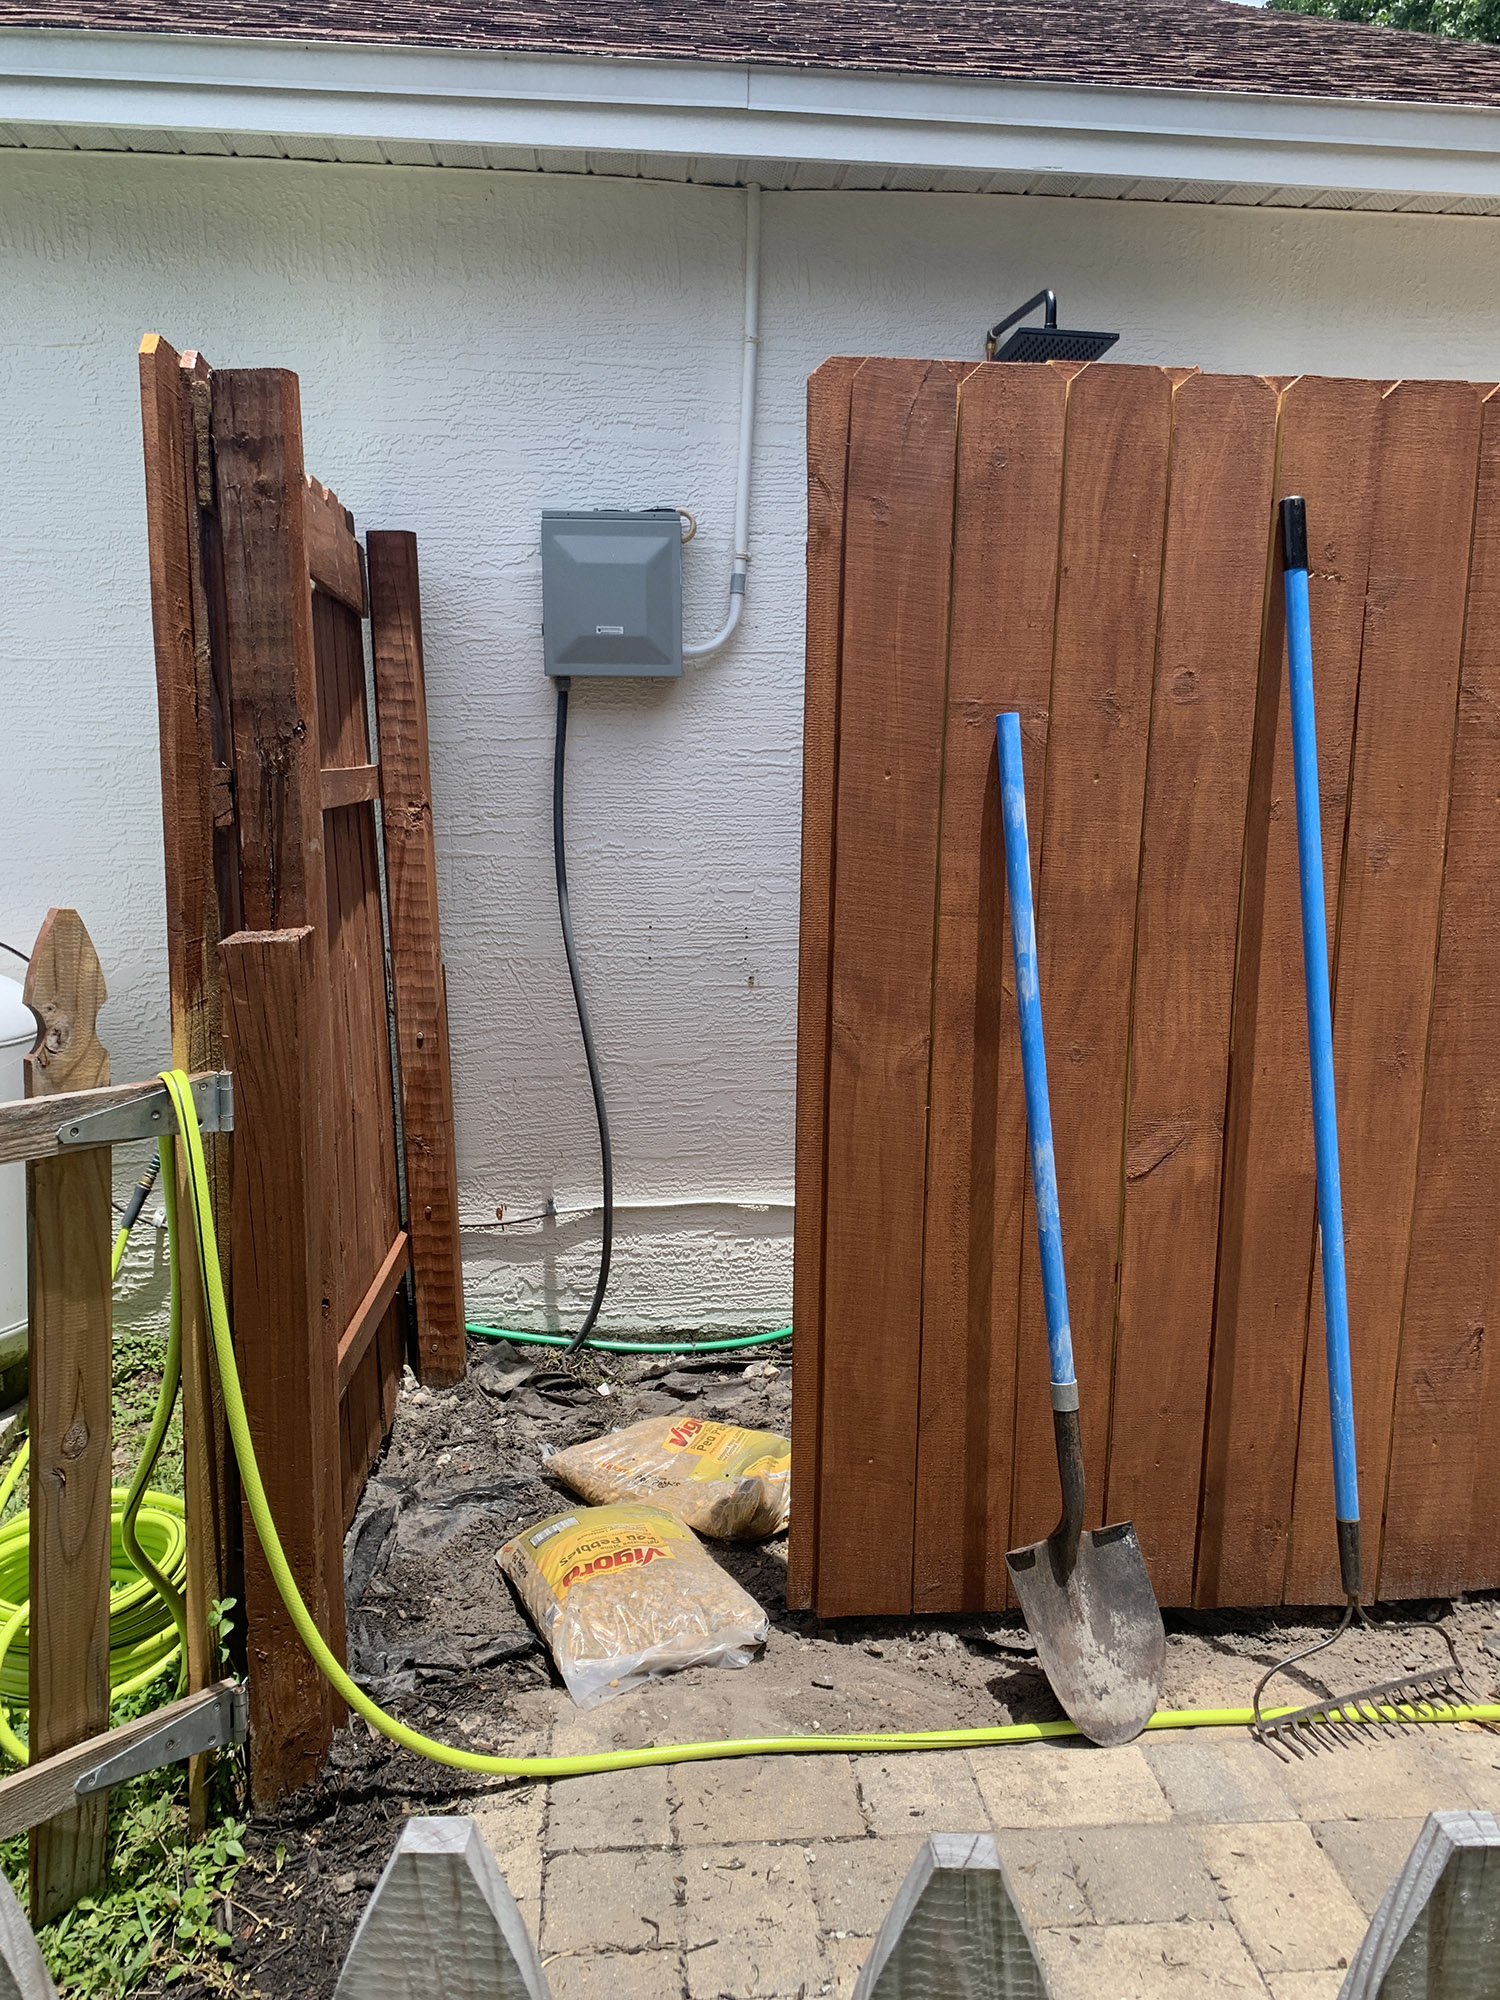
Once we removed the simple $1 cement patio stones from our outdoor shower “area” that we’ve had for the past couple of years so that we could really create a nicer, oasis outdoor shower – we always had plans to put those patio stones back, after adding in the fence and pea gravel.
But I have to say, Chris came up with the idea to paint the stones first! After finishing up the cement floor in our laundry room with paint and stencils, we realized just how simple an update these two items can make!
We already had all the paint on hand, too. We used the exterior house paint as the white base color (in fact I tried the stencil over the natural cement color and over the white and we liked it over the white better). I also had matte black spray paint leftover from our DIY Grill Table project, so we were ready to go… I just needed a stencil!
I quickly found this set of THREE 12×12 stencils on Amazon (thank you Prime!) and within a couple of days, we were updating the outdoor “tile”.

Items needed for outdoor shower tiles:
- Base paint, if desired (we used white)
- 12 X 12 Stencil
Stencil Paint Patio Stones to for an Outdoor Shower
I think the steps for painting these cement patio stones are pretty self-explanatory, but first, we laid out a paint cloth because when you get into spray painting, there will definitely have over-spray.
Next, we used a foam roller and our exterior house paint to get a base coat of paint on the cement patio stones. This worked out great, and I already had the house paint out because I was painting the side of the house and the utilities to get them to blend in just a bit.
It certainly helps to get a stencil that perfectly fits the size of the patio stone. That is where these 12 X 12 stencils came in handy. I made sure to search for a size that fit just right so I didn’t have to worry about placement.
Before placing the patio stones into the outdoor shower area, we made sure to level the ground, added , a layer of pea gravel for drainage, then a layer of white marble rocks before placing the painted paver stones.
Finally, we added in a layer of small white stones around the paver stones to finish off the look.


DIY Wood Hooks
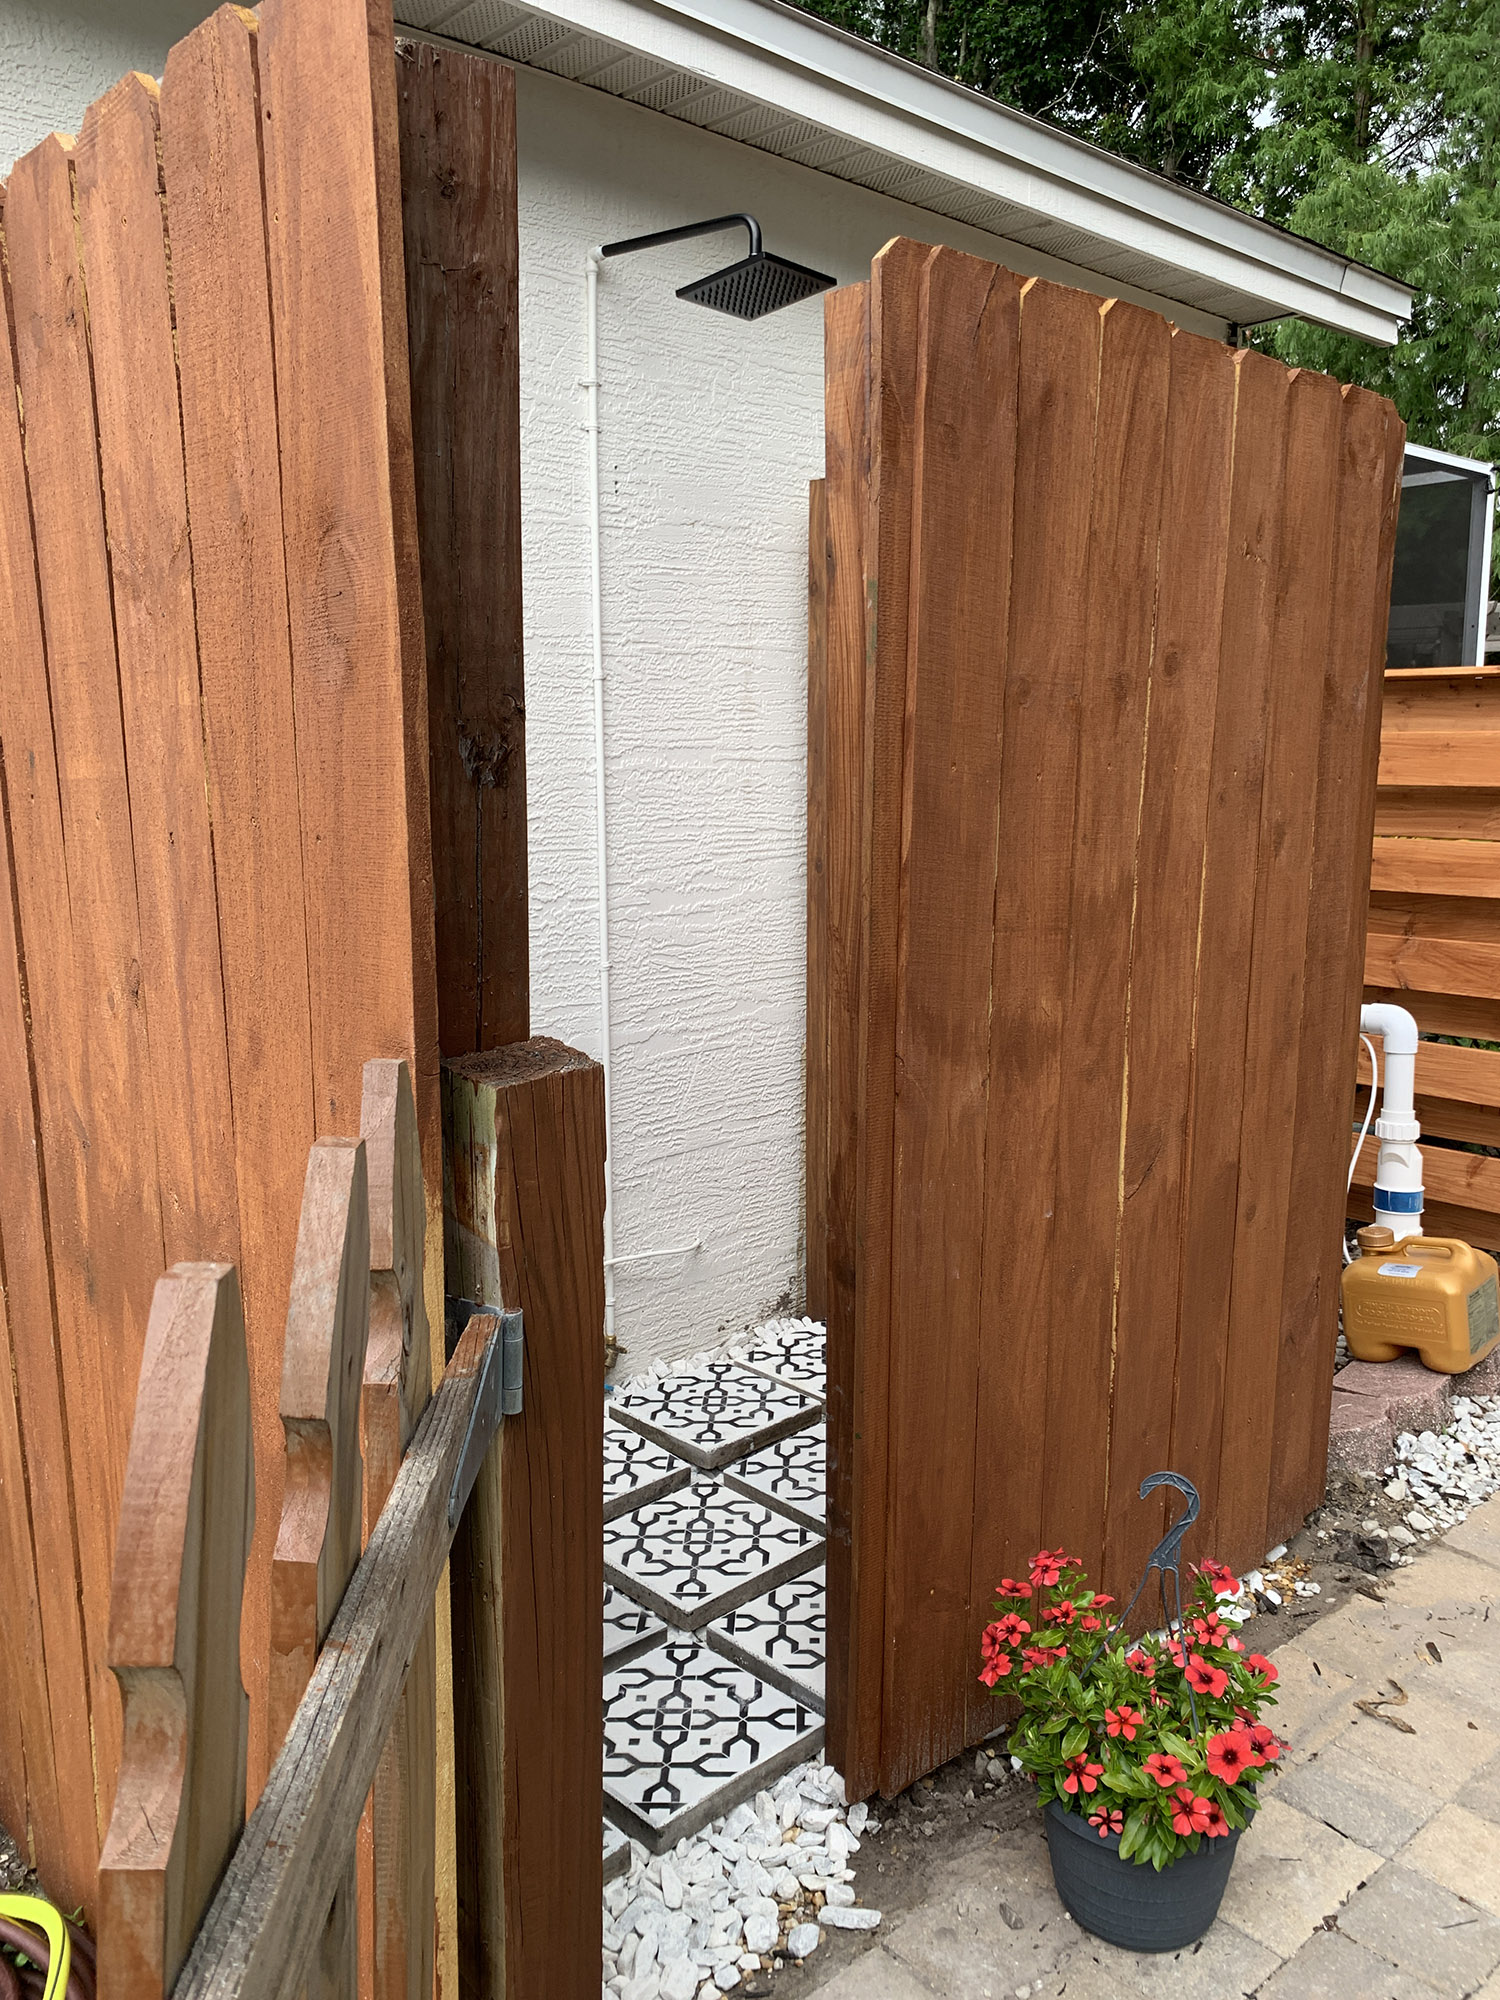
I knew that when creating this outdoor shower oasis, I wanted to add hooks for our towels and swimsuits – instead of just hanging them over the fence. The snag here is that I didn’t want a traditional towel bar, and I wanted to keep it slightly rustic and matching with our theme.
Black was going to be the perfect choice. It would tie in the matte black of the showerhead and the shower caddy holding the soap and shampoo. To also keep it in our minimal budget, we decided to DIY wood hooks. With a simple 2 X 2 piece of wood, we were able to create these angled wood hooks, perfect for our outdoor shower, and I’m loving them!
Plus, I used the leftover spray paint to match. (Full DIY coming soon!)

Outdoor Shower Finishing Touches
To keep our outdoor shower a truly serene oasis, I wanted to add in some finishing touches to give it that special feel.
A small bench (which I’m going to give a little makeover too as well) and greenery go a long way in making this space feel more complete.
We also added these black shower caddy shelves (no rust!!) to keep body wash, shampoo and conditioner. Since I wanted to keep all of those toiletries looking fancy as well, I used these BPA free plastic amber pump bottles (I mean, kids will be using these over cement, I didn’t want glass) and pulled out my trusty label maker to spruce them up.

What are your thoughts on a DIY outdoor shower? Do you have any other questions that weren’t answered in this post? Let me know in a comment below!




Haris Parikh says
Amazing Ideas! Thank you for sharing useful and budget friendly tips.
Bea says
I love this! I especially love all the links so that I could just buy it without having to do a bunch of research myself lol, however a few of the links didn’t work do you think that you could check them and re-post? Love it thank you I especially love the tile, nice touch!
Tabitha Blue says
Thank you so much!!! We’ve updated the post with fresh links 🙂
Patricia says
Love this! I saw this a few weeks back and immediately had my husband start the plumbing so I could build the outdoor shower. The floor is awesome and I’m trying to recreate it. I just had one question though for the base did you use river rocks or white crushed stone? It looks like crushed stone but I wanted to double check!
Tabitha Blue says
We used white crushed stone for the top layer of rocks… we did use a cheaper pea-gravel type of rock first, and then the white stone on top.
Jenna says
Hi ! Awesome shower ! Trying to replicate … dimensions / measurements please !
Tabitha Blue says
We used white crushed stone for the top layer of rocks… we did use a cheaper pea-gravel type of rock first, and then the white stone on top.
Tabitha Blue says
Hi Jenna!
Thanks so much, we love it! We just filled in the space that we had. The pavers are 12X12, so the full shower area is about 3.5 feet by 5.5 feet.
11 WINNER says
What an amazing DIY project! I love how you’ve transformed the outdoor space with this shower. It’s a perfect way to rinse off after a day at the beach. Can’t wait to try this out at my own home—thanks for the inspiration!
TV Express App says
I absolutely love this DIY outdoor shower idea! It’s perfect for hot Florida days, and I can’t wait to give it a try in my backyard. Thanks for the detailed instructions and inspiration!
Lucky91 says
I love this idea! An outdoor shower is perfect for those hot Florida days. The step-by-step instructions make it seem manageable, and I can already imagine how refreshing it would be after a day at the beach. Can’t wait to try this out in my backyard! Thank you for sharing!