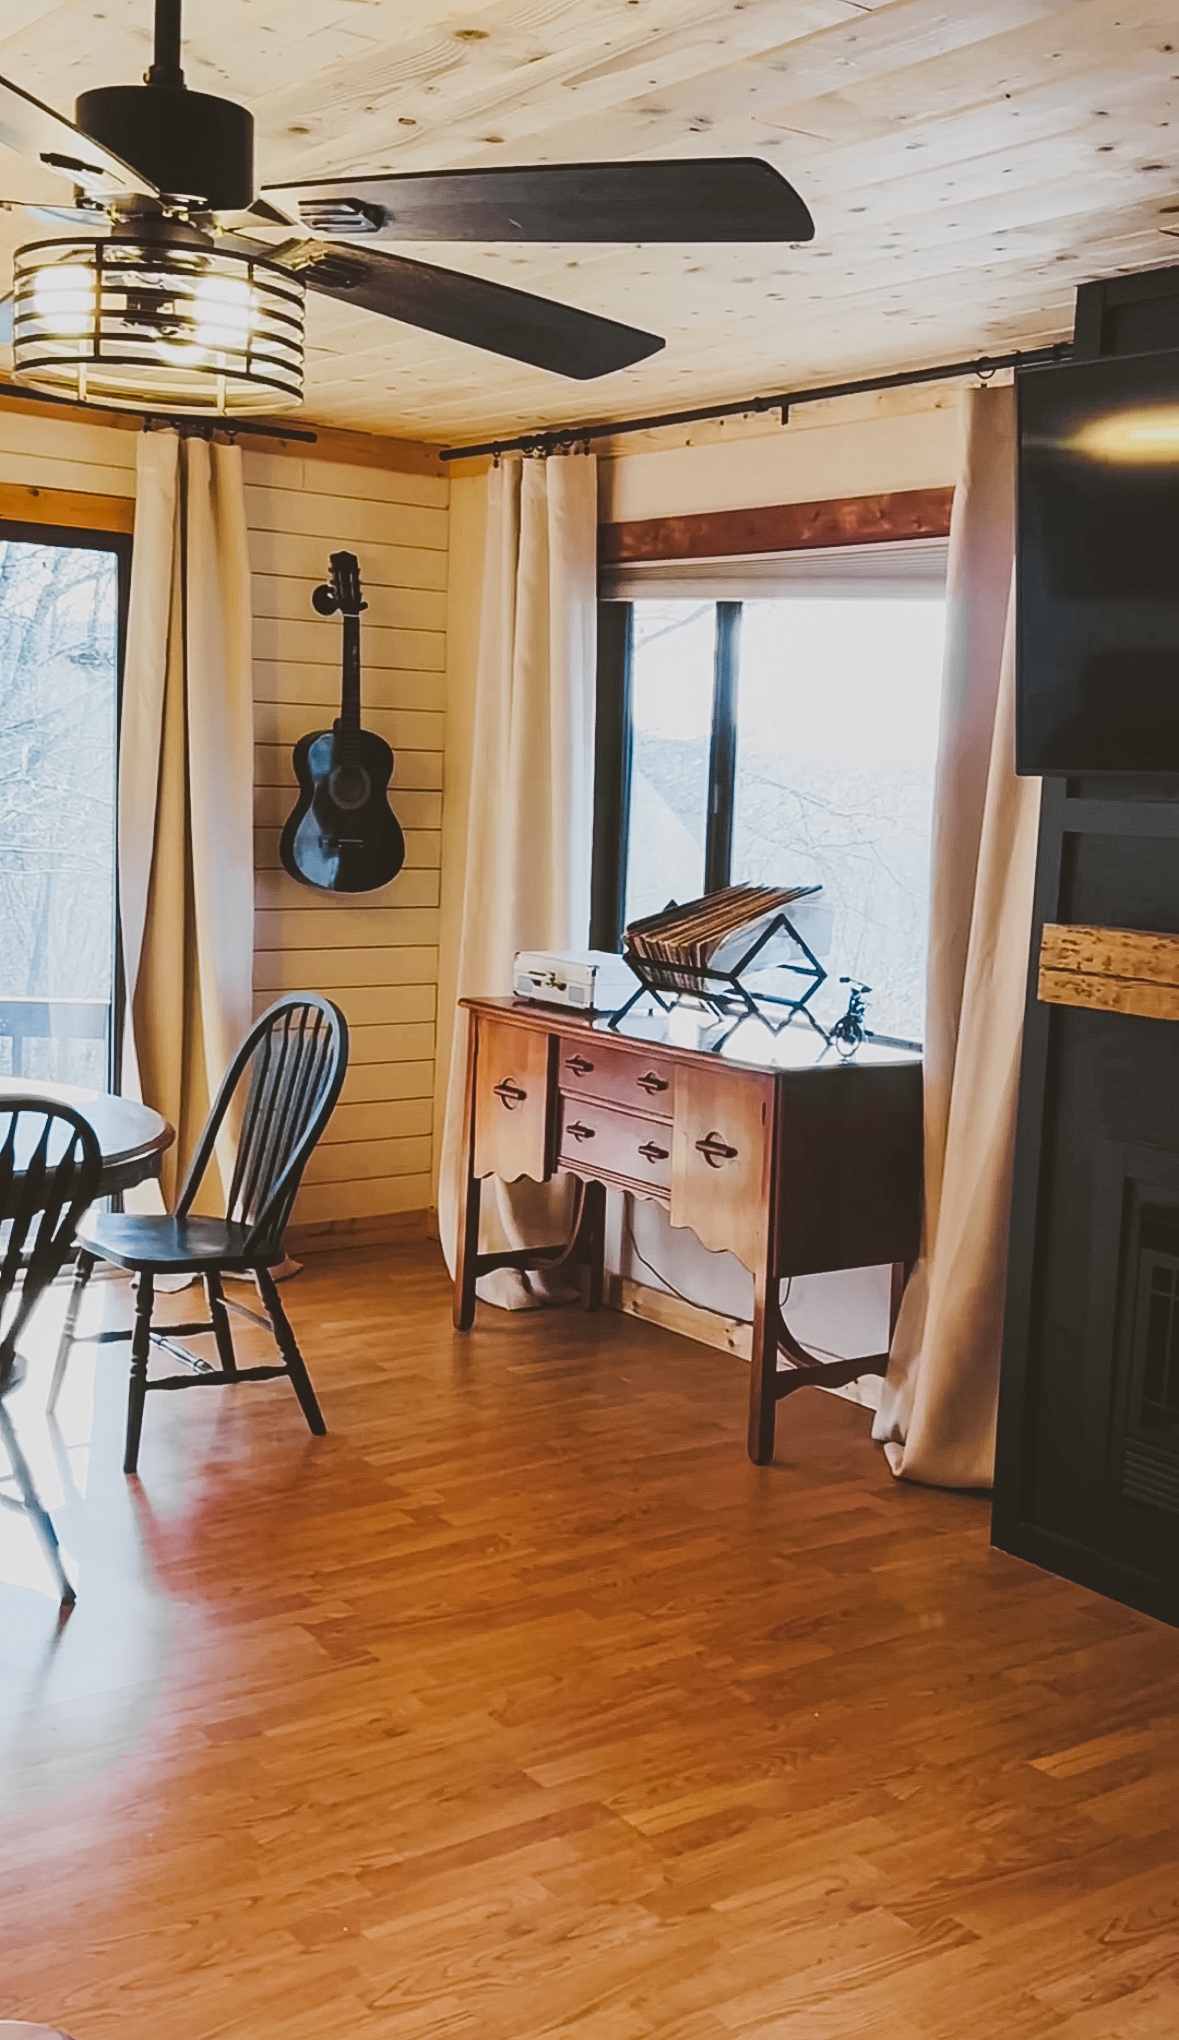
Remember that reel series we shared about wasted wall space? Well, we thought we would do a break down of how we transformed our wasted wall space into a built in library.

If you’ve been scrolling past beautiful built-in bookshelves on Pinterest and sighing because custom carpentry isn’t in the budget, this post is for you. We’re breaking down exactly how we created a high-end look using affordable materials, a little elbow grease, and some strategic styling.
The “Faux Built-In” Game Plan
Here’s the beauty of this project: it’s all about illusion. We didn’t actually build custom shelving into the wall. Instead, we used a combination of budget-friendly bookshelves, some additional lumber, and trim work to create the appearance of expensive built-ins.
The Basic Steps:
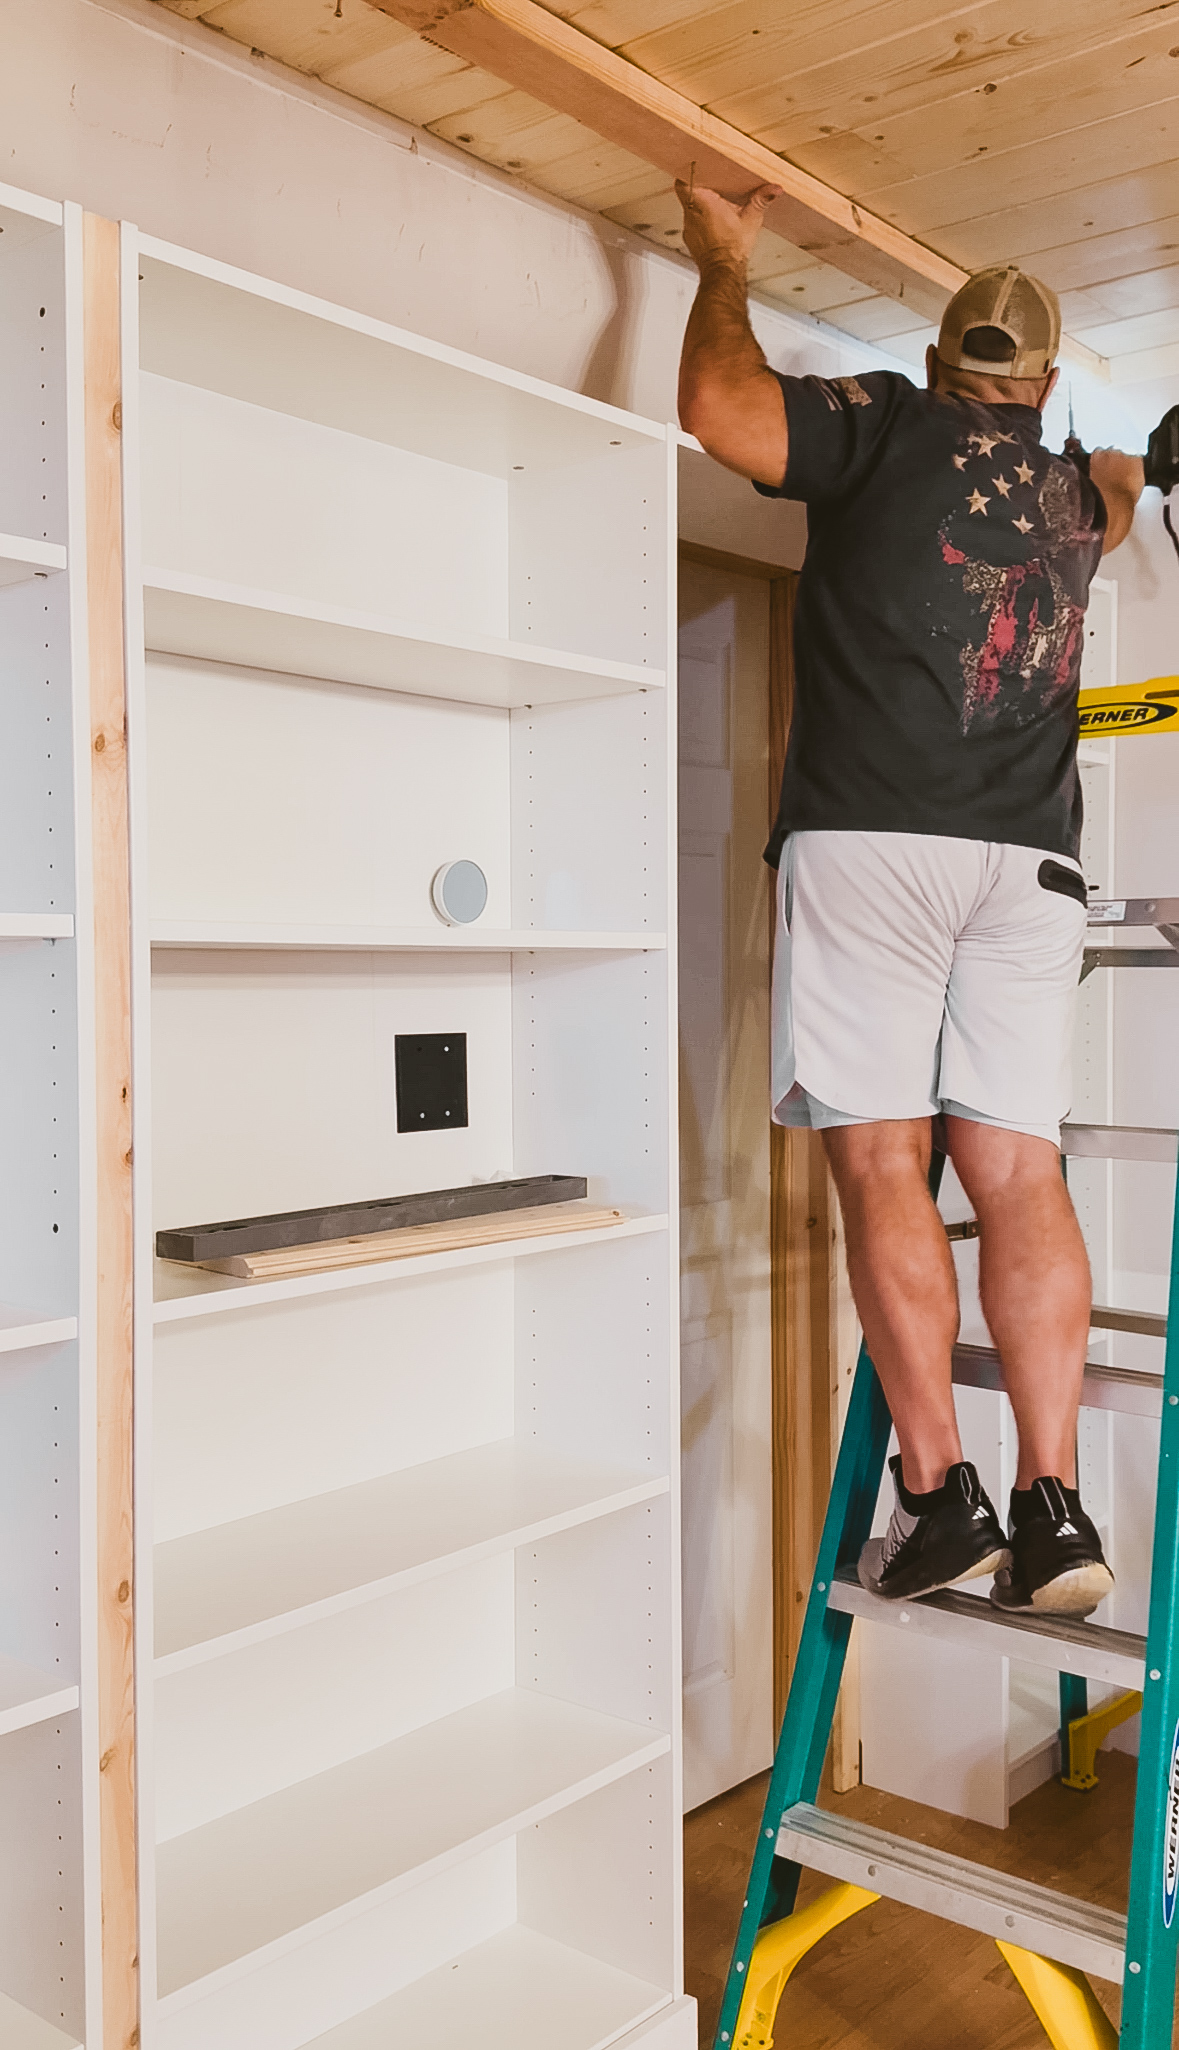
- Start with a solid base – We used the Ikea Billy Bookcases as our foundation, arranging them across the wall
- Build up to the ceiling – We added a shelf across the top to extend the height all the way to the ceiling, eliminating that awkward gap that screams “store-bought furniture”
- Trim it out – This is where the magic happens. Adding trim work around the entire unit creates that custom, built-in appearance
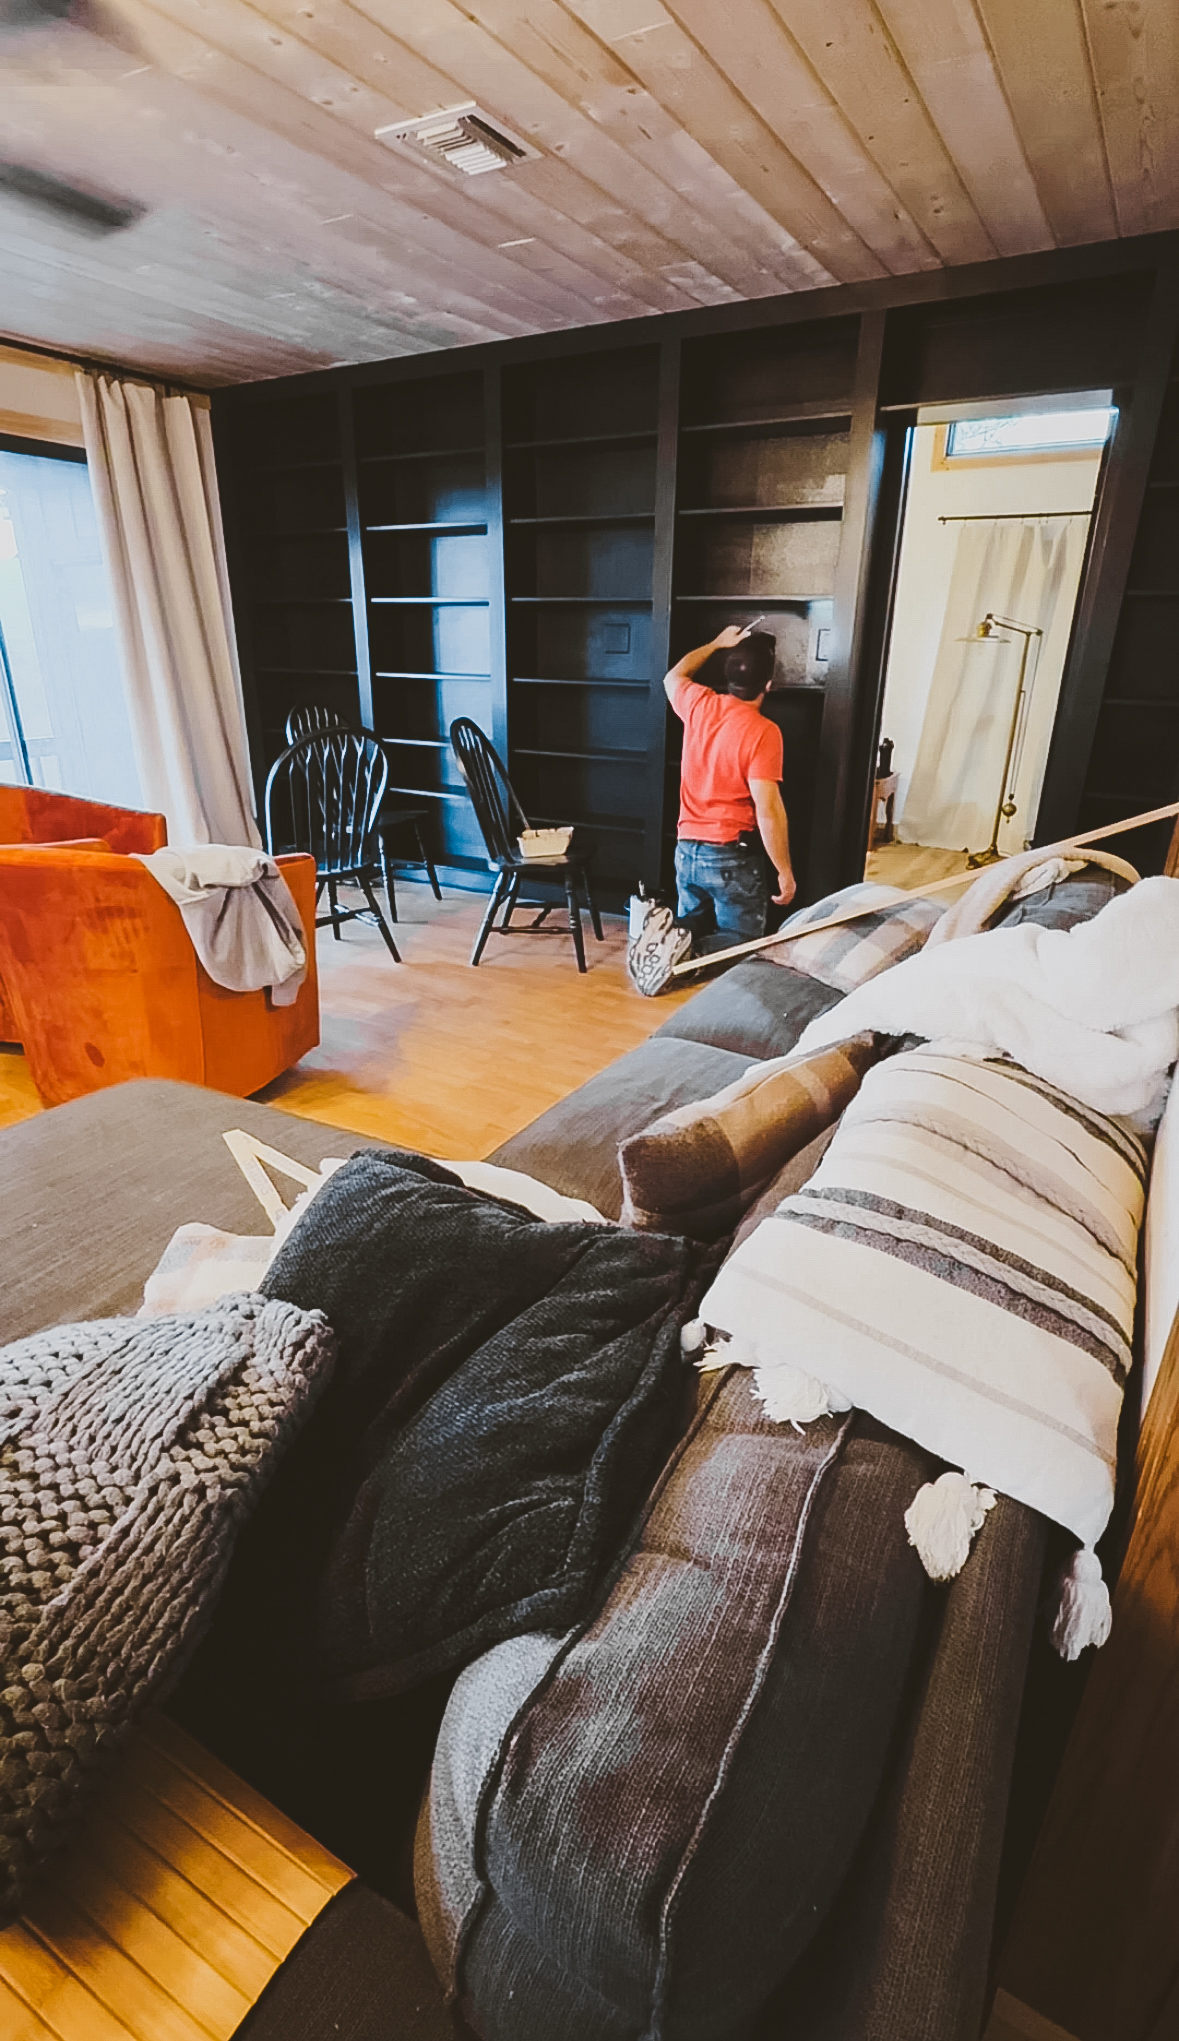
- Paint everything – A cohesive coat of paint ties it all together and makes it look like one intentional piece rather than separate units
Why This Works (And Why You Should Try It)
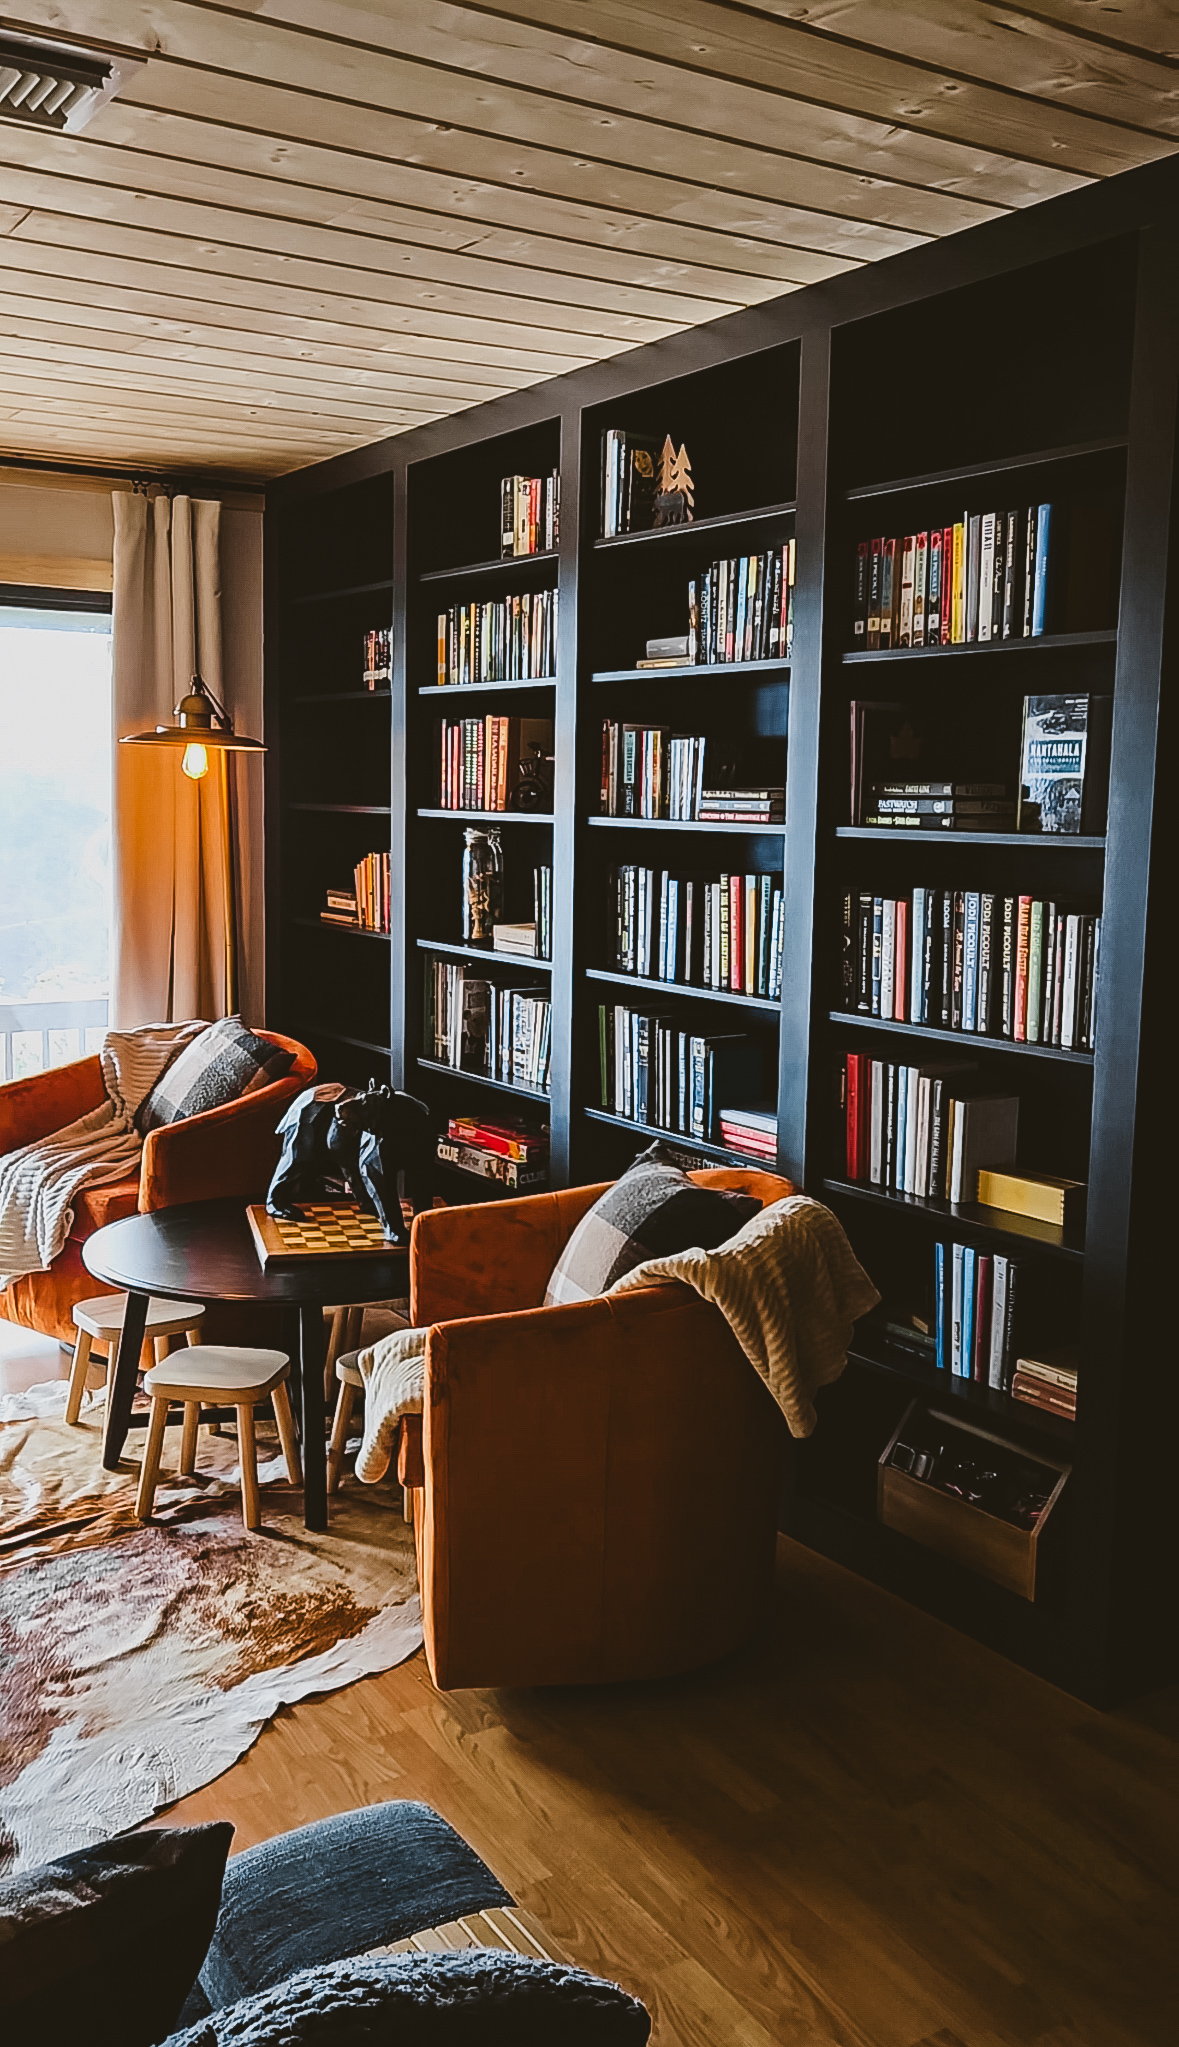
It fills vertical space. Most of us stop decorating at eye level, leaving feet of valuable real estate completely unused. Taking your storage all the way to the ceiling not only maximizes space but draws the eye upward, making your room feel taller and more intentional.
It adds architectural interest. Even in homes without original character details, you can create them. This bookshelf wall instantly became a focal point in our room.
It’s budget-friendly. Custom built-ins can run into the thousands. Our version? A fraction of that cost, with results that fooled even our contractor friends.
It’s functional AND beautiful. We gained massive storage while creating a design moment. Win-win.

The Materials List
Library Wall
- (4) Billy Bookcases – 31 1/2 x 11 x 79 1/2in
- (1) Billy Bookcase – 15 3/4 x 11 x 79 1/2in
- Trim for floor and ceiling: 1in x 4in x 8ft Unfinished #2 Better S4S Whitewood Common Softwood Board
- Lumber for top shelf: 1/2in x 4ft x 8ft Maple Sanded Plywood
- Shelf Board: 11.8in D x 35.8in L White Laminate Rectangular Shelf board
- Caulking for creases before painting – ALEX Plus 10.1-oz Paint and Trim White Paintable Latex Caulk
- Finishing Trim: RELIABILT 1in x 4in x 8ft Primed S4S Spruce pine fir Common Softwood Board
- Primer to paint shelves: Infinity Satin Base C Tintable Interior Paint Paint + Primer ( 1-gallon )
- Paint: Cabinet, Door and Trim Interior/Exterior Bonding Water-based Primer ( 1-gallon ) Color Iron Ore
- Paint Rollers: WHIZZ 2 -Pack 4in x (foam) Nap Cabinet and Door
- Trim Brush: Clearcut 2 1/2in Reusable Angle Wall Trim Brush
Wood Ceiling
- Ceiling Planks: 3/4-in x 7-1/4-in x 8-ft Reversible Unfinished Spruce pine fir Wood Tongue and groove Smooth Wall Plank
- Finish nailer for ceiling planks: 2 1/2in 16 – Gauge Pneumatic Straight Finish Nailer
- Finish nails for ceiling planks: 2 1/2in 16 – Gauge Straight Galvanized Collated Finish nails 1000-Per Box
Shop Our Supply List Here:

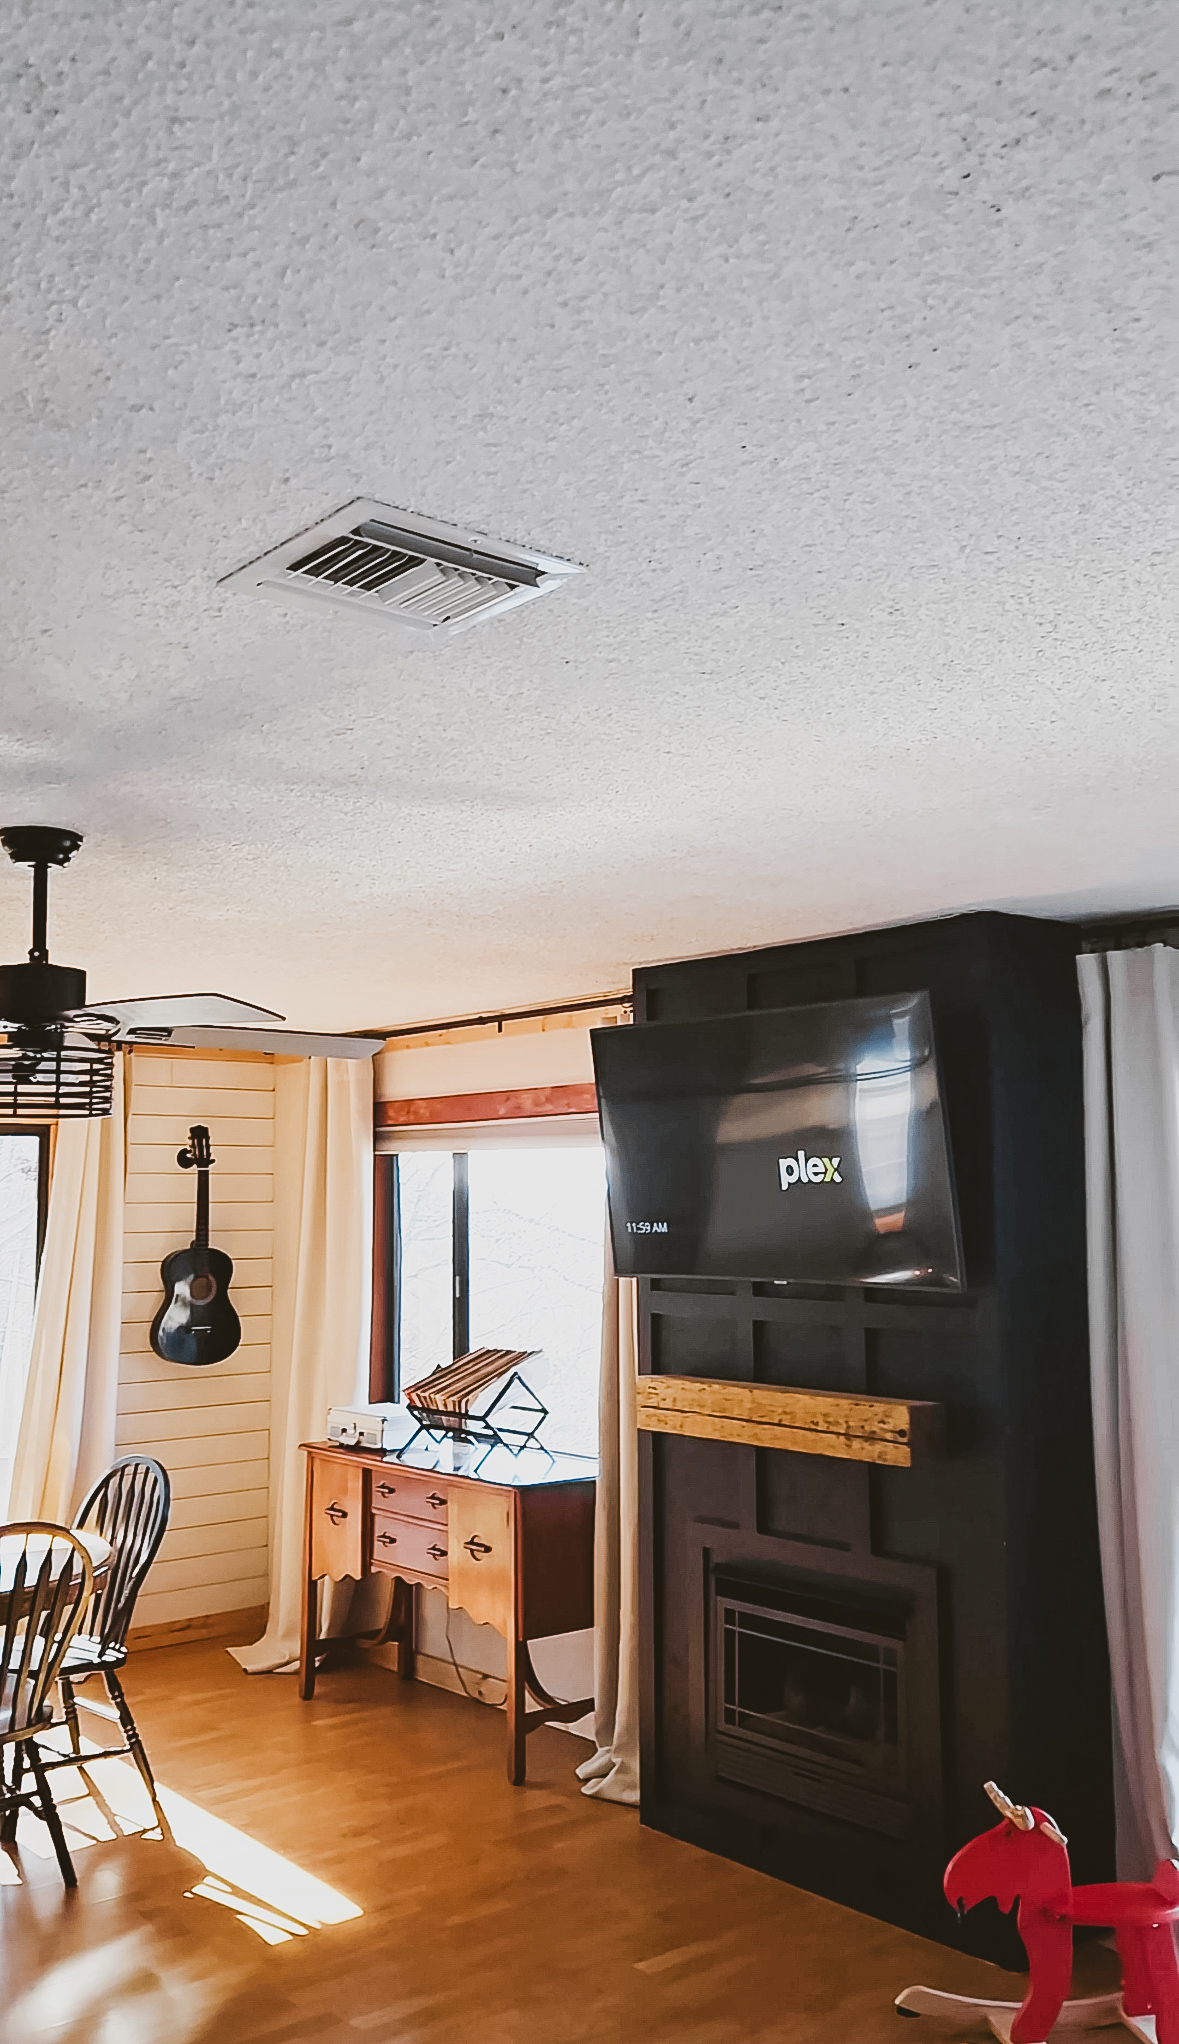
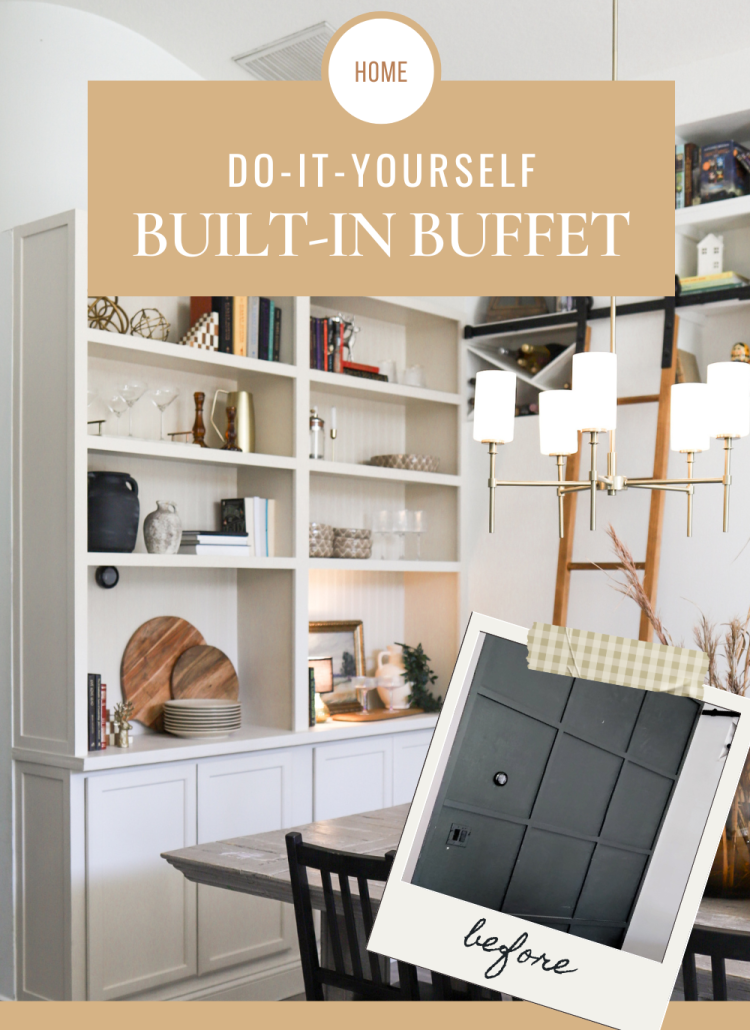
But First: We Tackled the Popcorn Ceiling
Before we get into the bookshelf transformation, let’s talk about what we did overhead. We had been living with a popcorn ceiling in this room for far too long, and we knew if we were going to do this bookshelf project right—extending all the way to the ceiling—this was our window of opportunity to address it.
Why we did it now: Once those shelves were built up to the ceiling, accessing and working on the ceiling would be nearly impossible. This was a now-or-never moment, and we’re so glad we seized it.
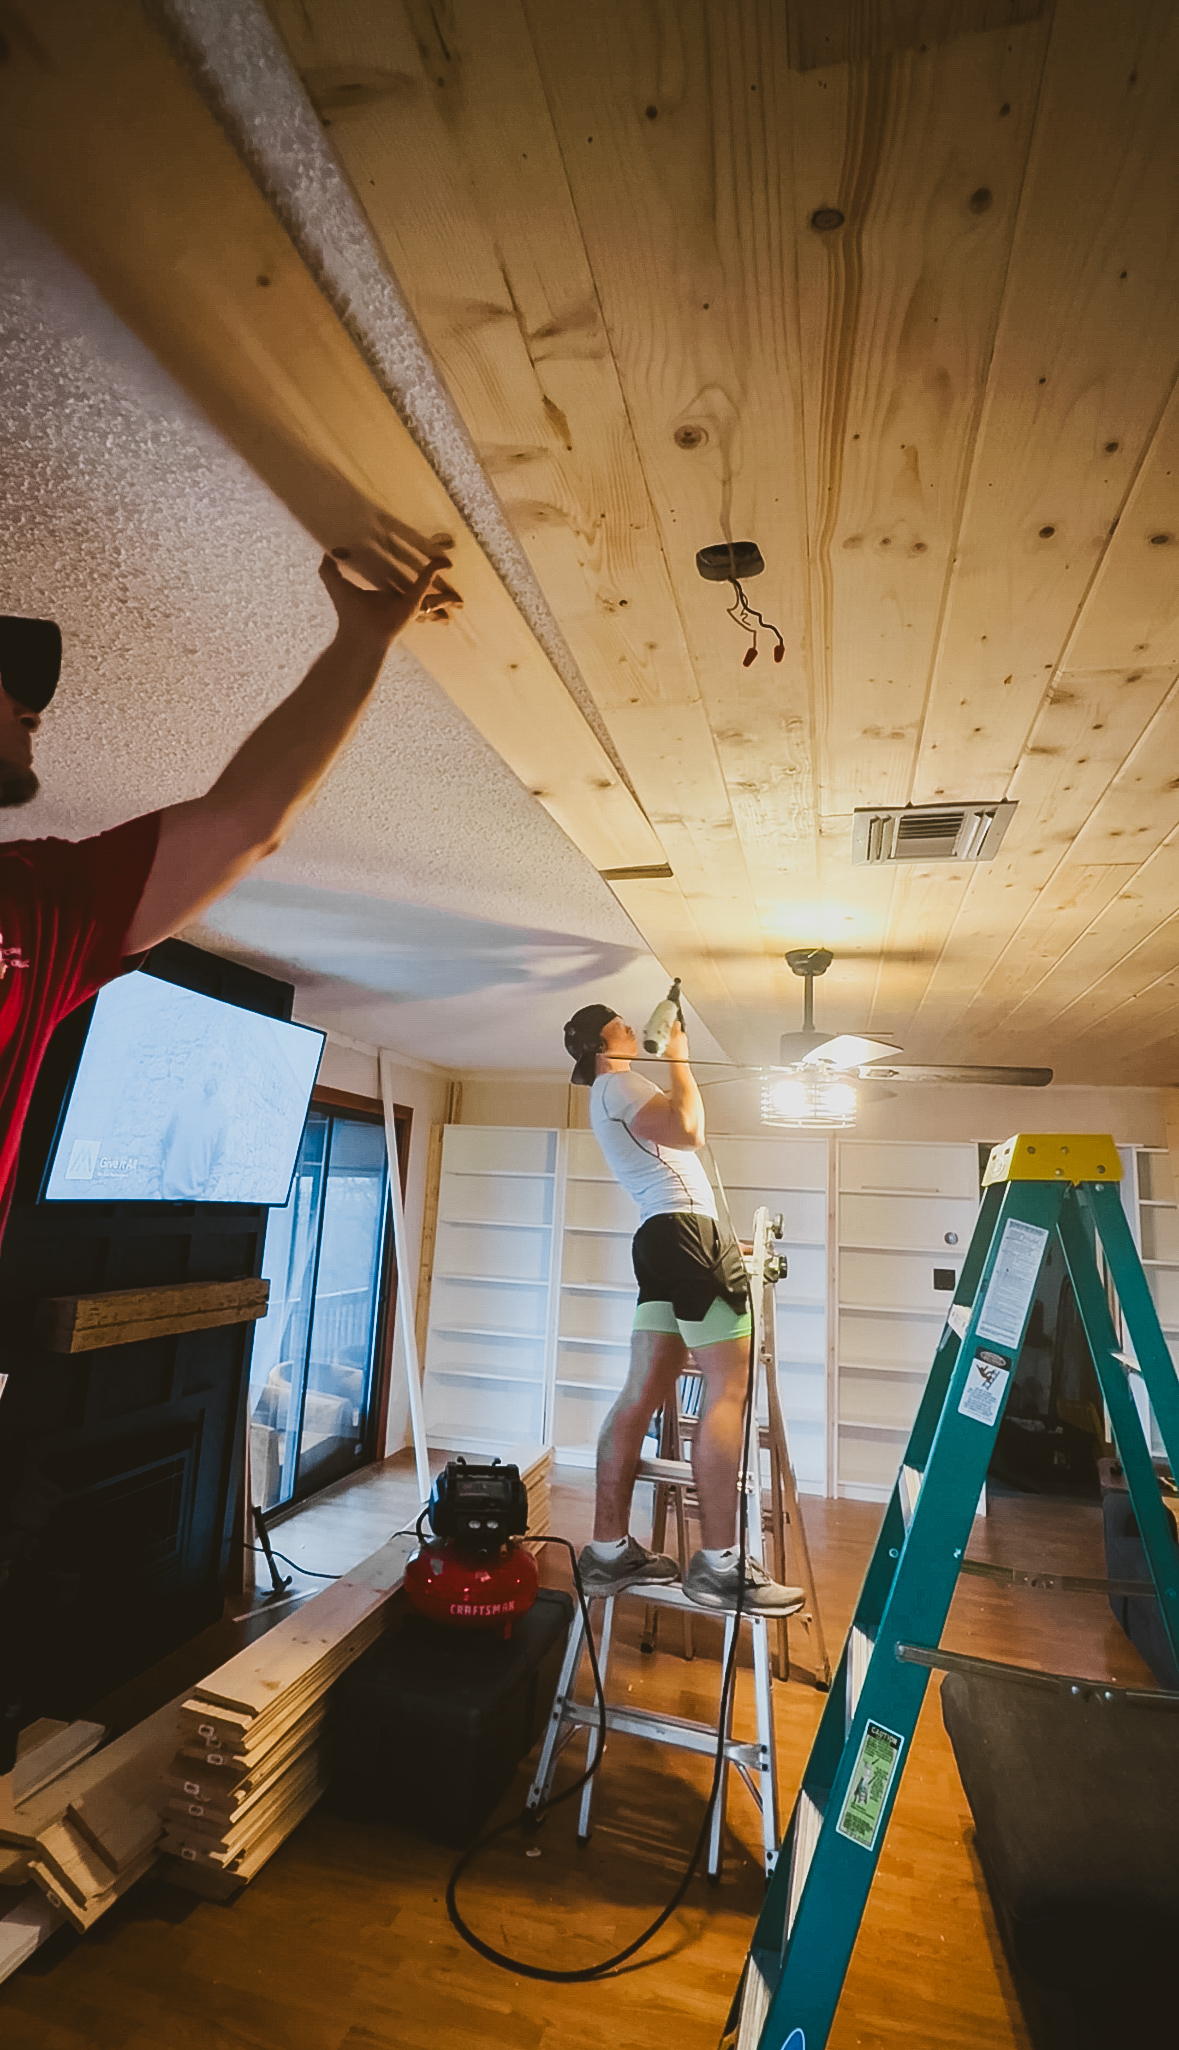
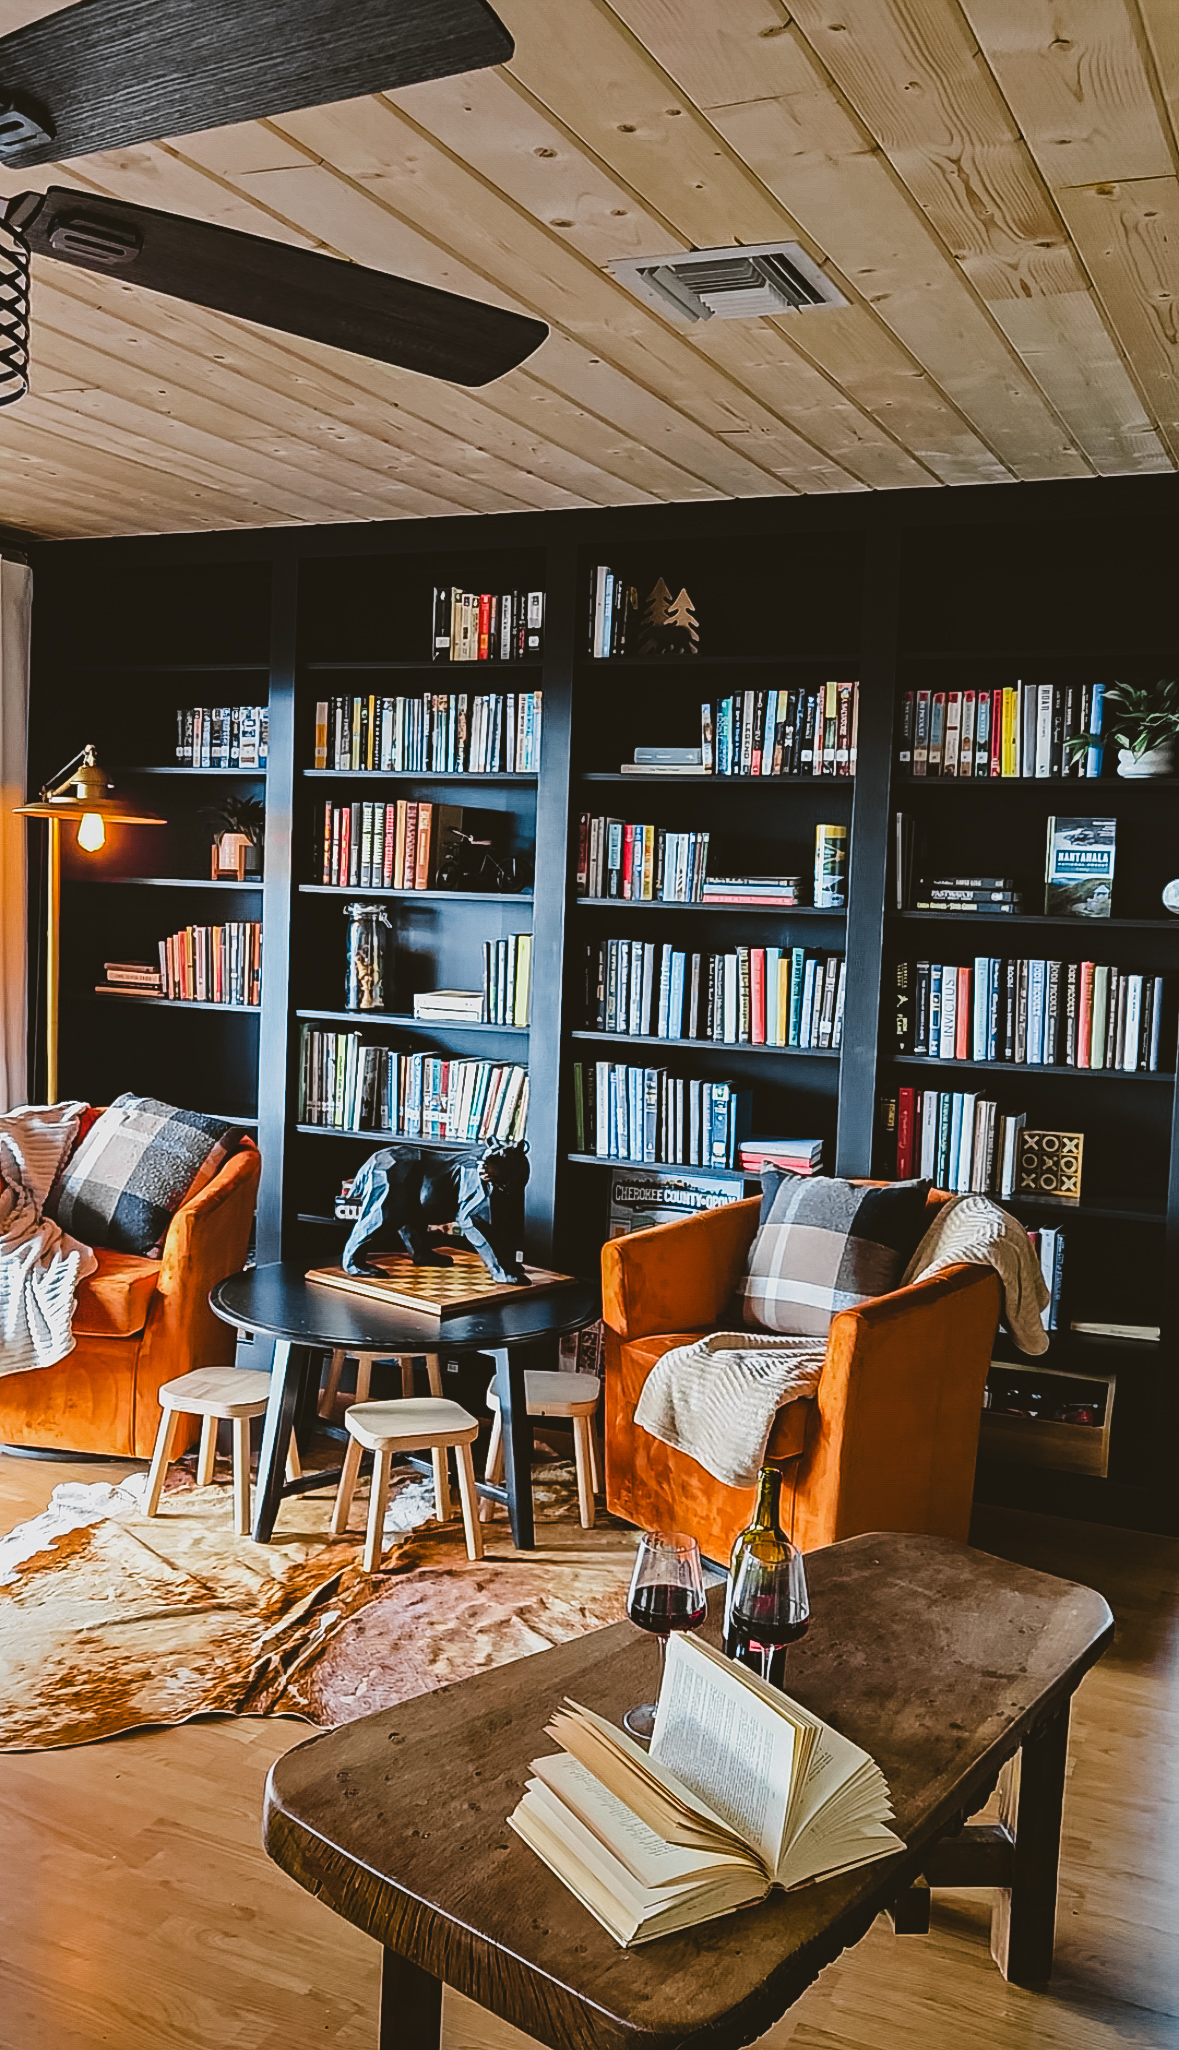
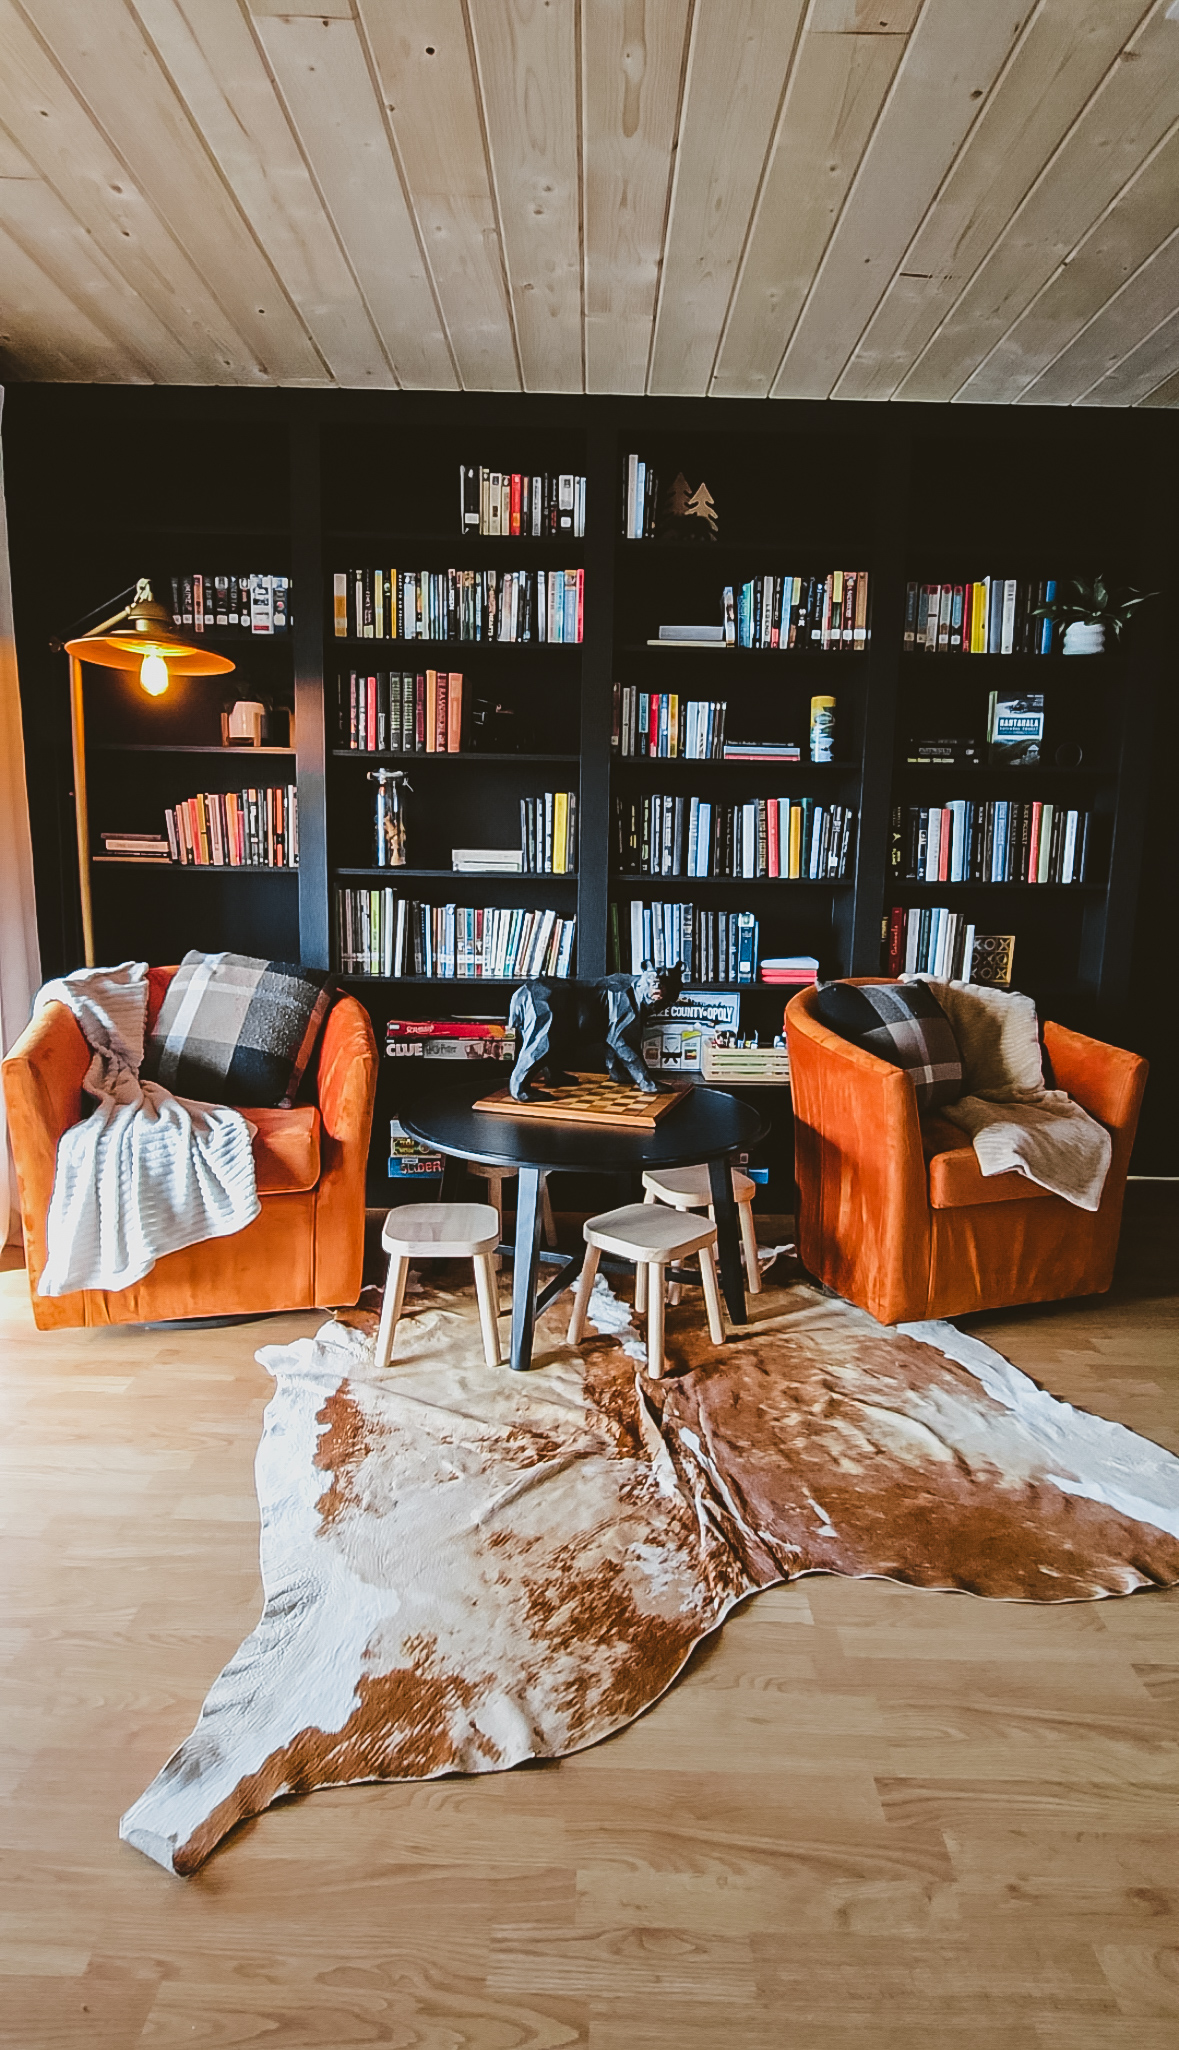
The solution: We covered the popcorn ceiling with wood planks, and the transformation was incredible. Not only did it eliminate that dated texture, but it added warmth and architectural character to the entire room. The wood ceiling paired with our new built-in shelves created a cohesive, library-like atmosphere that feels both cozy and elevated.
The process in brief: We used tongue and groove spruce pine fir planks that we installed with a pneumatic finish nailer. The tongue and groove system made the installation surprisingly straightforward—each plank locks into the next, creating clean lines across the ceiling. We worked methodically across the room, nailing the planks directly to the ceiling joists.
Was it an extra project on top of an already ambitious bookshelf build? Absolutely. But doing both at once meant we only had to move furniture and live in chaos once, and the end result is a room that feels completely transformed from floor to ceiling (literally).
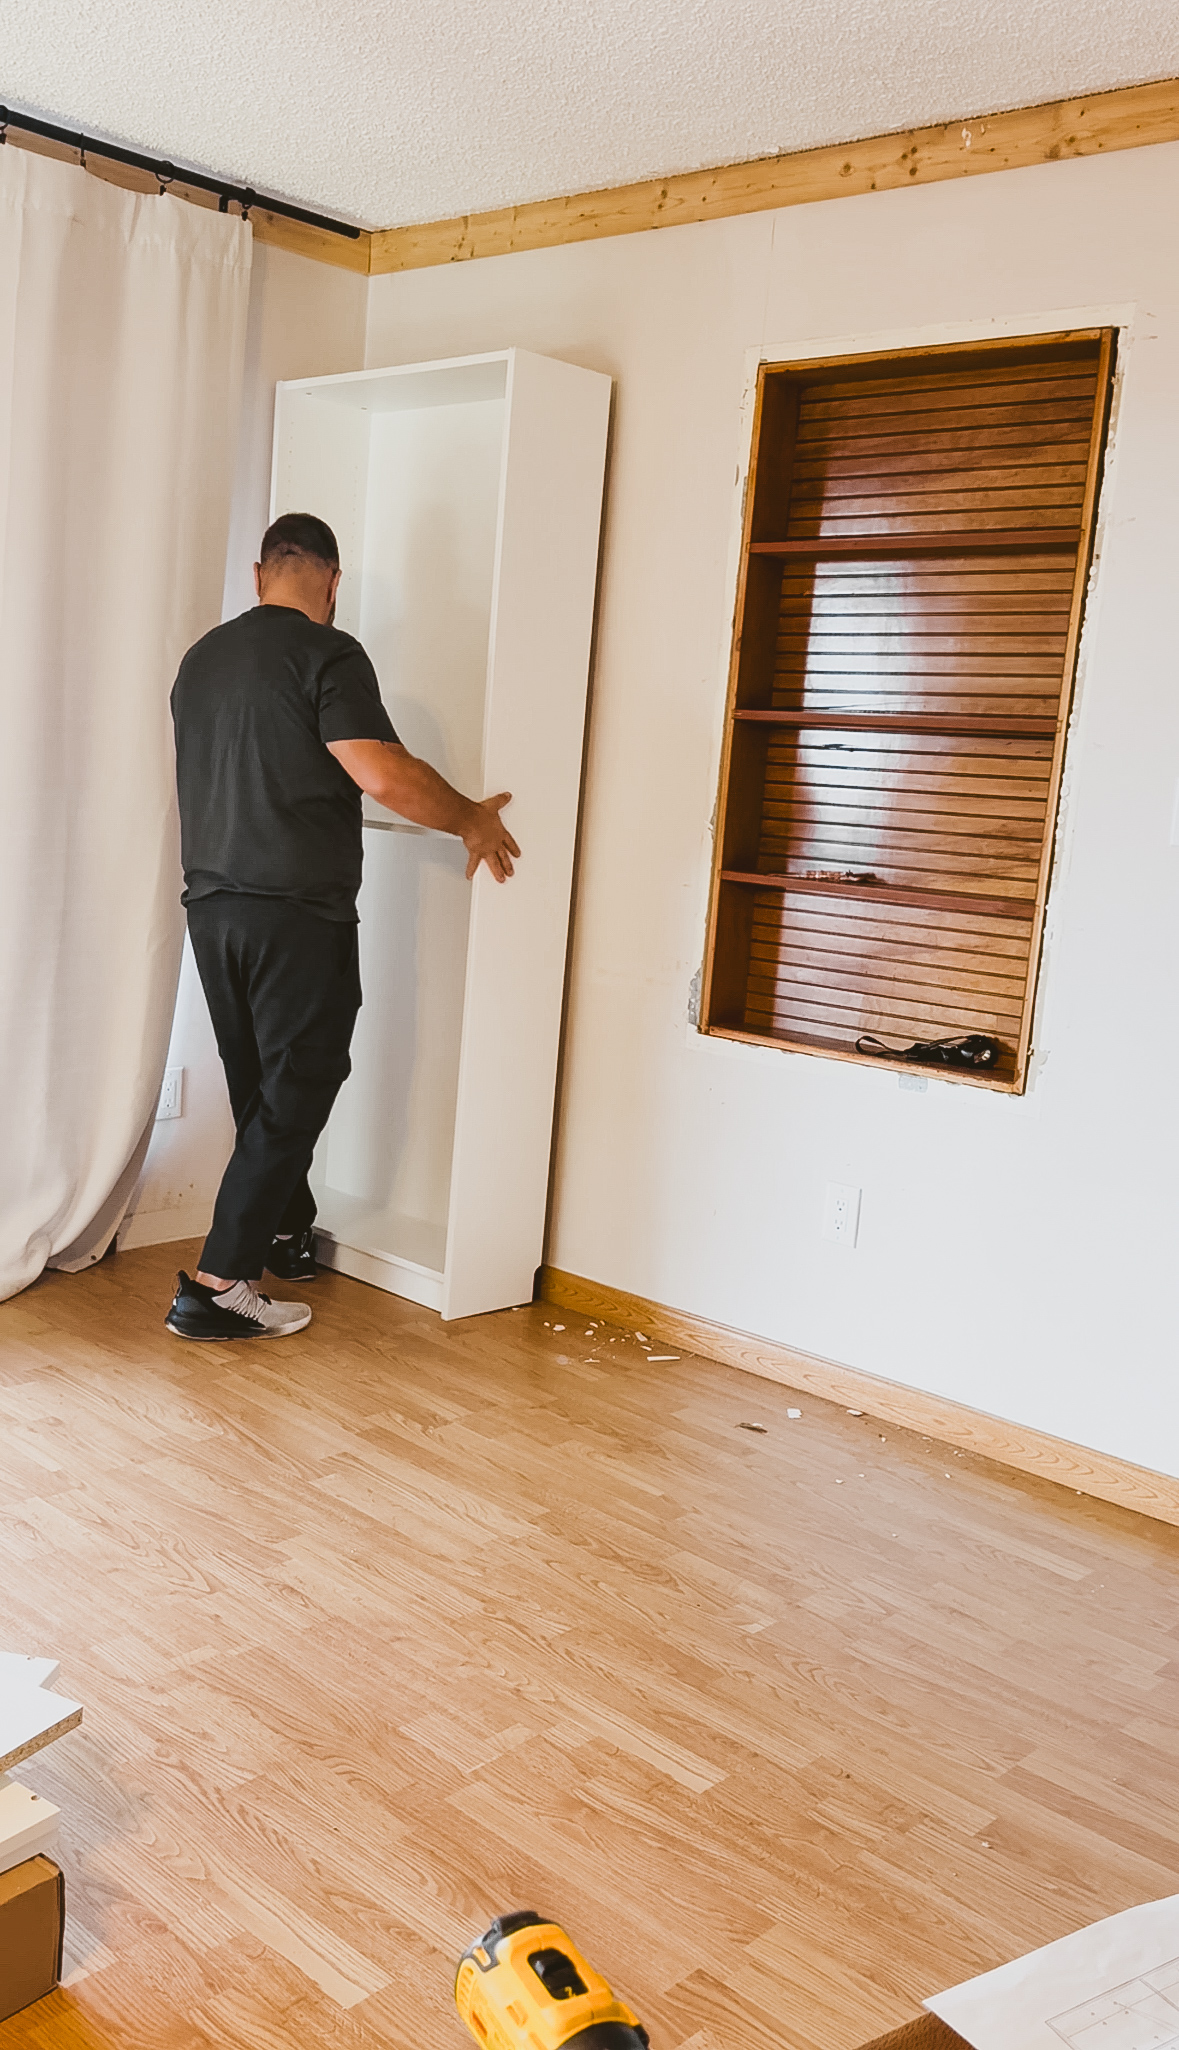
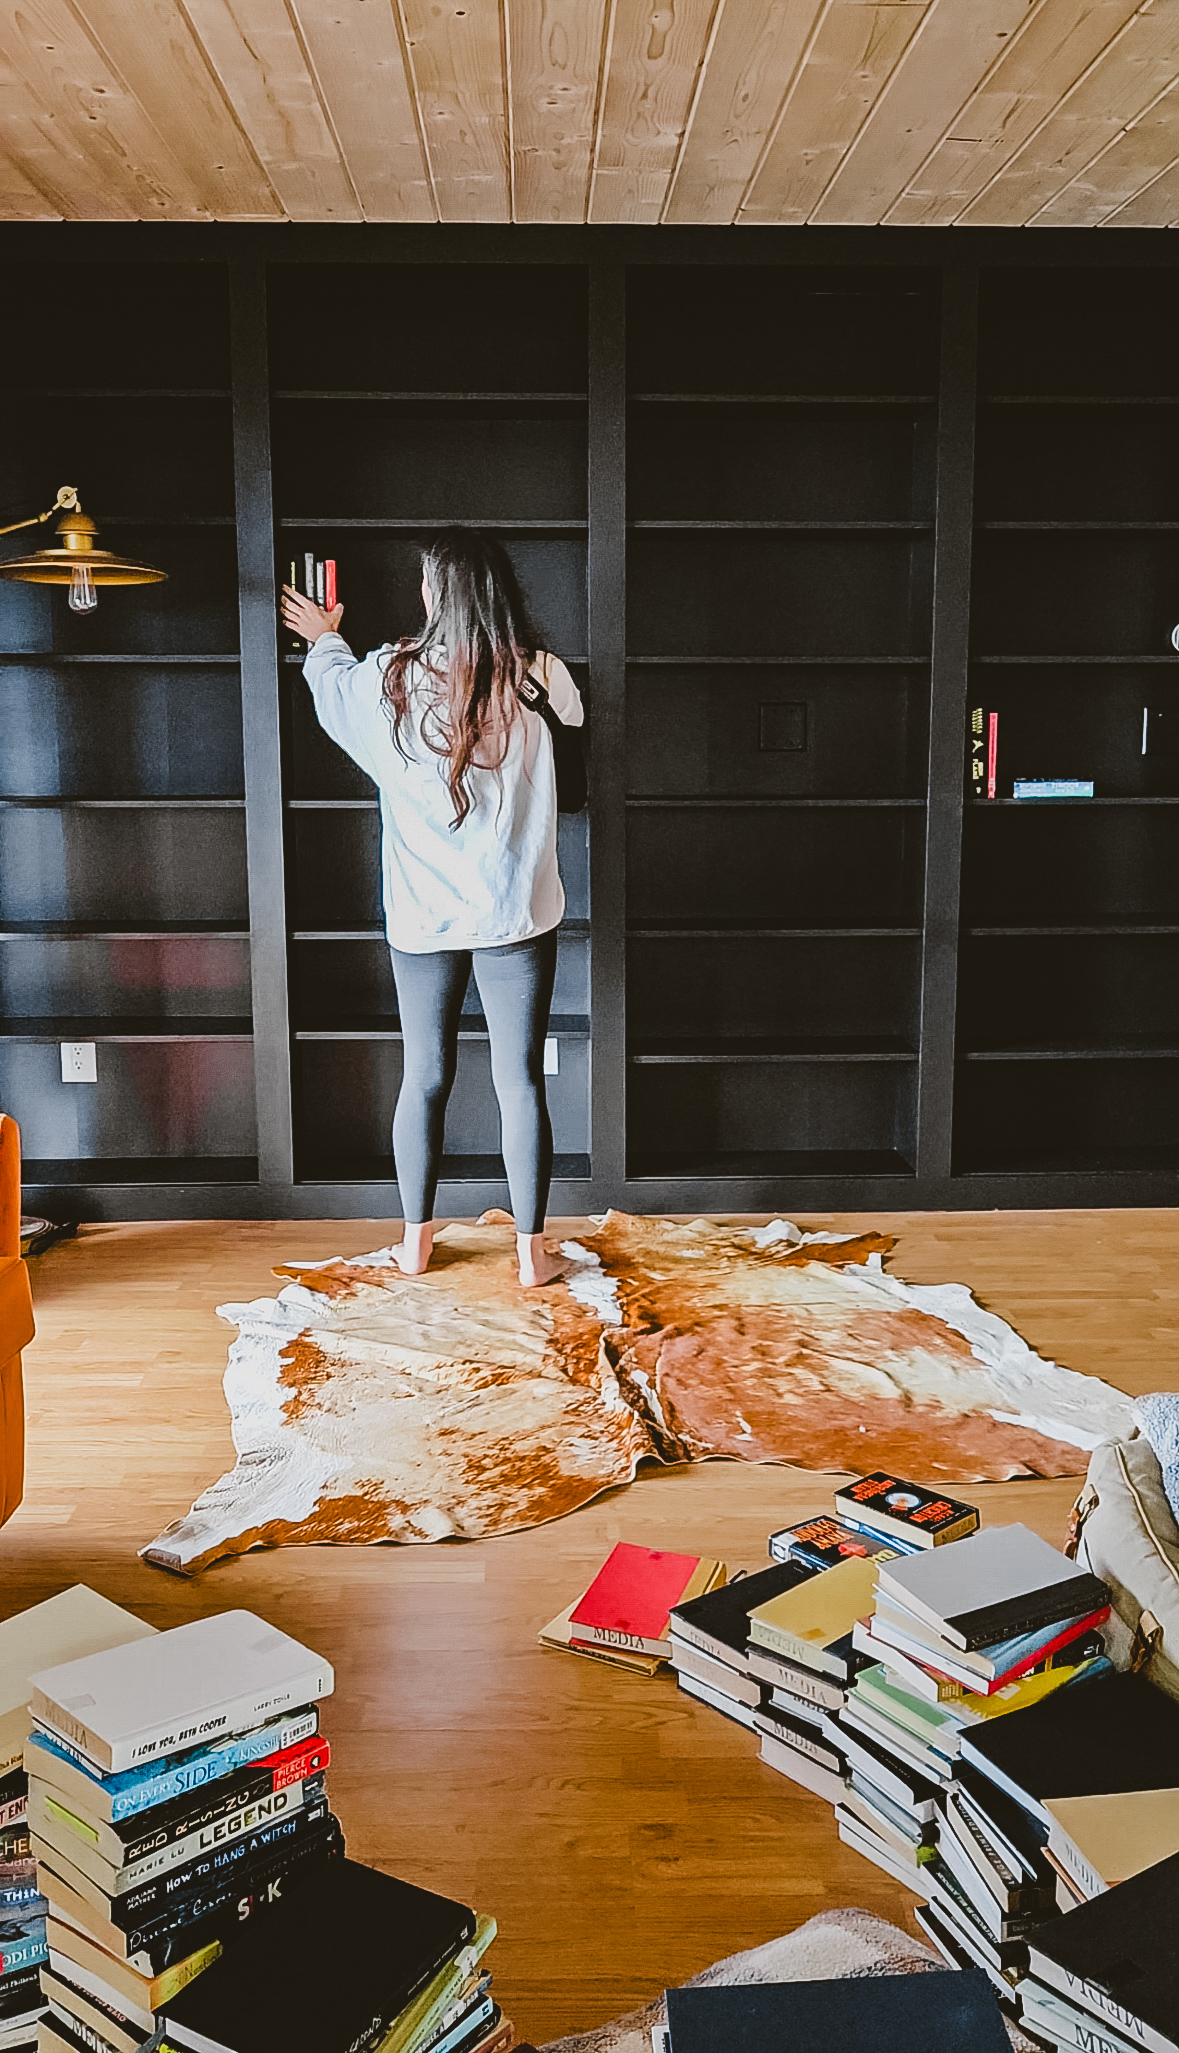
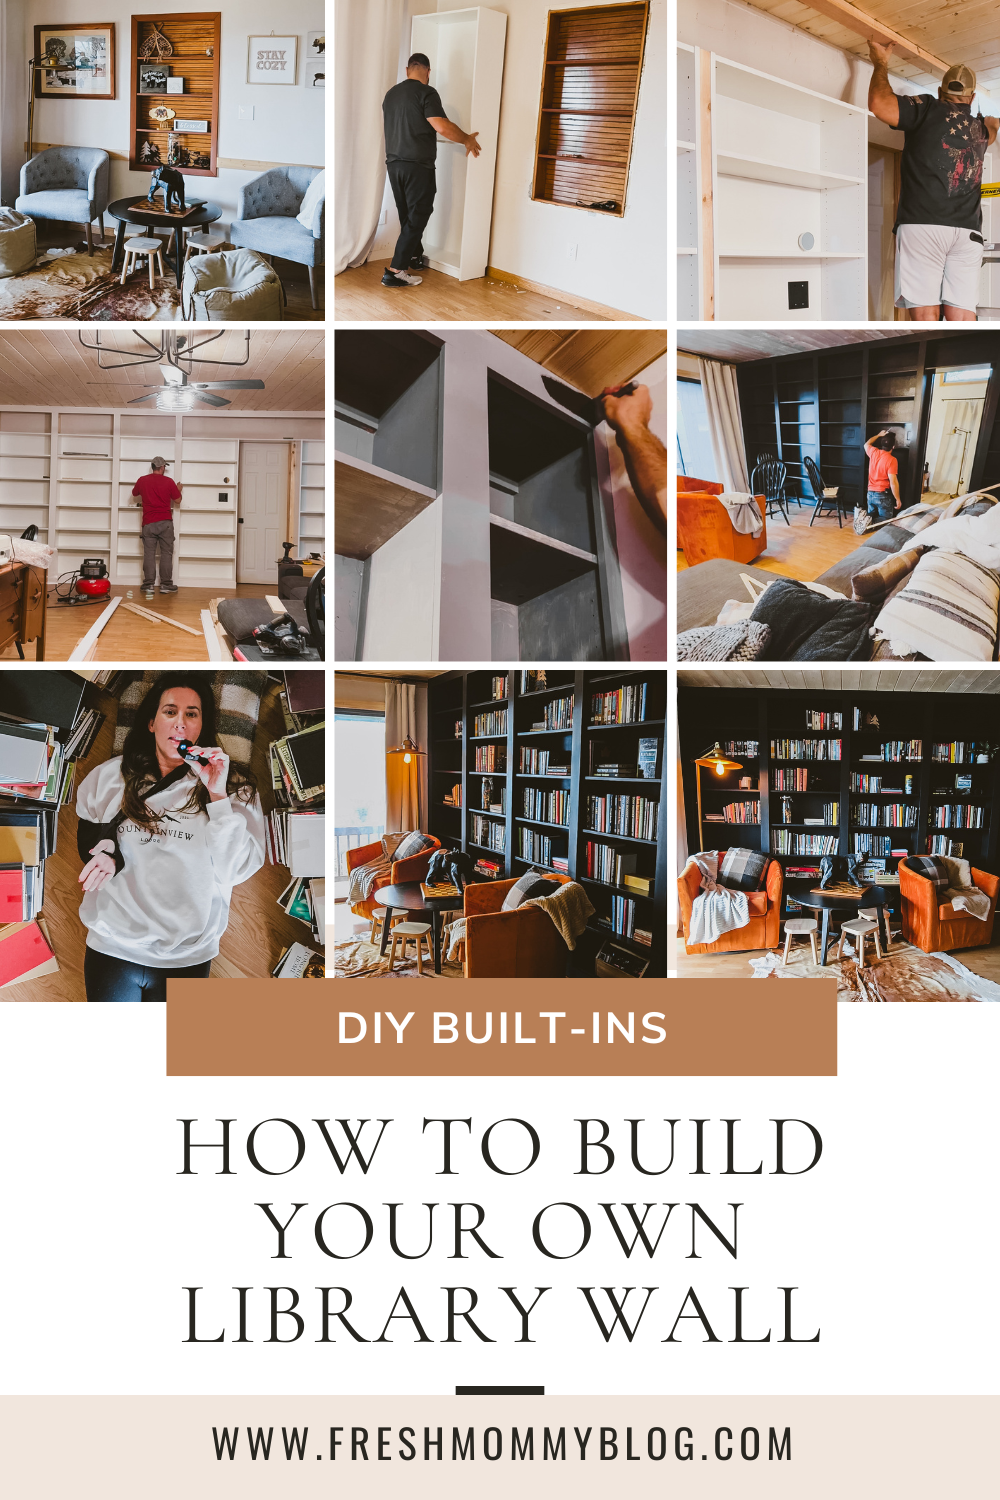
The Wall Transformation Process
Step 1: Positioning the Base Units We started by placing our bookshelves along the wall, making sure everything was level and secured to the wall for safety (especially important if you have little ones!).
Step 2: Extending to the Ceiling The gap between the top of standard bookshelves and the ceiling is a dead giveaway that they’re store-bought. We built a shelf across the top to close that gap and create a seamless look.
Step 3: Adding the Trim This is truly where the transformation happened. We added trim around the perimeter and between sections to create definition and that custom millwork appearance.
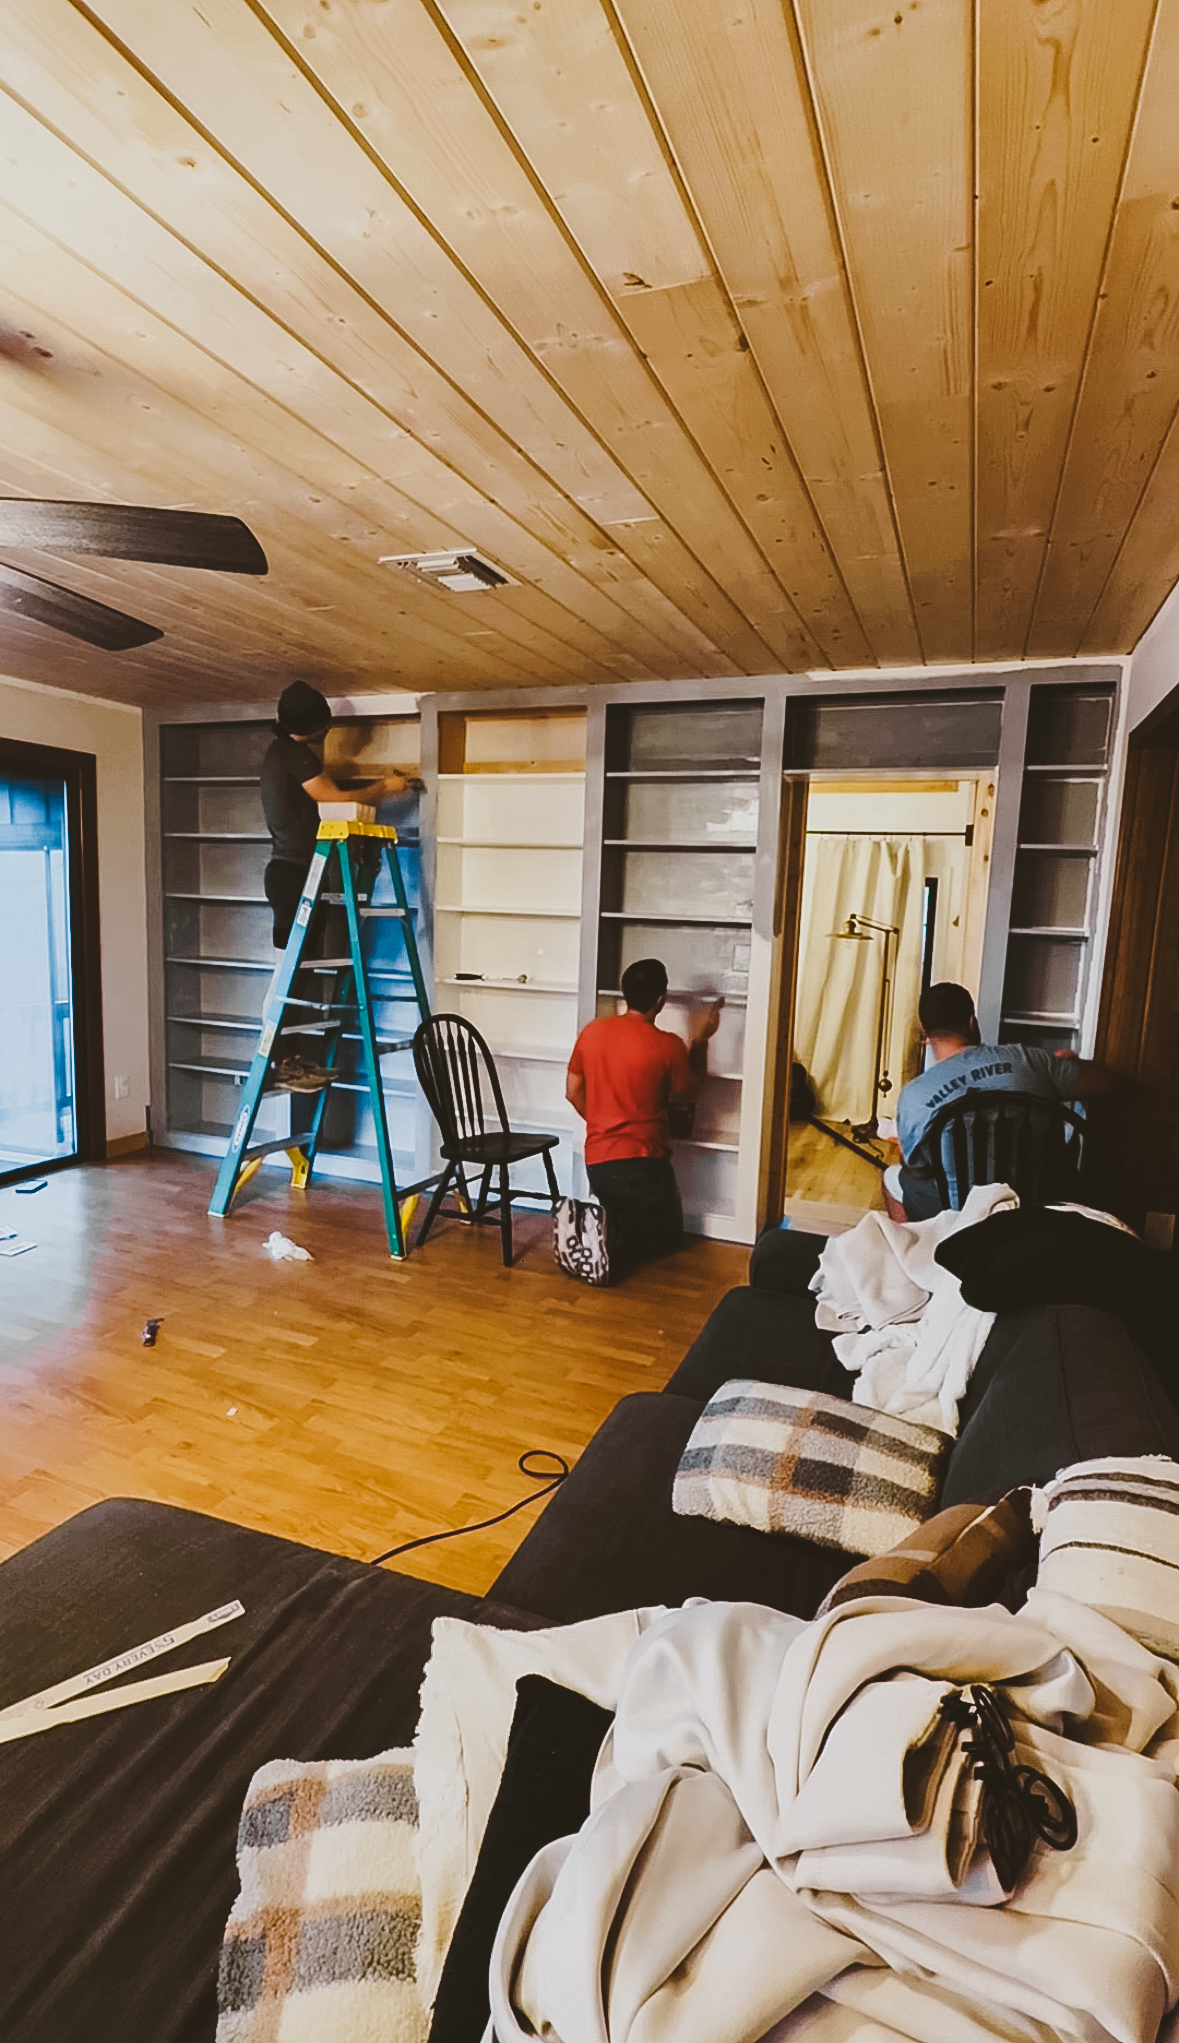
Step 4: Painting We chose Sherwin-Williams Infinity Interior Paint + Primer in Iron Ore in a Satin finish to tie everything together. Pro tip: painting everything the same color—including the back of the shelves—creates maximum impact and makes the whole thing feel intentional.
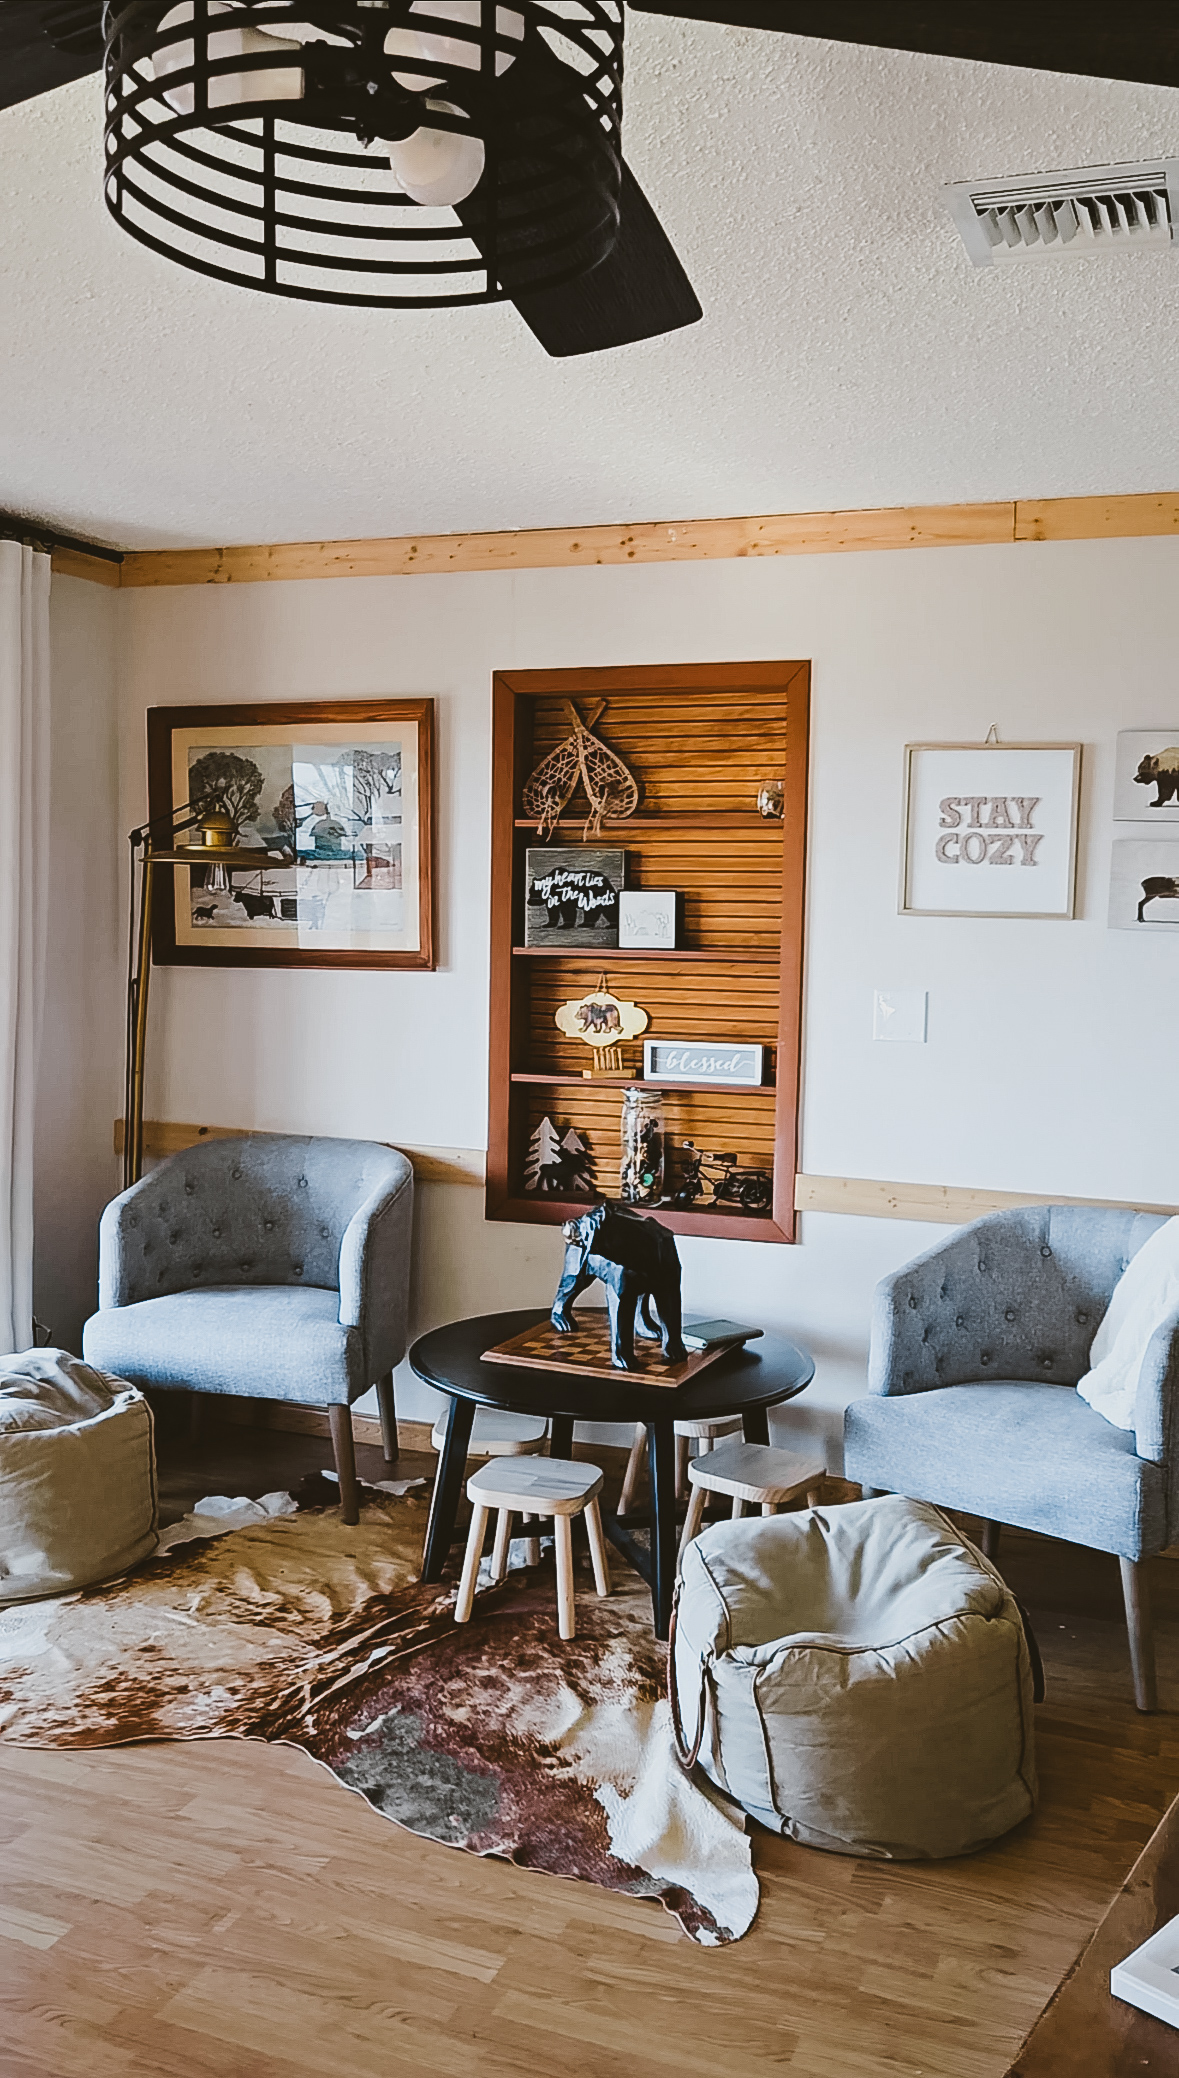
Now Let’s Talk Styling: Making Your Shelves Look Magazine-Worthy
You’ve built this beautiful bookshelf wall—now what do you put on it? Styling shelves can feel overwhelming, but I promise it’s easier than you think. Since we created this primarily as a library, books are our star, but we’ve layered in other elements to keep things interesting.
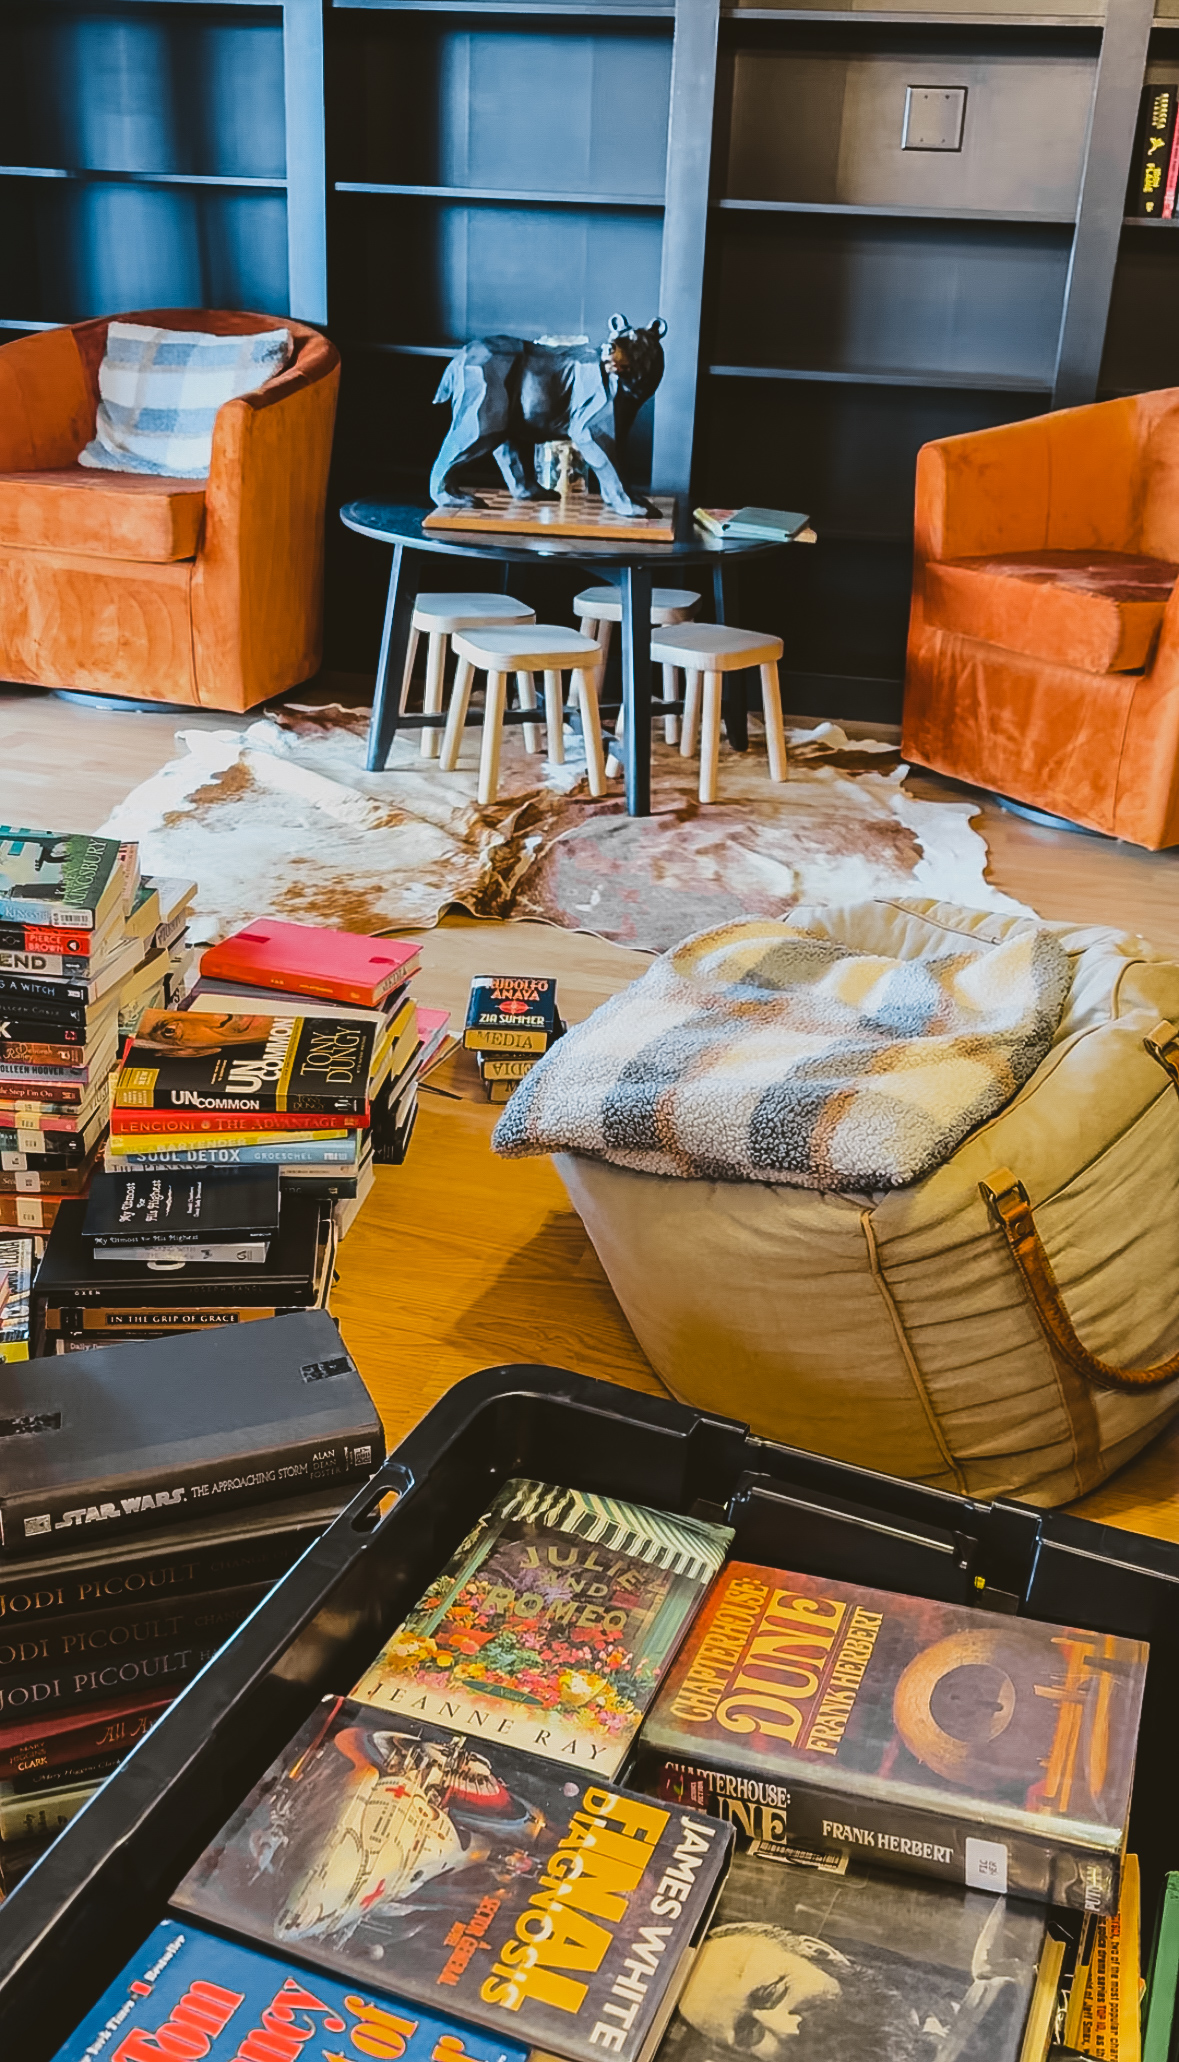
The Foundation: Books, Books, Books
Our shelves are majority books because that’s what we wanted—a true home library. But even with books, there’s strategy:
- Mix vertical and horizontal stacking. Stack some books horizontally to create varied heights and platforms for other objects
- Don’t worry about color-coding. Unless you’re going for a specific aesthetic, organize books in a way that makes sense for your family (by author, genre, or however you’ll actually use them.)
- Fill it up. Don’t be afraid to pack the shelves with books. That collected, lived-in look is exactly what we’re going for
The Rule of Three: Adding Visual Interest
Here’s my go-to styling principle: layer in threes. Whether it’s three objects grouped together or three different types of items creating variety on a shelf, this number just works visually.
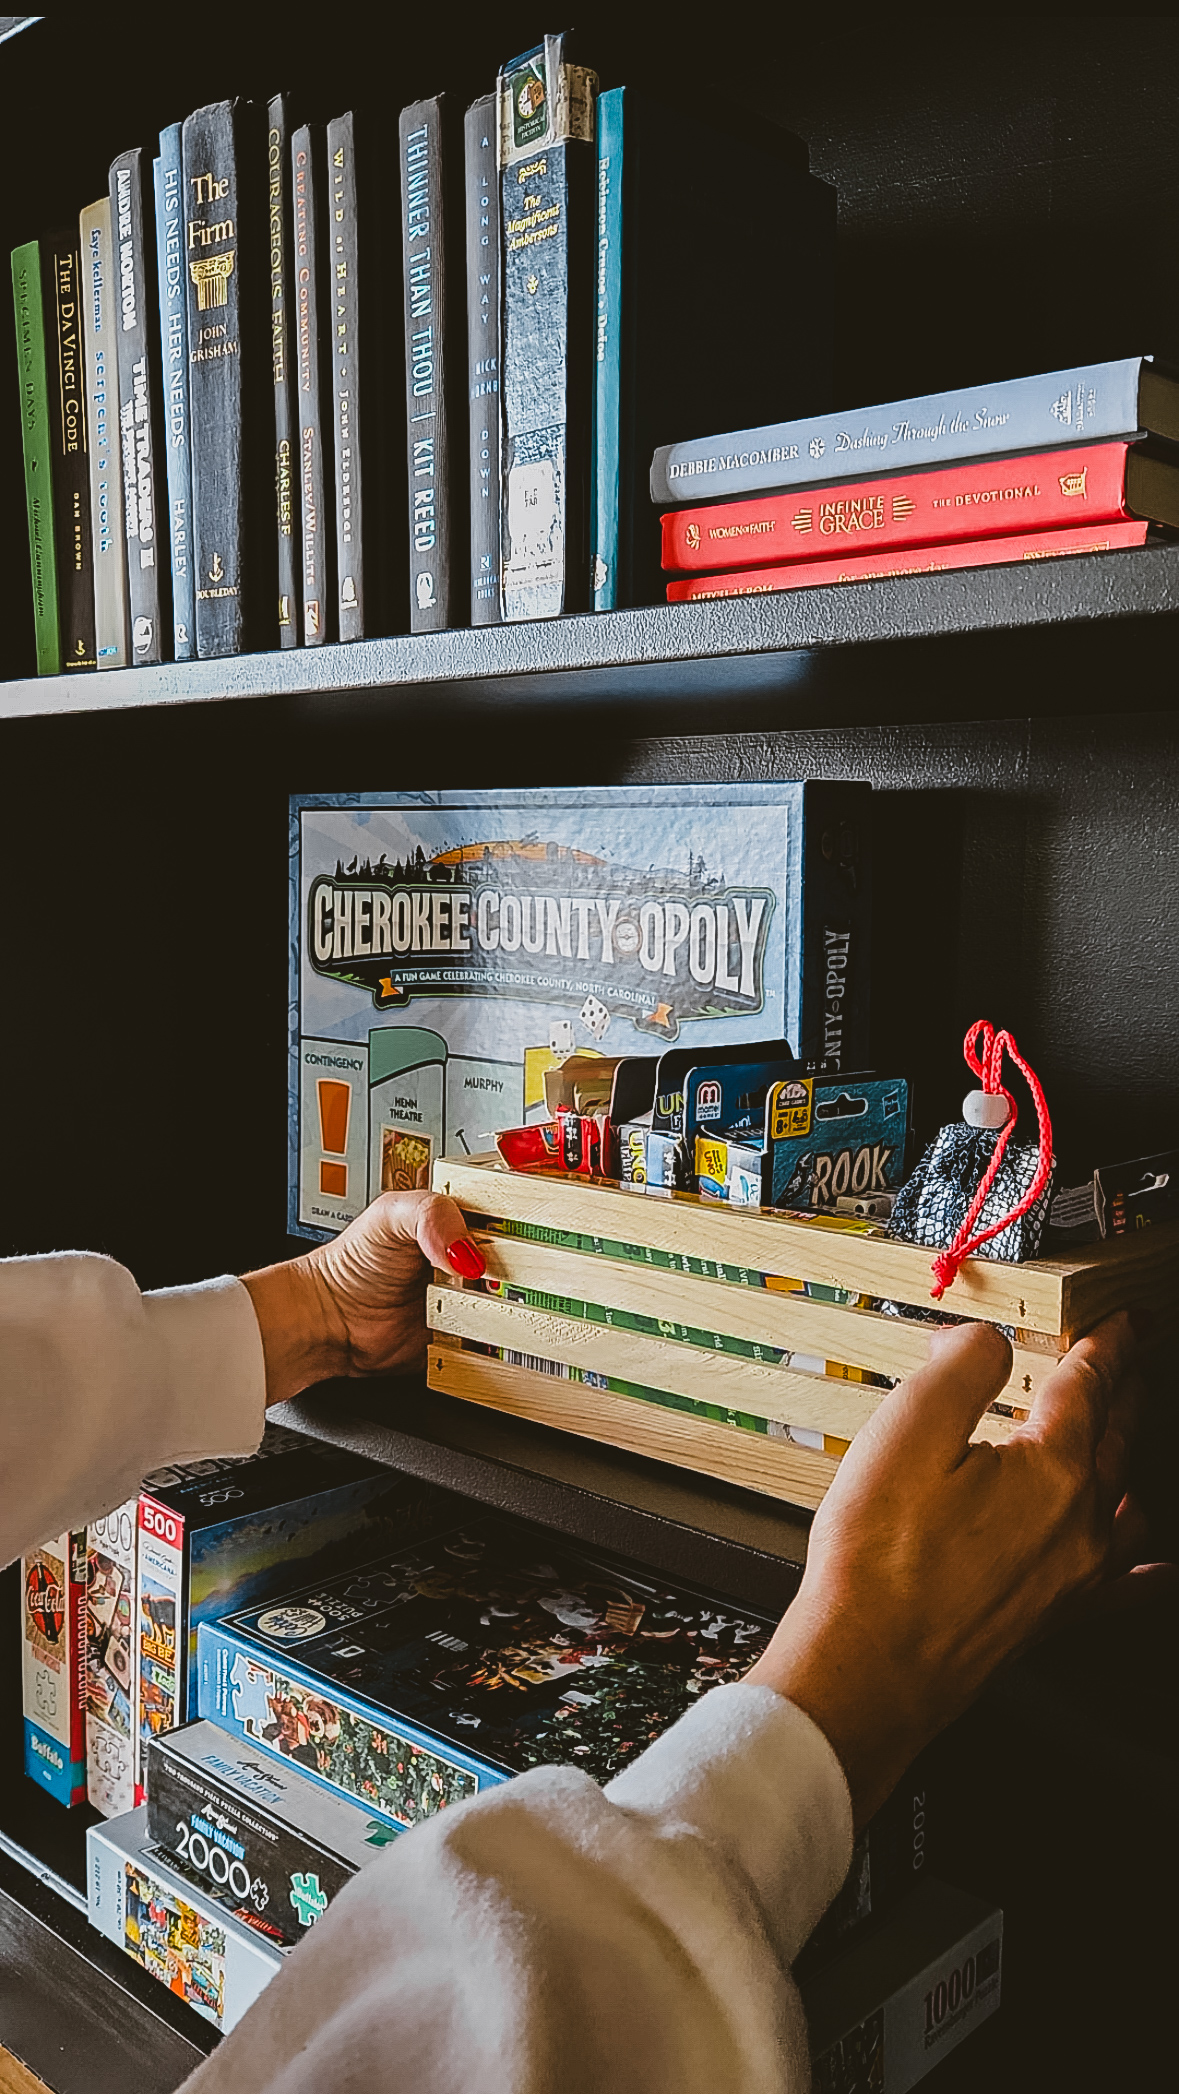
What we included beyond books:
Baskets for games – Functional AND beautiful, baskets hide clutter (like board game boxes) while adding texture. We tucked a few on lower shelves for easy access.
Plants – Scattered throughout, plants bring life and color to the shelves. Depending on light you have available you can use real or faux. Because ours is also a rental property we decided to go with faux plants. Trailing plants look especially beautiful cascading down from upper shelves.
Art – Small framed prints or artwork leaning against the back of shelves add dimension and personality. This is also a great way to display kids’ art or family photos without overwhelming the space.
Decorative objects – Think vases, candlesticks, bowls, small sculptures, or meaningful trinkets. These add personality and break up the lines of books.
Candles – Both practical and pretty, candles add warmth. Group them in odd numbers (there’s that rule of three again!) or mix heights for visual interest. Being that our space is also an AirBNB we didn’t do candles, just for safety. But if you too are concerned about that, there are amazing battery operated ones available.
Shop some of our fave decor items here:
Practical Styling Tips
Create breathing room. Not every inch needs to be filled. Leave some negative space so the eye can rest and individual pieces can shine.
Vary heights. Use stacked books as risers to elevate smaller objects and create different levels.
Layer items. Place smaller objects in front of larger ones, or lean art behind a small vase or stack of books.
Consider symmetry (or don’t). We kept our shelves fairly asymmetrical and organic, but if you prefer a more structured look, mirror your styling on opposite sides.
Edit, edit, edit. Start with more than you think you need, then remove items until it feels balanced. It’s easier to take away than to figure out what’s missing.
Make it personal. The best styled shelves tell a story. Include things you love, things that spark memories, things that make you smile when you see them.
The Bottom Line
Your blank wall really is wasted space—but it doesn’t have to stay that way. With some affordable materials and a weekend of work, you can create a showstopping feature that adds both function and beauty to your home.
This project gave us the library wall of our dreams without the custom price tag. Better yet, it’s become the heart of our mountain home—a place where the kids grab books for bedtime, where we display our favorite things, and where guests always stop to admire the library.
So what are you waiting for? That blank wall is calling.
Have you tackled a similar project? What would you put on your dream bookshelf wall? Drop a comment below—I’d love to hear about it!
Home Projects


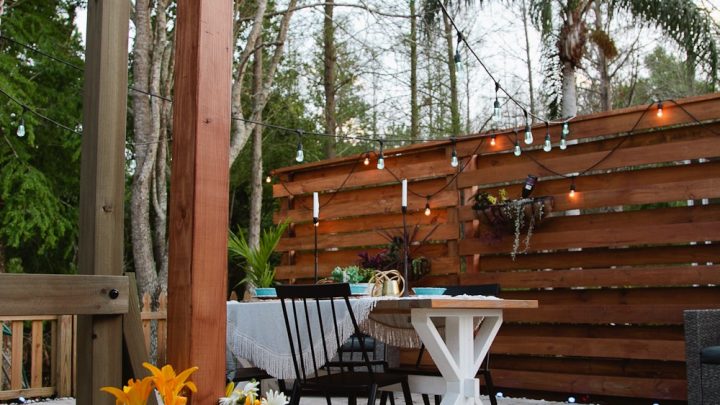
DIY Outdoor Planter Box for Hanging String Lighting
DIY Planter for Hanging String Lighting for under $40! How to build a planter for patio lights, or don't use the pole for lights and just use the planter!


Custom Potted Hanging Herb Garden DIY
A beautiful vertical garden, especially perfect for hanging herbs, but you could add any plant. Make with scraps for a budget-friendly, cost-effective potted hanging herb garden DIY!


Leave a Reply