The weather has been beautiful lately and so we thought we would use what nice days we had to take care of some fun projects on our list. Continuing our backyard makeover with a hanging string lighting update was the perfect way to weekend warrior our project list. These DIY outdoor planter flower boxes are a modern way to hang string lighting over a deck or patio and really update the look and feel of the great outdoors for all of your fun backyard plans!


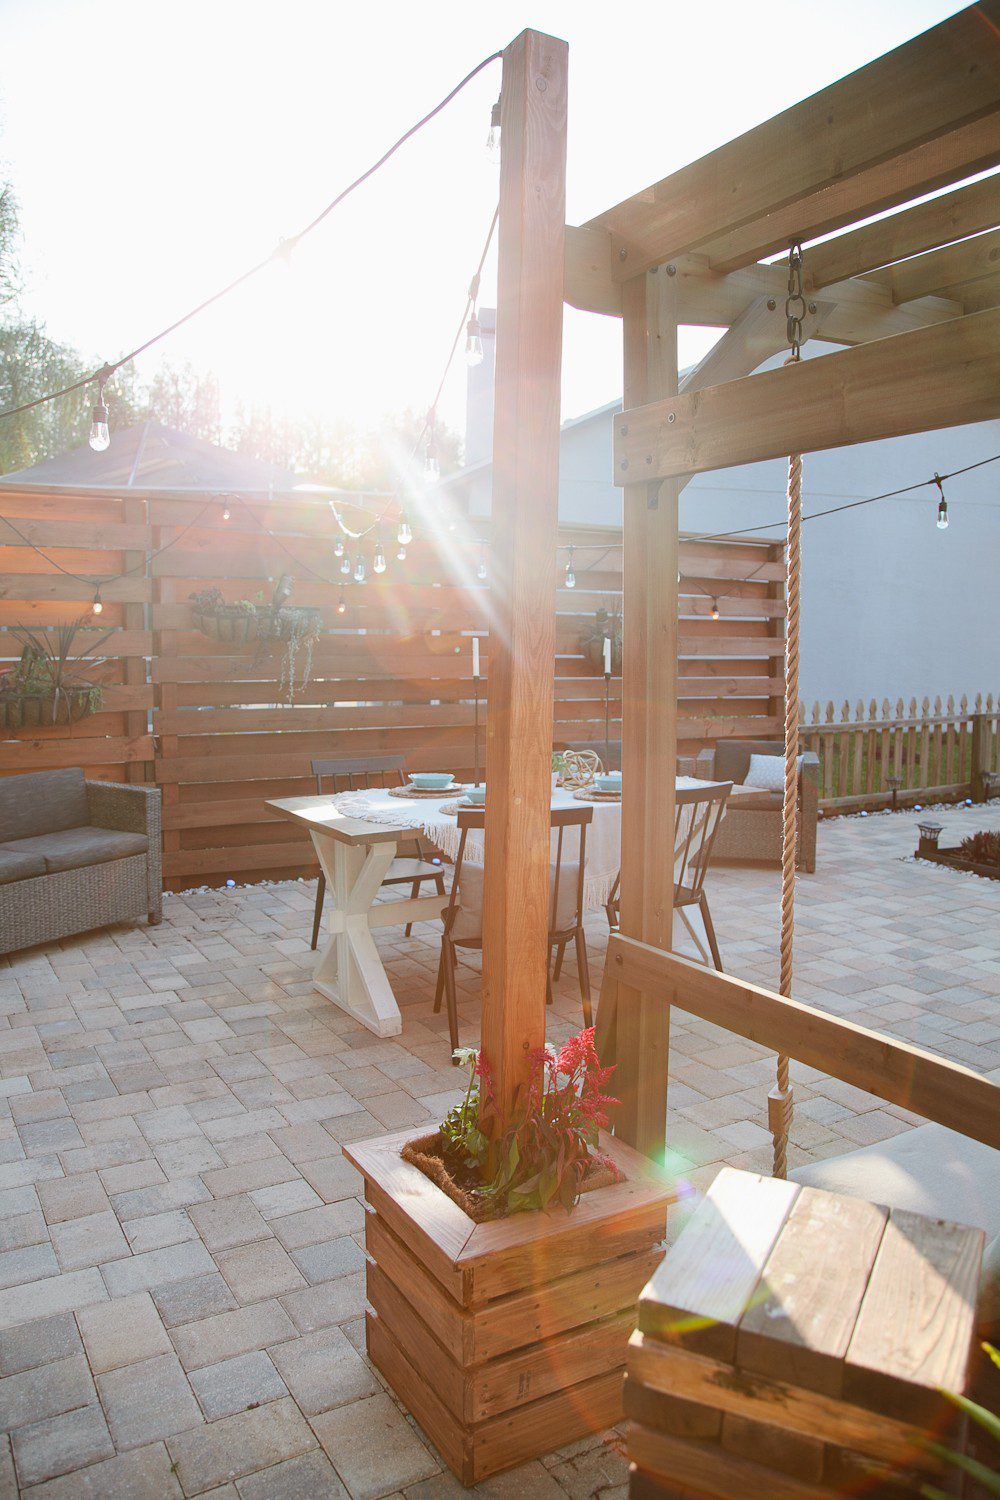
It’s a simple enough project even for beginners to DIY a planter, just take your time going through each step, and this one for hanging patio lights comes in at under $40 (at the time of this post)!

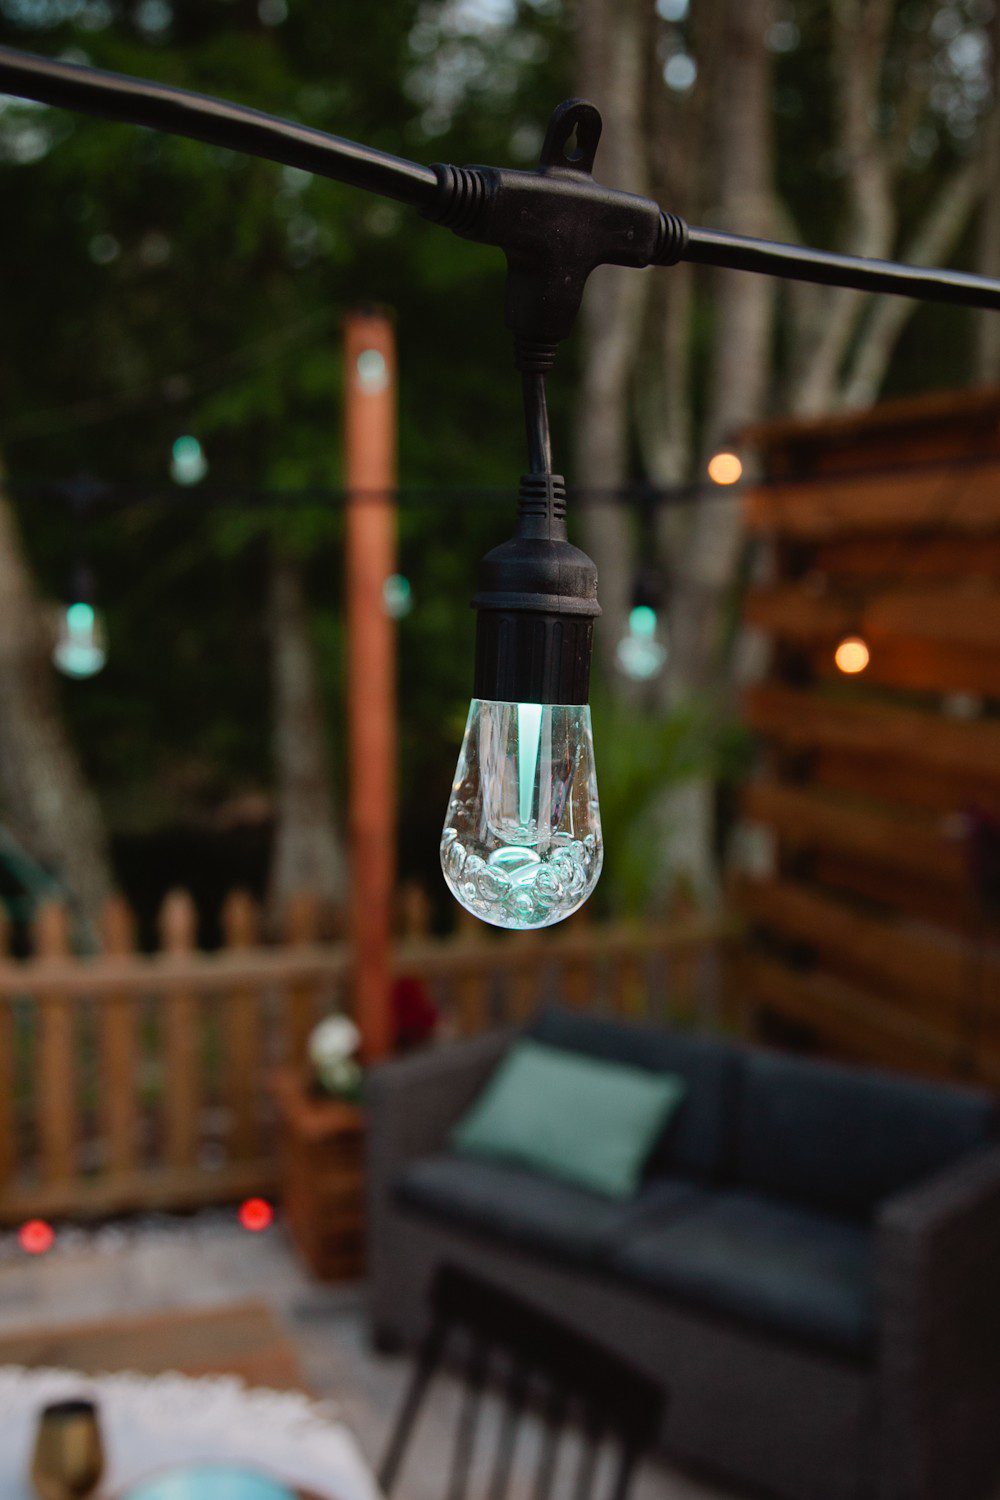
We’ve been slowly updating and renovating our home, and if you’ve followed along for a while, you’ve probably seen much of the progress right along with us as we share it in our House to Home episodes and posts!
I say slowly because when you have a long list, you pick and choose which projects to tackle, and this is the perfect season for us to get outdoors.
It’s not too hot or humid and with the temperatures rising here in Florida, this is the time of year we most want to be outside.
Okay, so as a blogger, I will say that there are some moments I think, “This project would be so much easier if I didn’t need to take photos/video/etc.”
And yes, the process would be quicker, but there is something so magical about documenting progress. So whether a blogger or not, I think EVERYONE should at least take before and after photos when updating a home or making changes.
Just looking back to two summers ago when we purchased our home makes me so proud and so grateful for how much we’ve learned, pushed through, and accomplished along the way! All that to say, look at the before and afters below and let it encourage you to start your own projects… even if they seem slow-going at the time!
Just take a look at the before of what is now our backyard oasis!


Ready to Make your own DIY Outdoor Planter Box and Start Hanging String Lighting?
Item list:
- (4) 1x4x8 common board
- (1) 2x2x8 common board
- (1) 4x4x8, untreated
- (1) 2×4
- 1 5/8” screws, 1 lb box
- 2 1/2″ screws
- (1) open-ended screw hook
- 16” round plant liner
- Optional Weight for Planter Base: 4 12×12 limestone pavers and 16″ square of plywood
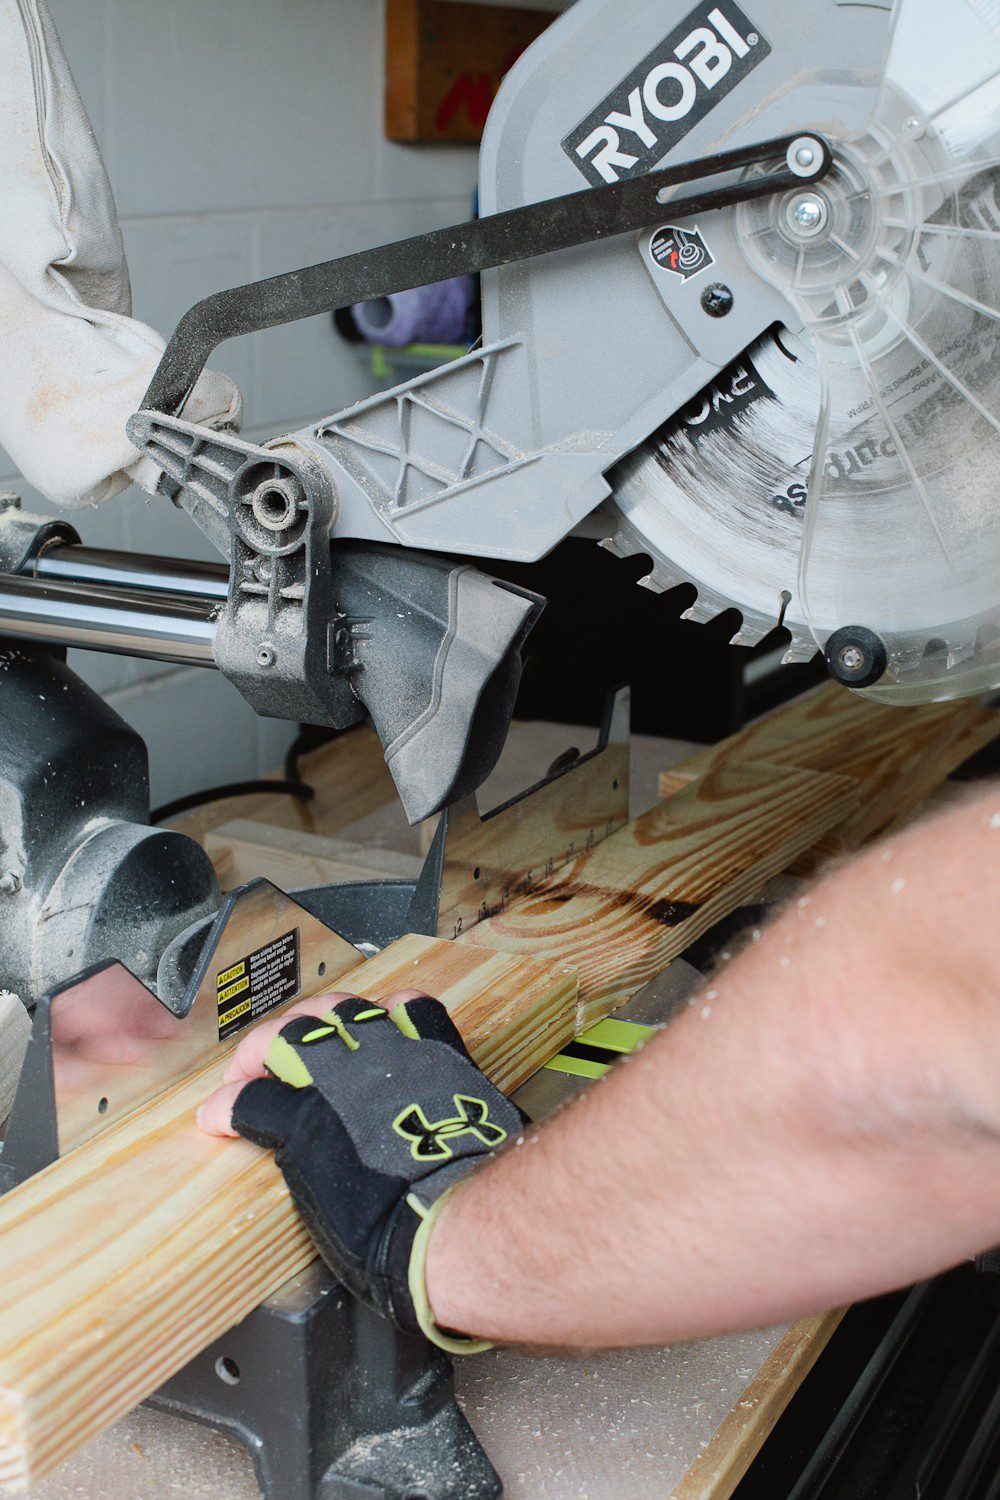
Cut List:
- 16 pieces – Cut 1×4 at 15 3/4”
- 4 pieces – Cut 2×2 at 16”
- 4 pieces – Cut 1×4 at 19” then 45 degree cut at each end
Directions to Create DIY Outdoor Planter Box for Hanging String Lighting:
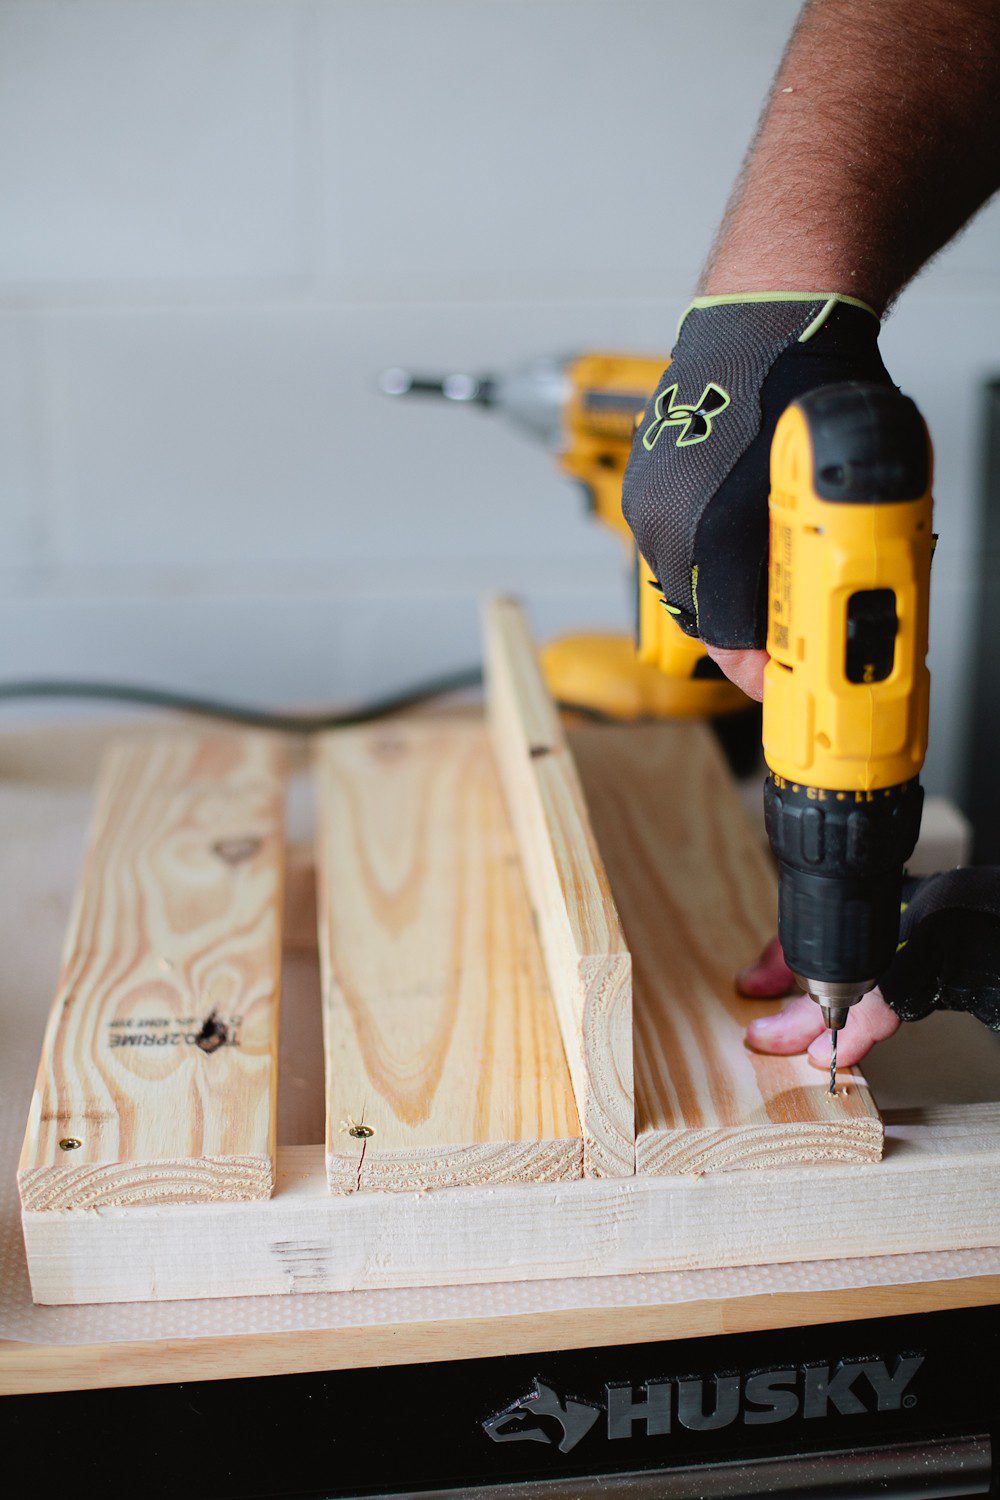
Step 1:
Align one cut 2×2 flush with short edge of cut 1×4.
Attach with two screws.
Create a space and then screw on another 1×4 until you have four 1×4 boards attached and running perpendicular to the 2×2.
4 boards attached form 1 side of your outdoor planter box.
Tip: Place another 1×4 board on edge for spacer.
Step 2:
Repeat to make all 4 sides.

Step 3:
Line up two sides to form the corner of the box and attach with screws.
Attach all four sides to form the entire box – attaching with screws.

Step 4:
Measure inside edge to edge of box and cut 2 x 4 to form brace.
Cut 2 braces

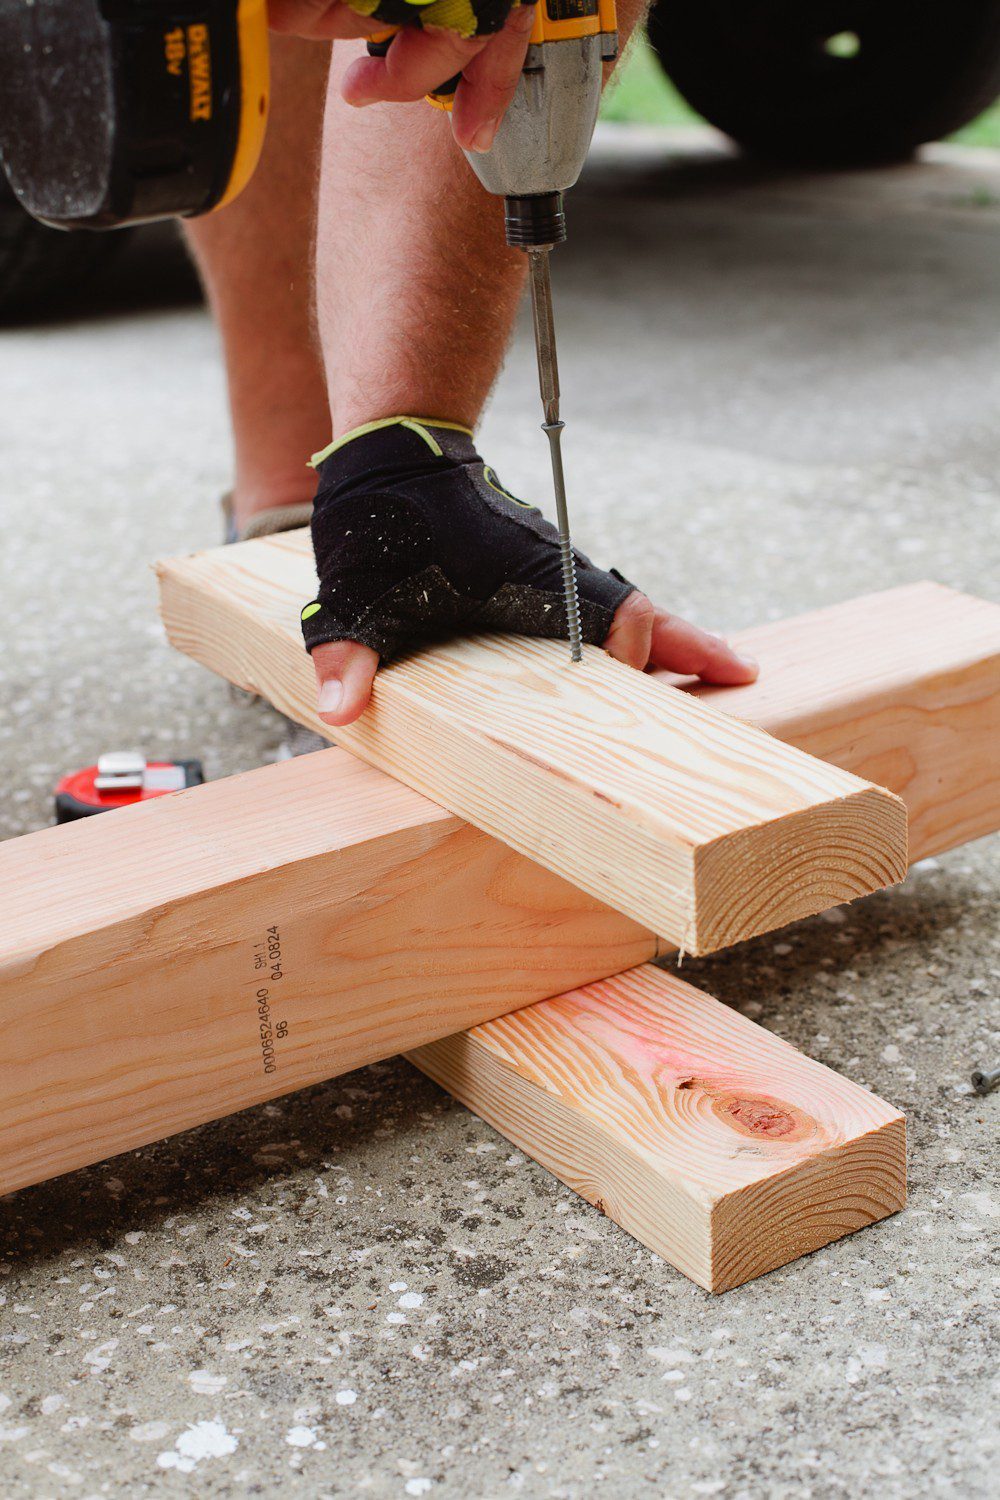
Step 5:
Attach bottom of 2×4 brace at 4 ¼” on each side of 4×4
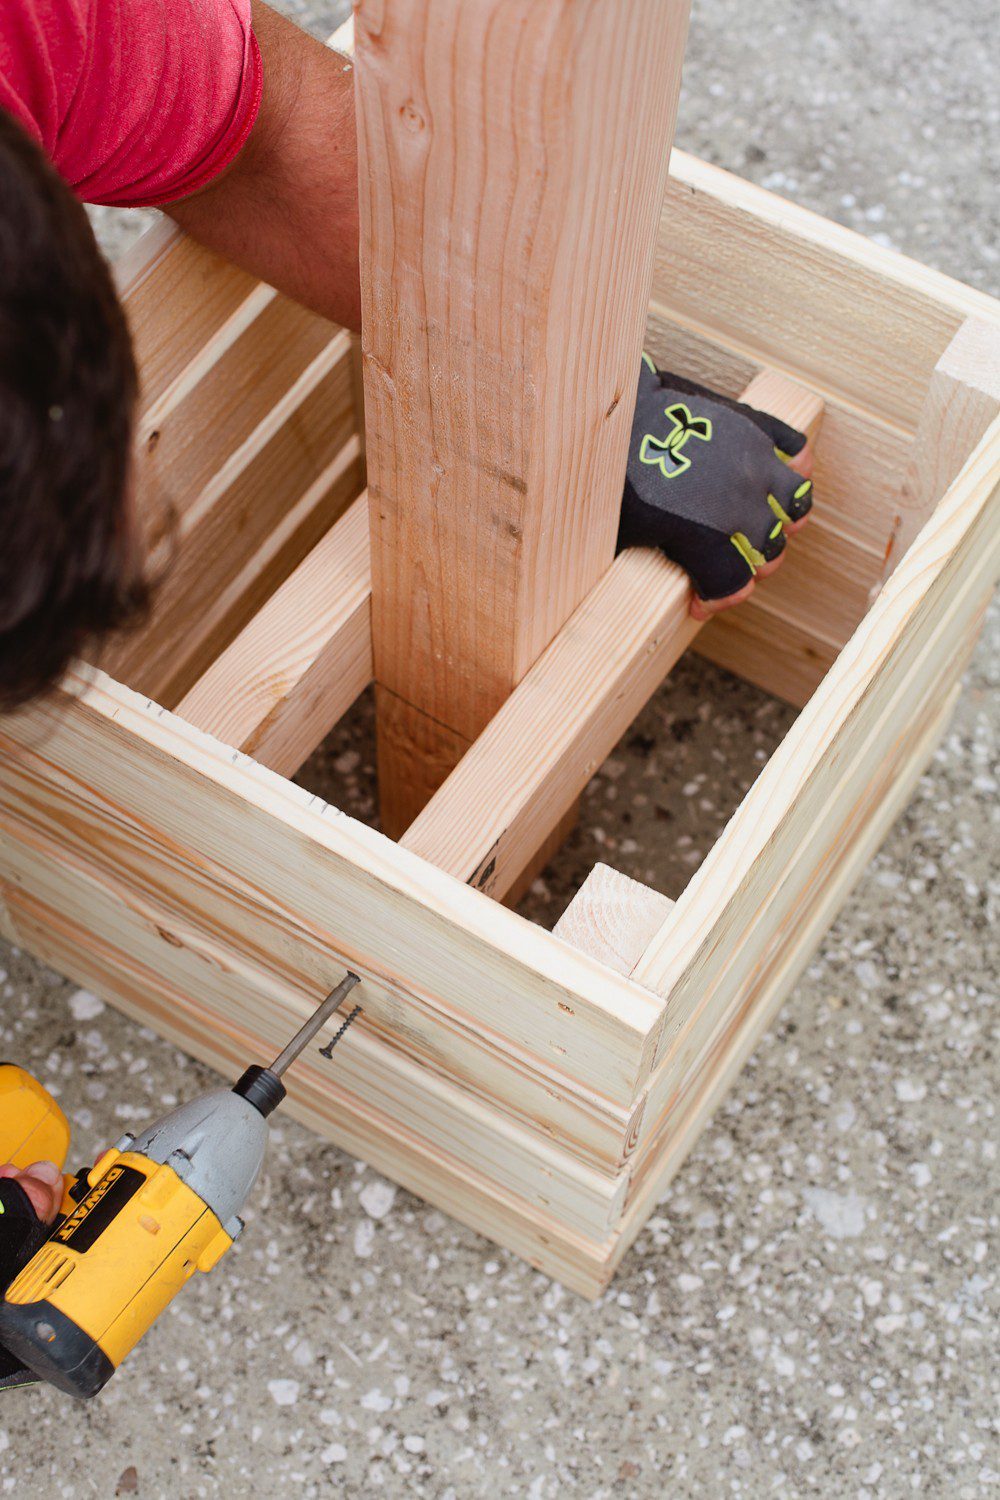
Step 6:
Align 4×4 in box flush to bottom and attach on both sides.
Step 7:
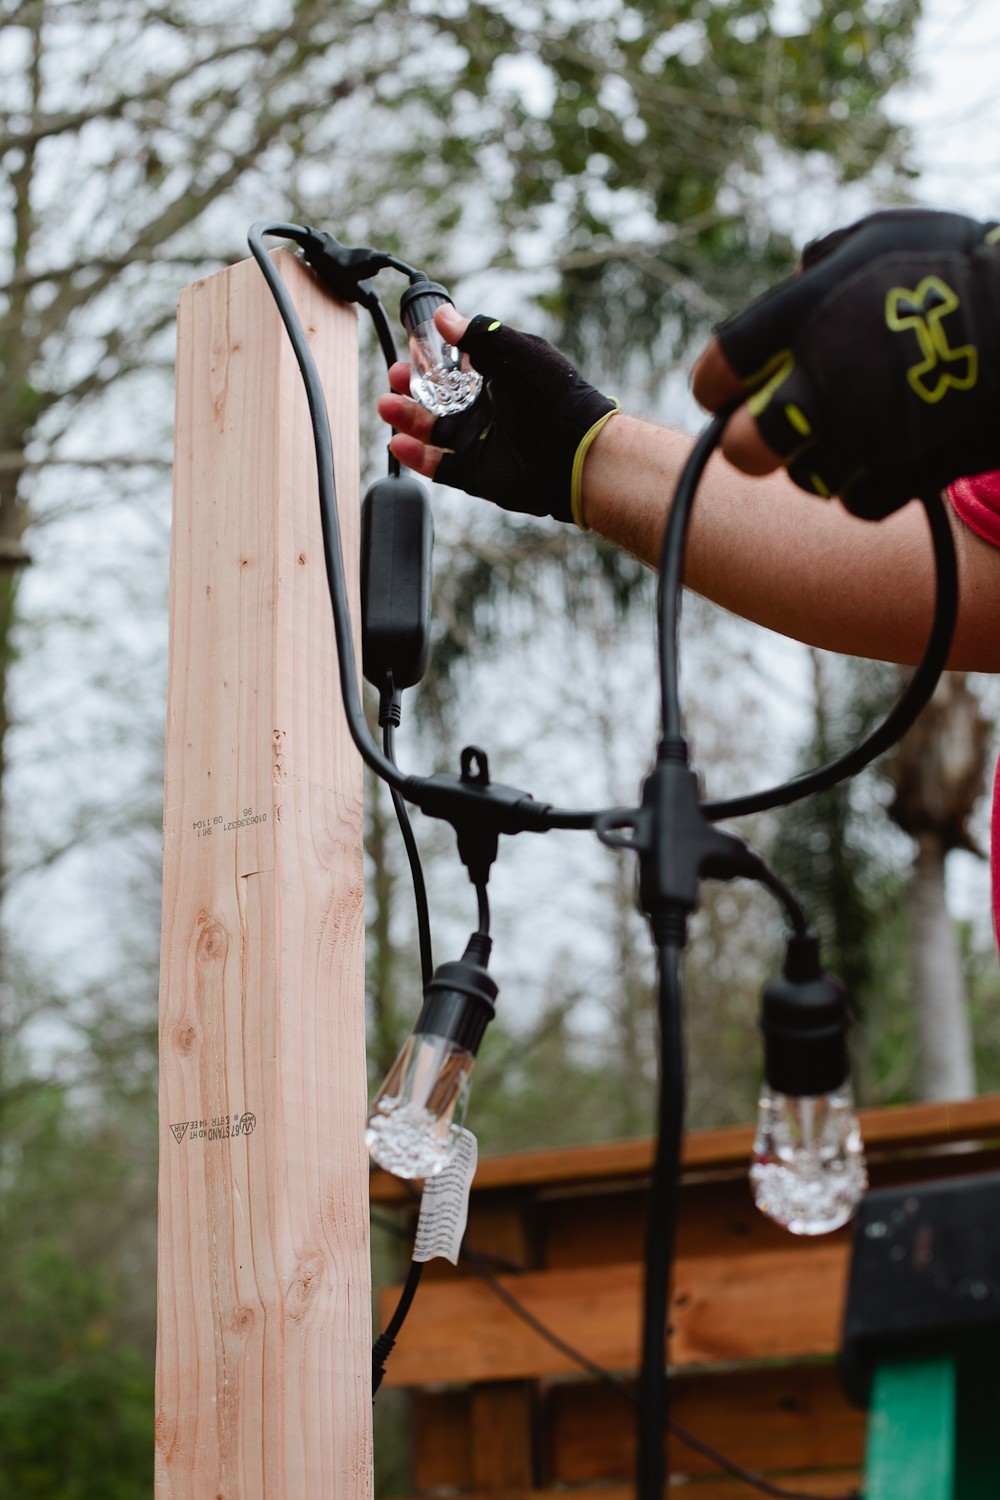
Insert hook to top of pole to attach your hanging string lighting.
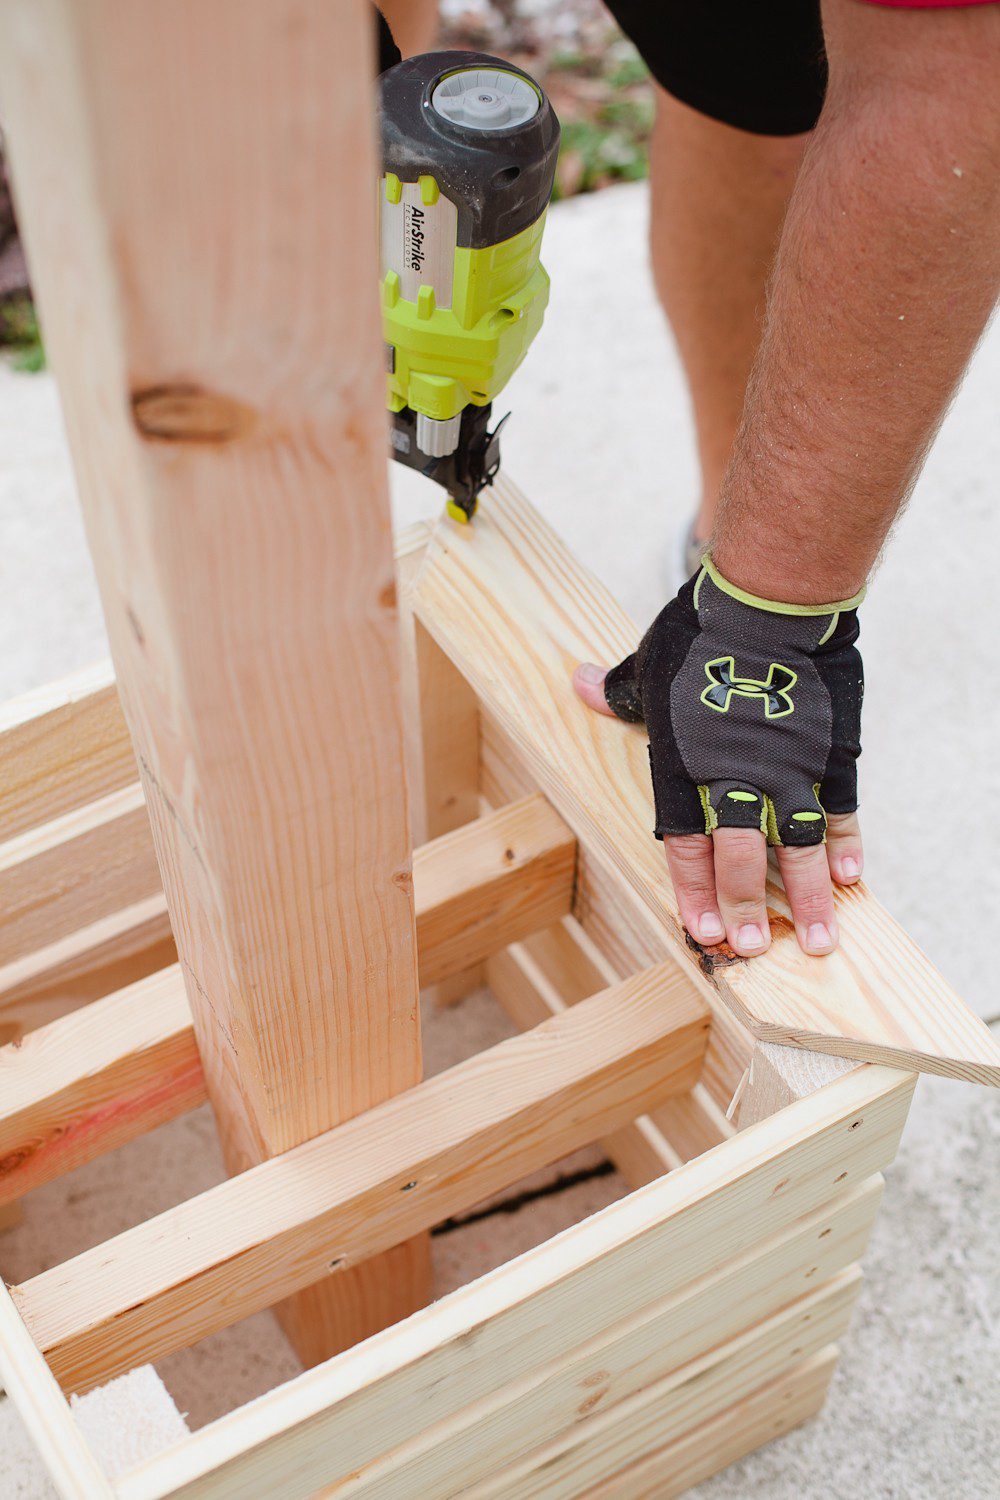
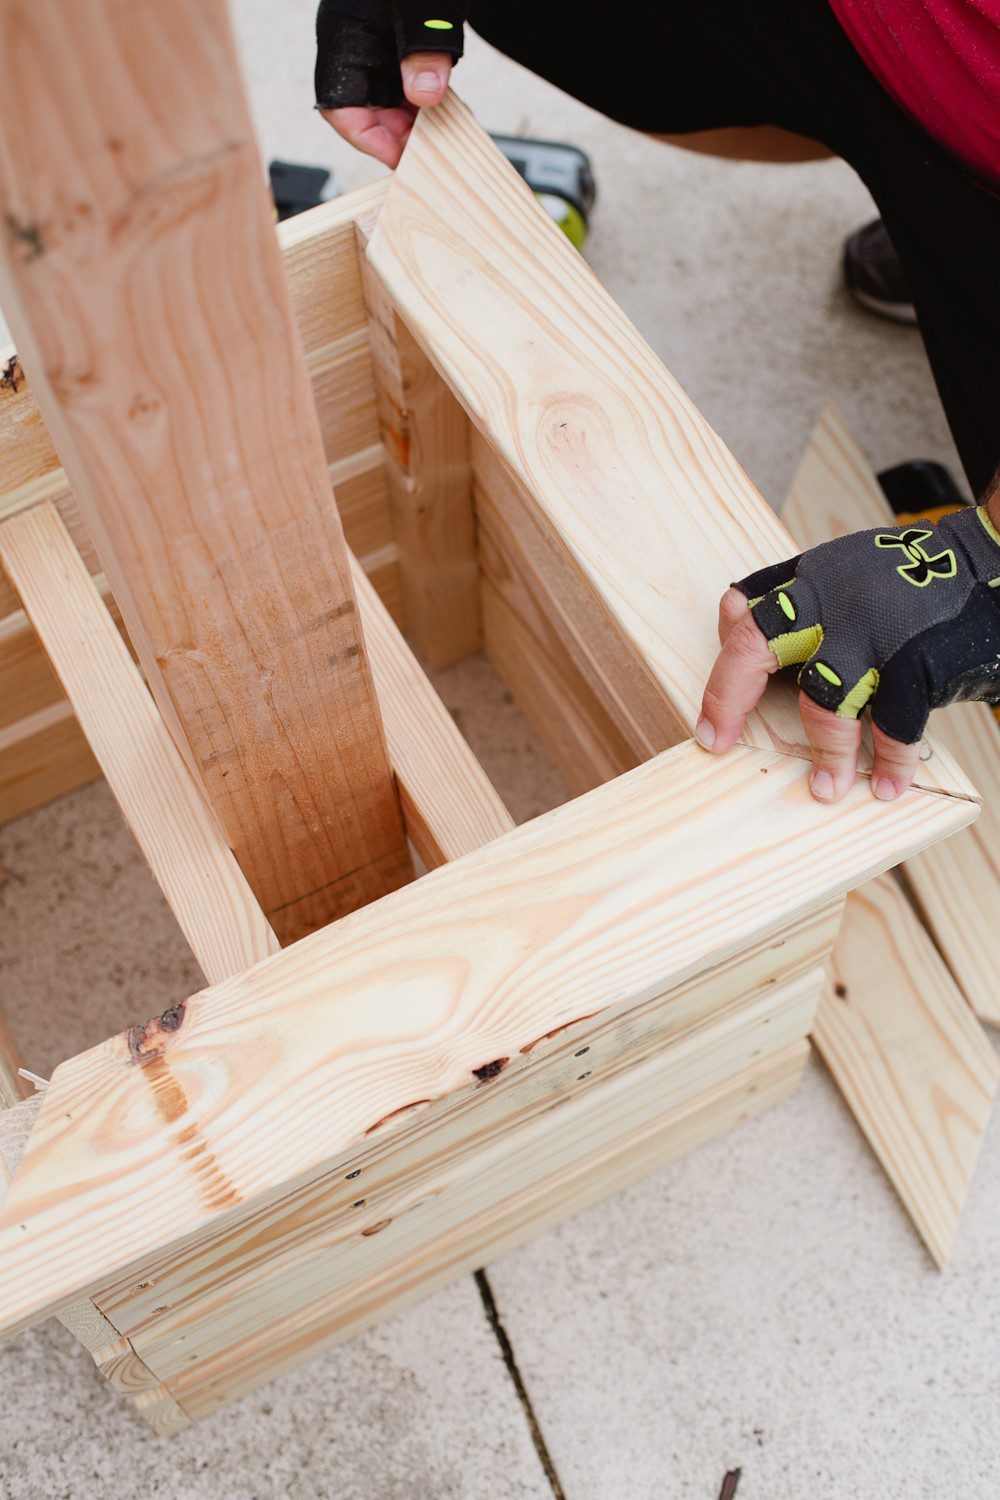
Step 8:
Attach all 4 cut pieces of 1×4 with 45 degree cuts flat on top of box. Arrange pieces on top and place inside corner on the corner of 2×2 post. Attach with finish nails or screws.
Step 9:
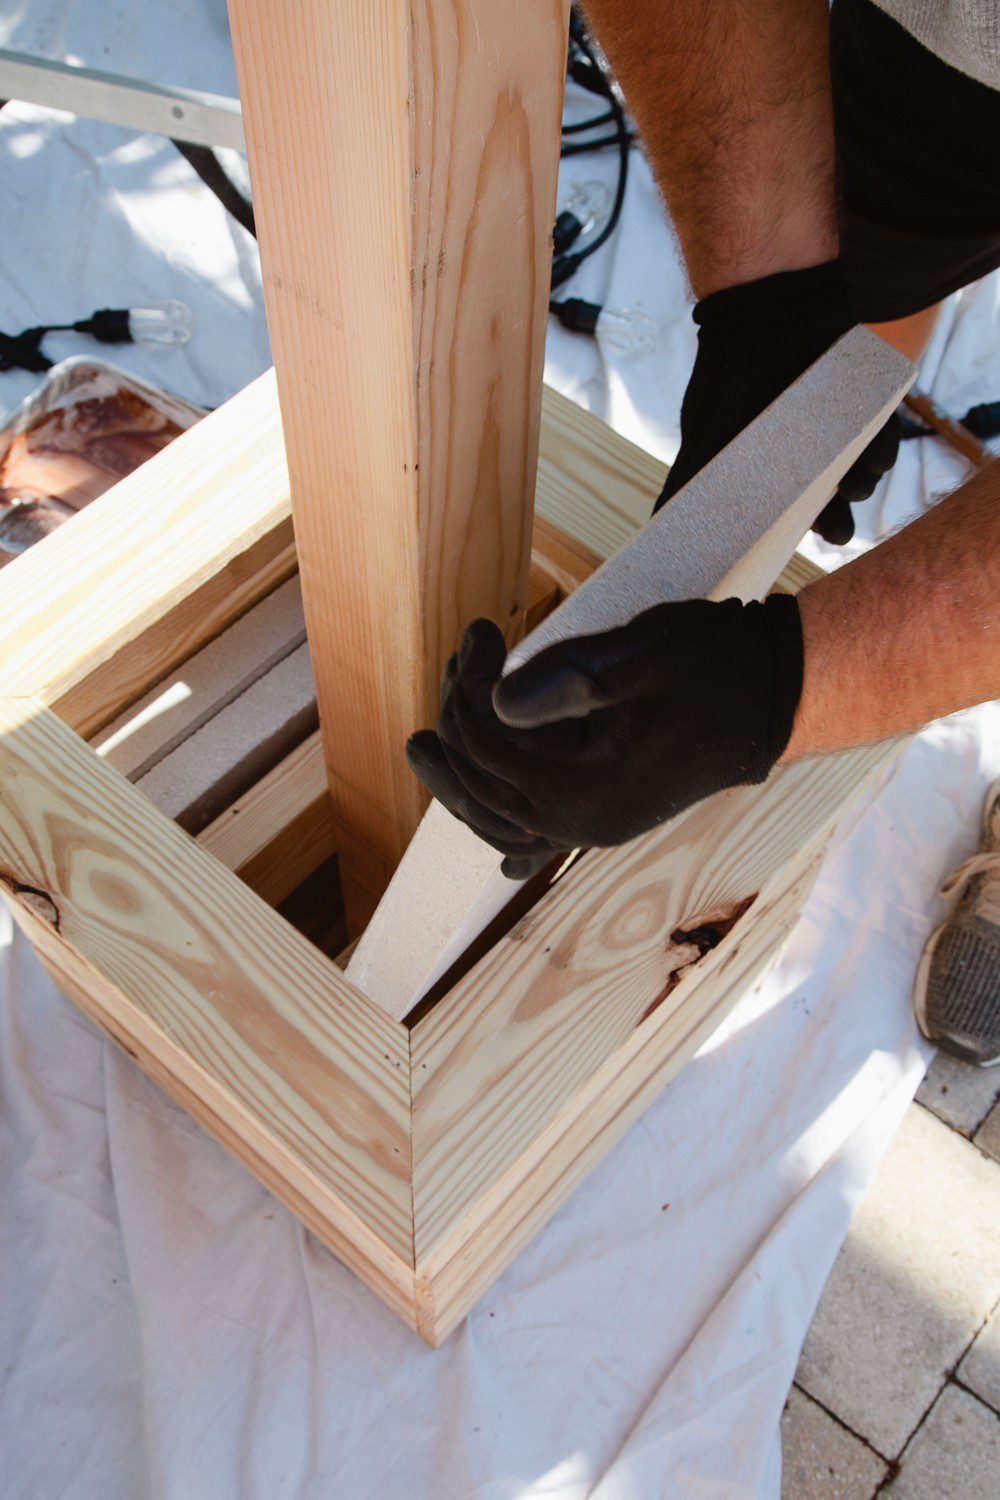
Optional: Depending on the weight of outdoor lighting you may need to add weight to the base of your outdoor planter box.
In our case, we used 12X12 limestone pavers.
They slide in nicely after the box is built. Before we added the pavers, we attached a 16″ X 16″ square of plywood to the bottom of each planter box.

Step 10:
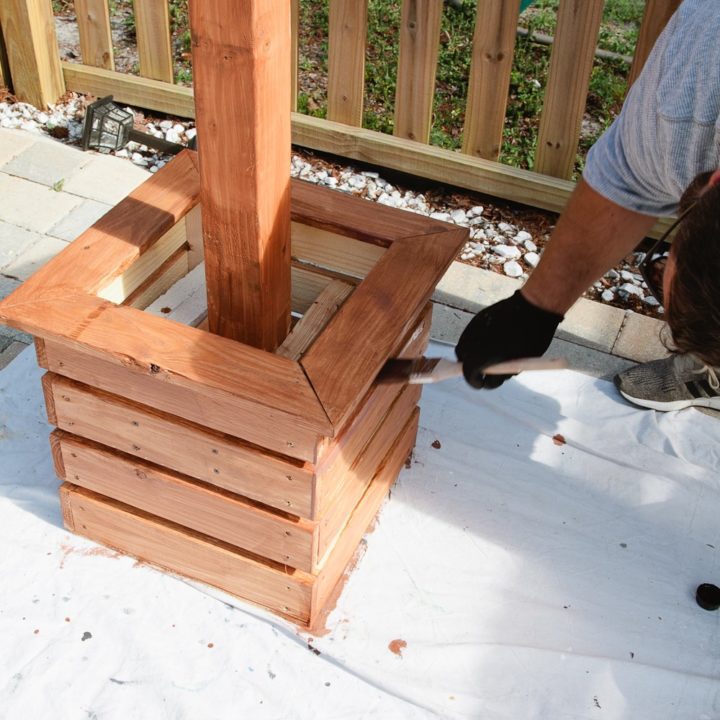
At this point, you could paint or stain, and I would recommend one or the other to give some outdoor weather protection to your new DIY outdoor planter box for hanging string lighting. We chose to use the stain leftover from our DIY horizontal slat fence so that they would match.
Step 11:
Place small cut in the center of plant liner.
Slide over the 4×4 from the top and press into the box flush with the top of the box.
Add soil and plants/flowers to suit.
DIY Outdoor Planter Box for Hanging String Lighting
DIY Planter for Hanging String Lighting for under $40! How to build a planter for patio lights, or don't use the pole for lights and just use the planter!
Materials
- (4) 1x4x8 common board
- (1) 2x2x8 common board
- (1) 4x4x8, untreated
- (1) 2×4x8
- 1 open-ended screw hook
- 16” round plant liner
- Optional Weight for Planter Base: (4) 12×12 limestone pavers and 16″ square of plywood
- Cut List:
- 16 pieces – Cut 1×4 at 15 3/4”
- 4 pieces – Cut 2×2 at 16”
- 4 pieces – Cut 1×4 at 19” then 45 degree cut at each end
Tools
- Hammer
- Chop Saw
- Drill
- Quick Square Triangle
- Goggles
- Gloves
- 1 5/8" Screws Qty 100
- 2 1/2" Screws Qty 50
Instructions
Step 1:
Align one cut 2×2 flush with short edge of cut 1×4.
Attach with two screws.
Create a space and then screw on another 1×4 until you have four 1×4 boards attached and running perpendicular to the 2×2.
4 boards attached form 1 side of your outdoor planter box.
Tip: Place another 1×4 board on edge for spacer.
Step 2:
Repeat to make all 4 sides.
Step 3:
Line up two sides to form corner of box and attach with screws.
Attach all four sides to form entire box attaching with screws.
Step 4:
Measure inside edge to edge of box and cut 2 x 4 to form brace.
Cut 2 braces
Step 5:
Attach bottom of 2×4 brace at 4 ¼” on each side of 4×4
Step 6:
Align 4×4 in box flush to bottom and attach on both sides.
Step 7:
Insert hook to top of pole to attach your hanging string lighting.
Step 8:
Attach all 4 cut pieces of 1×4 with 45 degree cuts flat on top of box. Arrange pieces on top and place inside corner on corner of 2×2 post. Attach with finish nails or screws.
Step 9:
Optional: Depending on weight of outdoor lighting you may need to add weight to base of your outdoor planter box.
In our case we used 12X12 lime stone pavers.
They slide in nicely after box is built. Before we added the pavers, we attached a 16″ X 16″ square of plywood to the bottom of each planter box.
Step 10:
At this point you could paint or stain, and I would recommend one or the other to give some outdoor weather protection to your new DIY outdoor planter box for hanging string lighting. We chose to use the stain left over from our DIY horizontal slat fence so that they would match.
Step 11:
Place small cut in center of plant liner.
Slide over the 4×4 from the top and press into the box flush with top of box.
Add soil and plants/flowers to suit.











cait says
omg we love our lights to and they add so much comfort and joy to our little porch now! i love what you did with yours! what a great entertaining backyard and those planters look awesome! great project!
Karen says
This would be awesome for our deck! We love having family and friends over, and what a great way to start a conversation and bring some enjoyment to our outdoor time! I love that you can change the colors by remote control!
Amber Myers says
I love this! Your backyard is lovely. Mine looks rather blah at the moment. I need to add some lighting.
Katie says
Such a cute idea! Thanks for the instructions and tips!
Dana says
I love this idea. Would you think a novice DIYer? I don’t have any skills with power tools, cutting, measuring, etc but I want to create this planter box for my yard. Any advice would be appreciated.
Tabitha Blue says
Hi Dana! I definitely think you could tackle this project! My advice when starting out is to take it slow, read through each step, and understand it before cutting, etc. Maybe that means holding the wood up how you think it should go and re-read a step, etc. The old saying, measure twice and cut once is a good one too. Double-check things like measurements before you do the cutting. Otherwise, just take your time and have fun with it! The best way to learn is to just DO! 🙂
Melanie Edjourian says
I am loving the planter box idea. We need more in the garden and hanging lights from them will make it look so much more inviting over the summer.
Michelle Garrett says
Gorgeous results! We have a long list and I was just going back and forth over where to start. I’m going to take your advice and just pick one. With the warmer weather here, our outside projects can definitely be a priority.
Alli says
I love the lights and your entire patio setup. I’m crazy about table settings and yours is beautiful! It’s such a great look for spring.
Marysa says
Those came out wonderfully! I love the big style of bulbs, and I had no idea you could get ones that changed colors like that. I would love to do this with my patio!
Jenn@Engineermommy says
You did such a great job with the woodwork on this planter box. I definitely want to try making this. I love DIY woodwork projects like this!
Dana Nurse says
I love this idea. Would you think a novice DIYer? I don’t have any skills with power tools, cutting, measuring, etc but I want to create this planter box for my yard. Any advice would be appreciated.
Pam says
I’ve been redoing my patio and feel like it is missing something. I need to make a set up like this.
Terri Steffes says
I was so lucky to win this type of party lights as a door prize, AND I was also gifted the installment. They are up and so pretty. It makes the backyard so festive.
Tasheena says
Your backyard is pretty amazing. Love your planter boxes. I would love them for my yard.
Christy Maurer says
That looks great! I have basically zero yard, but if I did I’d be all over this. I adore the lights and love that they’re remote controlled!
Cathy Mini says
Oh my goodness! This makes me so amazed! I love the creativity that you have and the result of that you made a beautiful backyard. Pretty cool!
Dennis Littley says
This planter looks like it was definitely worth making. The lights will be ideal for summer parties! Great work on the planter!
Ruth I says
This is a beautiful set up. I would love to make this in our little space. My niece would be so happy!
Lisa Favre says
I would love to have a setup like this for my house! Your backyard is seriously home goals!
Heather says
Love this DIY! Maybe something I can do…maybe. Either way, It’s goals for me!
Ironmongery Experts says
Love your outdoor area, ready for summer parties! The little bronze details on the table are really something special! Thanks for sharing. Carolina at Ironmongery Experts.
Heather Wilkerson says
We plan on making these this weekend! I think the only adjustment we might make is to make the planter as a sort of “shell” and not attach the post to the planter itself. We will most likely set the posts in a 5-gallon bucket (50% concrete, 50% soil) and still use the stone pavers as a weight. We’ll drill drainage holes above the concrete in the bucket so we can still plant. We need ours to be more mobile. Thanks for the great tutorial!
Meghan says
Hi! What size screws did you use to attach the 4x4s to the 2×4 braces? I don’t see another screw size listed, but it looks longer than the other screws. Thanks!
Tabitha Blue says
Sorry about that! Those were 2.5″ screws.
Meghan says
Thank you!
Brian says
These plans were great. Thank you! I did make some modifications since I wanted them raised off the ground. So, I left two inches at the bottom of the 2×2 posts, Then I added some additional cross 2x4s at the bottom, sliding the post through them (looks like a cross from above). In that way the paver stones were inserted from the top but then rested on the 2x4s going the other way off the ground. Easiest way to do that was to remove the 1×4 boards to expose the post (which did sit on the ground) and secure it to the 2×4 before securing to the side 1×4. It did give me an excuse to buy an angle grinder to cut the paver stones so that the coconut basket now rested flat.
Scott W says
Looks great and fits the inspiration of what we wanted to do. Is the box heavy enough to hold the strand of lights?
Tabitha Blue says
Hi Scott! Yes, with the addition of the cement patio pavers in the bottom of the box, it is stronger enough to hold strands of lights.
LaToya says
Absolutely stunning. Where did you find your lights? I love the color!
Maggie says
This is super cool! Thank you for taking the time to share. I’ve been researching for awhile and your idea is the best! Love this.
Jerry says
Did you add any type of bottom to the planter box?
Anna says
Beautiful and inviting backyard. Just curious what is the color tint used in your wood? Thank you in advance.
Ann McC says
Hi,
I absolutely love your planter boxes and lights.. love the fact that they change color.. can you please share with me where you purchased them?
Joel Sanabria says
Hi, I noticed on the top list you have:
1 5/8” building screws, 1 lb box
2 1/2″ screws
Then on the bottom print list, you have:
1 1/2 deck screws
2 1/2 deck screws
I just want to make sure I get the correct screws?
Erin says
What are the overall dimensions of the box completed?
Chris says
His was easy and fun to make. Thanks for the easy instructions on this project.
Bathtub Refinishing says
HI, Wonderful site. Plenty of useful info here. Got real useful and I am very impressed by your tips. I will use this because I’m also a professional plumber and efficient in bathroom remodeling. Hope you could bring out some more helpful tips. Keep up doing such great and amazing work.
Patti says
Did you mention where you bought your light?
Energetic DIYer says
Just made four of these! They are awesome, great plans, easy to follow. The screw sizes listed at the top are the ones to go off of.
Took us about 5 hours overall. We built one from step 1 to final step, and then we built the other three together step by step to be more efficient. It was a super fun husband-wife project.
To anyone reading this, here’s what I would do if we built them again.
– Double the planter box in height. They seem a bit short and I love them nice and tall, good for shelving too when they are taller (drinks / speakers / phone / food)! I’m not a huge planter person, so I’m considering just filling the tops in with wood shelving entirely and going without soil and plants. We’ll see (easy to change at any time).
– I also might use a 2×4 inside of the planter corners for added weight/stability, easier to nail in the top shelving into, but the 2×2 is very easy to work with, so maybe not. (Depends on how wonky your lumber is at your local lumber yard.)
Thanks again for a great post (pun intended) love these so much! We’ve already had a ton of compliments and they’ve only been up for a day! Very beautiful 🙂
Josh says
Just like a recipe that steers you wrong.
Bad cut list, everything stained now and ready to put together but can’t because of a bad cut list. Today was assemble day and tomorrow is party day and now I’m screwed. So thanks for that.
Tabitha Blue says
I’m truly sorry to hear that. Which pieces were wrong on the cut list? We haven’t had issues with it previously. I hope you were able to get it working right for your party!
Kirtika saha says
Such a very useful blog. In this blog, I got so much useful information. They are really nice article shared!
On Screen Solution says
“Brighten up your backyard with this DIY outdoor planter box project—perfect for hanging string lights and giving your deck or patio a fresh, modern look!”
Kellie Kearney says
This DIY planter box project is such a brilliant way to enhance outdoor spaces! I love how it combines function and style by supporting string lights. Perfect for a cozy backyard vibe!