
Do you have an unruly backyard like us? We needed to do something to clean that mess up, but what? After a brief deliberation, hubby and I decided on creating a simple homemade fire pit space.
We bought a new-to-us home a few years ago and have made it our mission to create a home ever since. You can follow some of our DIY adventures on our House to Home Youtube playlist. And if you prefer to read your DIYs, you can find them right here on the blog too.
We always knew our backyard was going to be a project. And we’ve done several fun ideas to make things better, like our DIY outdoor shower, a horizontal fence, and a paver patio area.
You won’t believe how super simple this homemade fire pit is, and the completed project made a big difference. Let’s get into it!
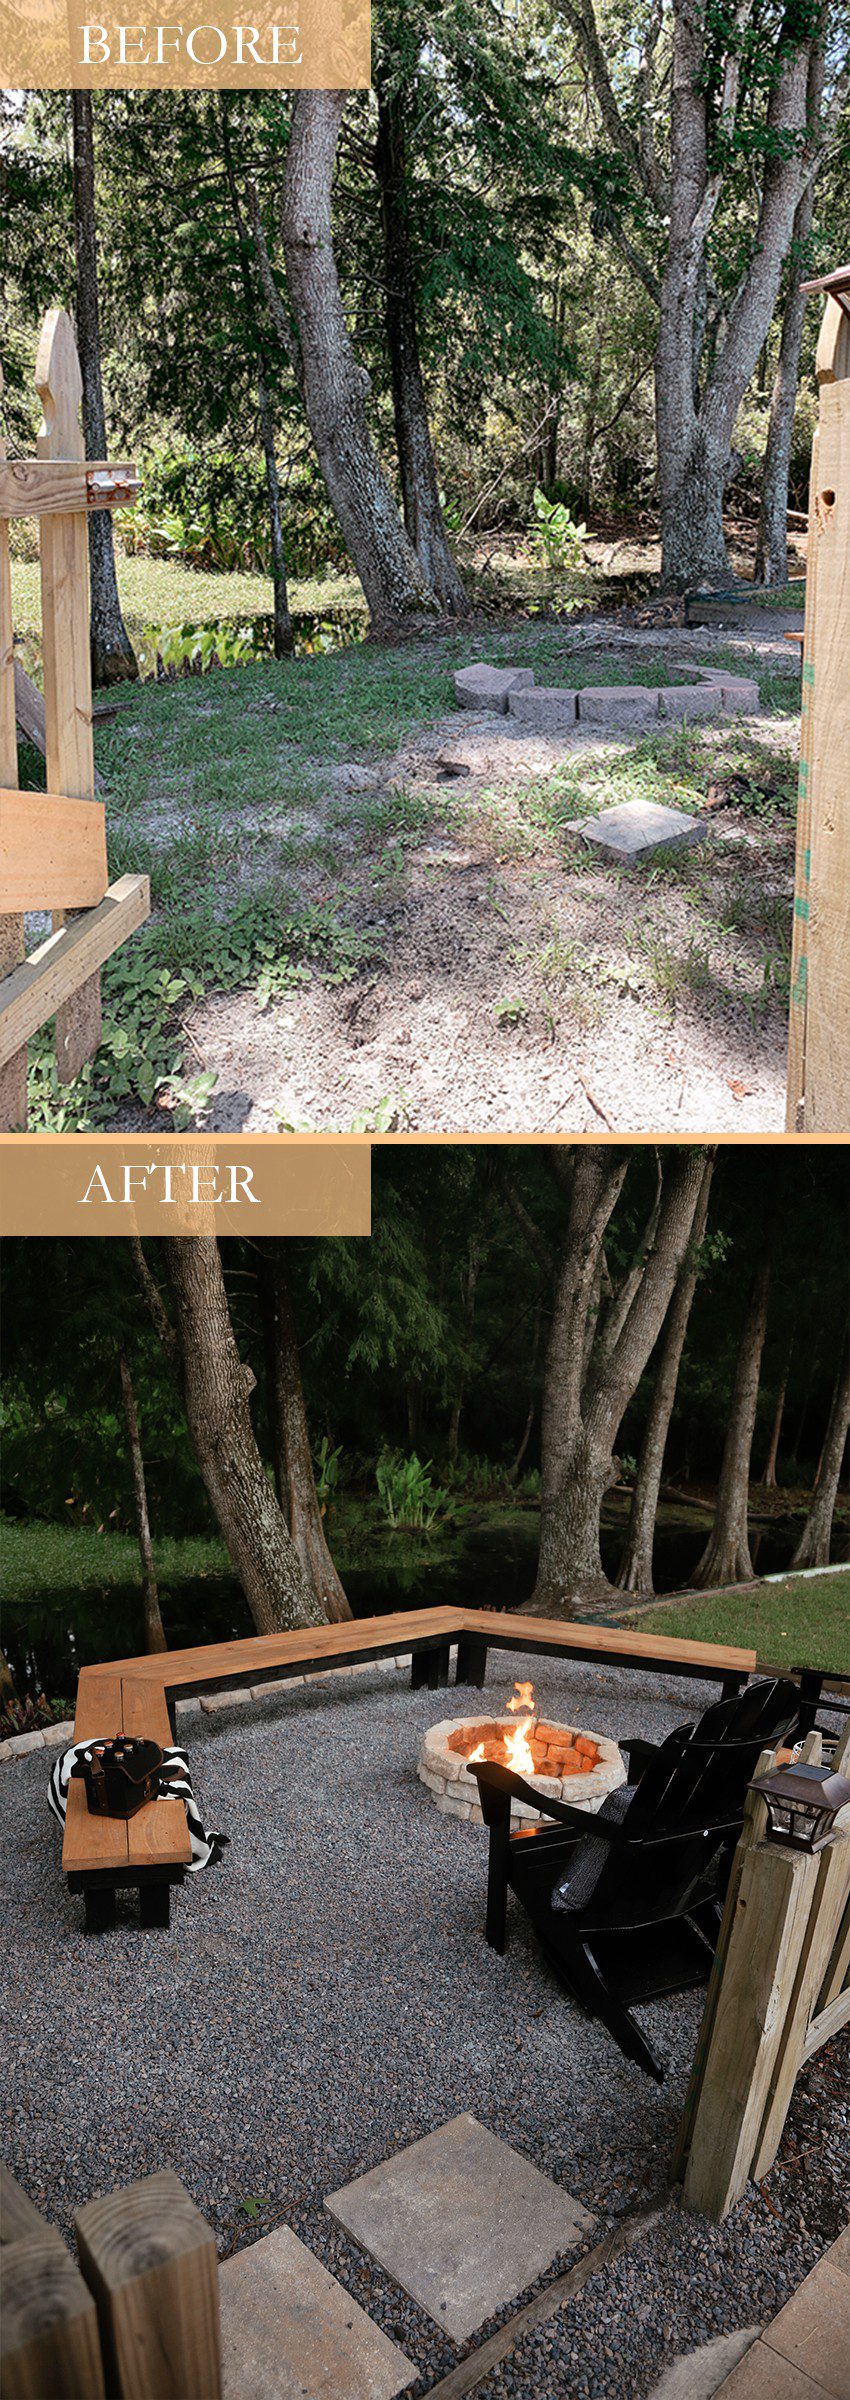
Homemade DIY Easy Fire Pit
When we bought our house, we loved our view. There is a pond beyond the backyard lined with mature trees. It’s like living at a lake.
But despite the water view, our backyard seemed to only grow weeds. It’s probably a combo of too much shade (from those beautiful trees) and the sandy Florida soil. Regardless of the why, we were determined to solve this issue with a little sweat equity.
We looked into getting a fire pit kit from our local big box hardware store, but they were crazy expensive. It was anywhere from $500-$2,000 for a fire pit kit.
Um…. no thank you. Time for a weekend warrior project!

Hubby and I knew we could do it on our own for way less. The following are the supplies you’ll need to recreate our simple homemade fire pit.
Homemade Easy Fire Pit Supplies:
- colored spray paint for marking
- concrete landscaping stones
- gravel to fill your pit
- level (optional)
- masonry adhesive
- rubber mallet
- shovel

Warning! Know Before You Go
Before you begin buying your supplies and digging, be sure to check your local recreational fire codes. If you are having a hard time finding the info, call your local fire department.
Build your pit a safe distance from any building, trees, structures, fences, or other obstructions. Also, look for overhanging branches that may catch fire from heat or flying ash.
Pro-tip: Compare stones at your big-box hardware store (like Lowe’s and Home Depot) to other local landscapers and hardware stores. You may find a better price, or simply a different product you like better.
The number of stones you purchase will be determined by the size of your homemade fire pit. You could make it wider or smaller based on your space and needs, or taller or shorter.
We decided to make ours 4 layers high (3 layers above ground) since we have children and want to avoid accidents, if possible, but fewer layers would mean additional savings. Ours is also on an incline, and we wanted to keep some height all the way around.

How to Make a DIY Easy Fire Pit
1) Outline Your DIY Fire Pit
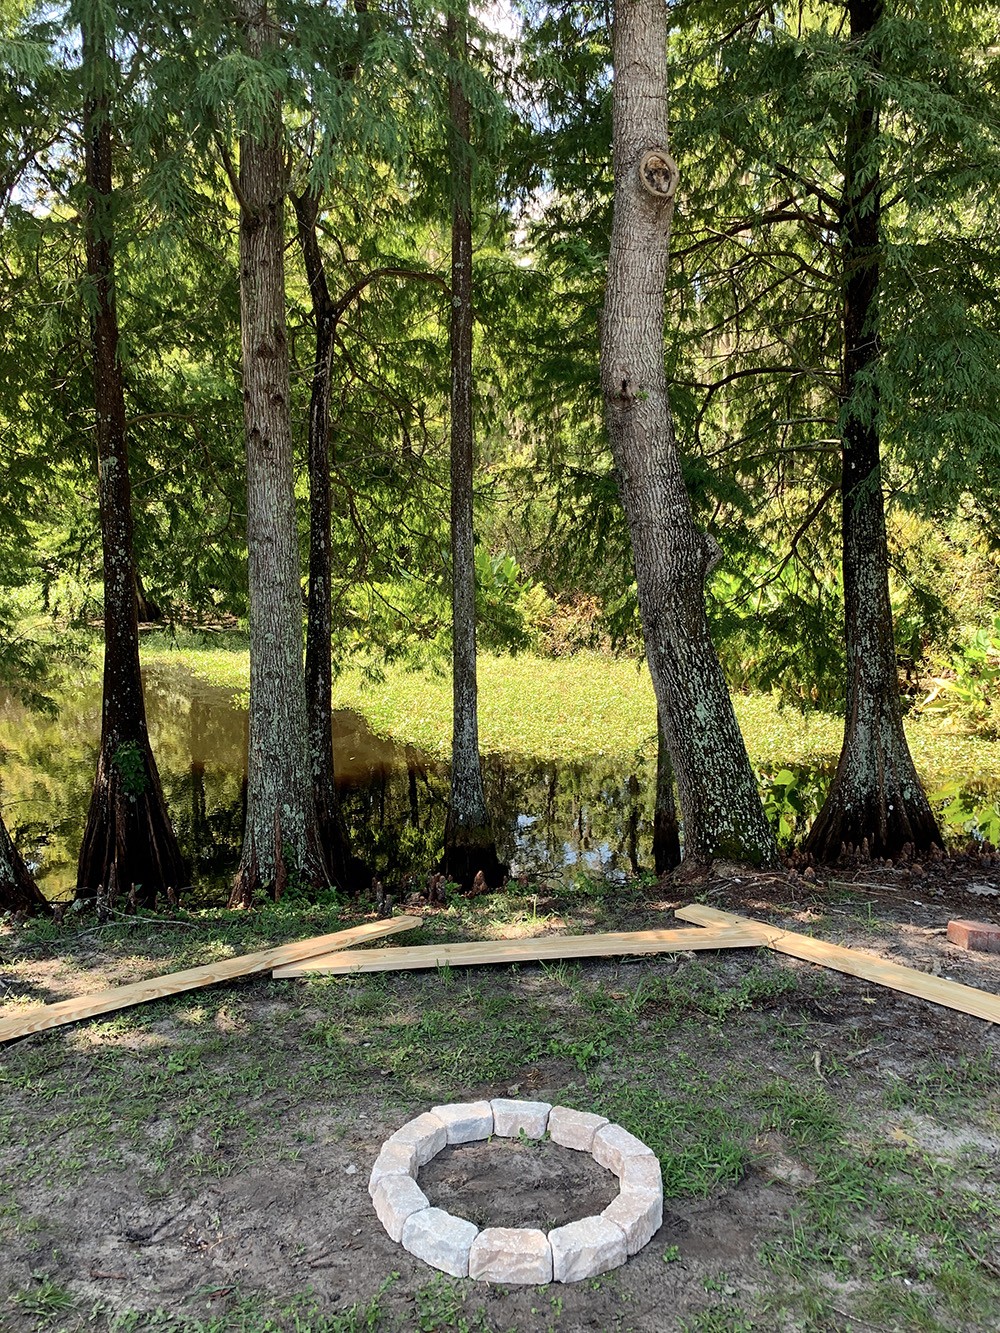
Lay the paving stones in a single layer bottom ring. If you feel uncomfortable with your circle-making ability you could put a stick with a string to help measure a more perfect circle.
With curved paver stones, they will naturally make a circle when laid in the same pattern.
Remove some of the stones so there are empty spaces in the circle. Spray paint the line at the outermost edge of the circle between the remaining stones. Remove the leftover stones, and complete your painted circle.


2) Dig Your Homemade Fire Pit
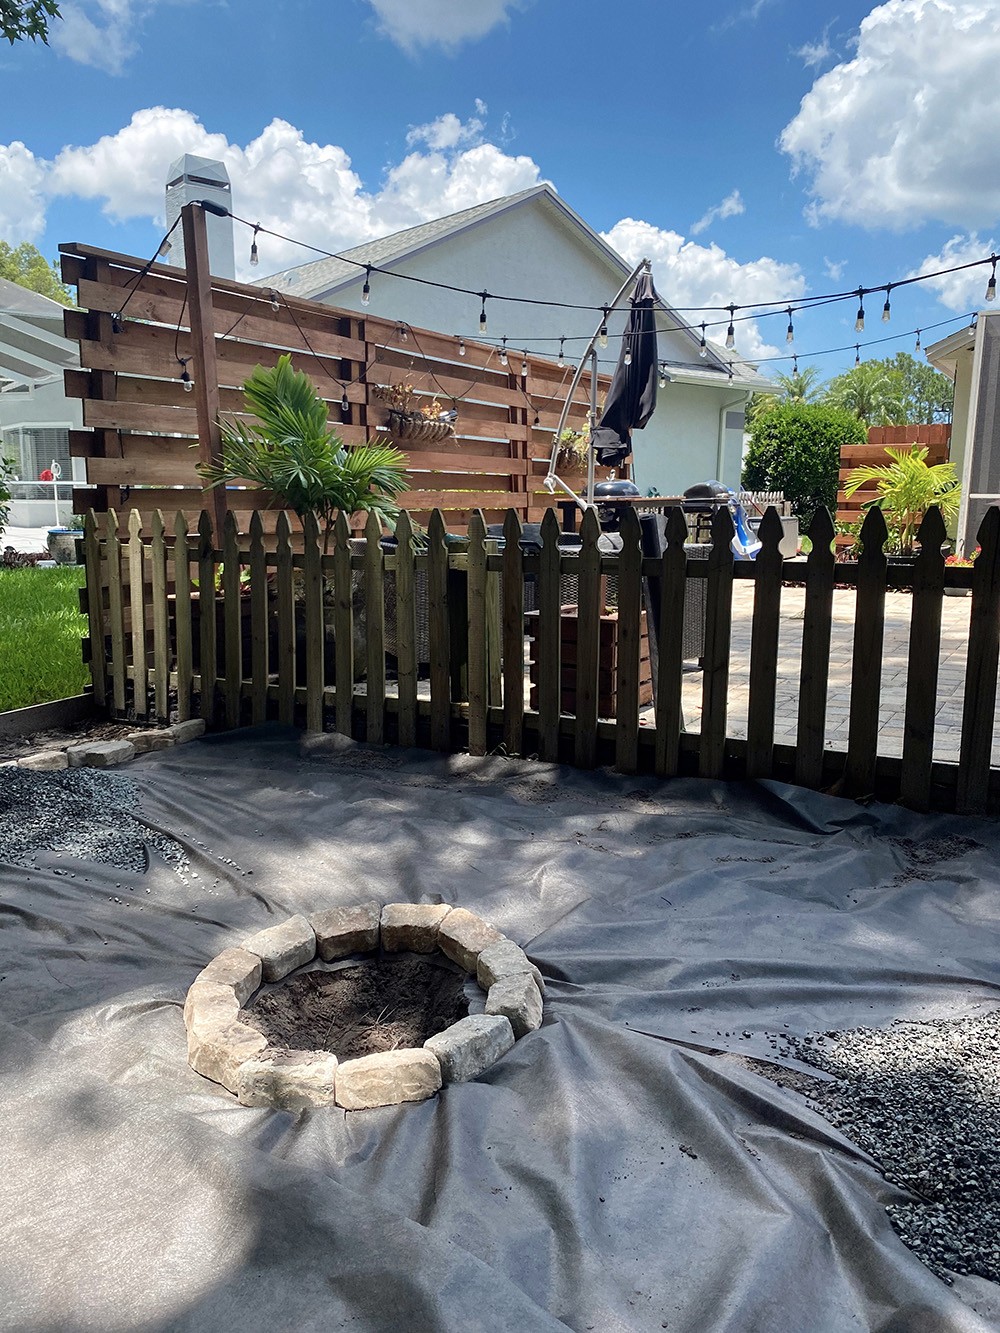
Use a shovel to dig a 6” deep circle, (including the center) following your spray paint guideline. Depending on your soil type this could be easy or challenging. Don’t be afraid to use other tools if needed, like a mattock.

3) Fill Your DIY Fire Pit
After digging your 6″ deep hole, fill it 2-3″ with your chosen gravel. This is an important step to allow for drainage and a nice base for your pit.

4) Build Your Easy Fire Pit
- First, place your bottom ring of stones around the edge of the gravel circle. Use the rubber mallet to tamp the stones flat and even with each other. You can eyeball this step or use a level to ensure that your ring is even.
- When placing the second row of stones, use masonry adhesive on the bottom to create a strong structure. Be sure to stagger these stones so the center of the stone is placed directly over a seam from the bottom row. This also strengthens your homemade fire pit structure. Again, use the rubber mallet to even and tighten the stone placement.
- If you are creating a third row, repeat the process from step 2.

Building a Fire in Your DIY Easy Fire Pit
When you’re ready to build a fire in your homemade fire pit, start with small dry materials like twigs, newspaper, and dry leaves. After the fire gets going, you can add larger branches and finally larger logs once your fire is really going.
Occasionally, every few fires or so, scoop out most of the ashes to prevent build-up (they will blow around like little pieces of snow).
Pro-tip: You can use this ash in the garden or around fruit trees for added minerals.


Final Thoughts on Our Simple Easy Fire Pit
Our simple homemade fire pit area changed the look and feel of our backyard space. We are really looking forward to enjoying the fire pit during the cool season.
The complete project turned out amazing with hubby’s DIY bench and all the little details we did to elevate our outdoor space on the cheap.

We already have lots of camping accessories (from our summer of camping) that we can enjoy around the fire.
You may want to pick up some items like retractable campfire sticks and a cast iron pan. And definitely check out our post on the easy DIY bench hubby created (coming soon!).
Last but not least, be sure to use your new space. Try out some of these yummy smore recipes. It’s our kids’ favorite part of having the fire pit.
Make your effort worth it. Your DIY fire pit is an extension of your home, so get out there and enjoy it!


Super Simple Homemade Fire Pit DIY That Anyone Can Do
You won't believe how super simple this homemade fire pit is, and the completed project made a big difference. Easy DIY firepit that anyone can do!
Materials
- colored spray paint for marking
- concrete landscaping stones
- gravel to fill your pit
- masonry adhesive
Tools
- level (optional)
- rubber mallet
- shovel
Instructions
1) Outline Your DIYFire Pit
- Lay the paving stones in a single layer bottom ring. If you feel uncomfortable with your circle-making ability you could put a stick with a string to help measure a more perfect circle.
- Remove some of the stones so there are empty spaces in the circle. Spray paint the line at the outermost edge of the circle between the remaining stones. Remove the leftover stones, and complete your painted circle.
2) Dig YourHomemade Fire Pit
- Use a shovel to dig a 6” deep circle, (including the center) following your spray paint guideline. Depending on your soil typesoiltype this could be easy or challenging. Don't be afraid to use other tools if needed, like a mattock.
3) Fill YourFire Pit
- After digging your 6" deep hole, fill it 2-3" with your chosen gravel. This is an important step to allow for drainage and a nice base for your pit.
4) Build YourSimple Homemade Fire Pit
- First, place your bottom ring of stones around the edge of the gravel circle. Use the rubber mallet to tamp the stones flat and even with each other. You can eyeball this step or use a level to ensure that your ring is even.
- When placing the second row of stones, use masonry adhesive on the bottom to create a strong structure. Be sure to stagger these stones so the center of the stone is placed directly over a seam from the bottom row. This also strengthens your homemade fire pit structure. Again, use the rubber mallet to even and tighten the stone placement.
- If you are creating a third row, repeat the process from step 2.















Leave a Reply