
Table of Contents
Easy DIY Bench Tutorial
Do you see beautiful social media posts and want to recreate them in your own home? I’m constantly working on having a picture-perfect home, but with 6 children, it isn’t easy, and I don’t have large amounts of money to blow. Hubby and I wanted to make our backyard fire pit space awesome with an easy DIY bench, but it needed to be on the cheap.
We believe a little sweat equity goes a long way, and over the last several years, we have raised our house game with several great DIY projects. Instead of spending our hard-earned money on fancy outdoor benches, we knew we could do it ourselves for less. All while creating an Insta worthy space.
It turned out so well we wanted to share our finished DIY bench plans with you. So, take a peek, get some lumber, and let’s make your backyard fabulous.


Supplies for Our Easy DIY Bench
When we researched outdoor benches for our backyard, we just couldn’t stomach spending hundreds of dollars to fit our large family. As I said, we knew we could do it for less.
With that said, we are not pro carpenters. We wanted an easy DIY bench for weekend warriors like us.
Hubby figured out just what we needed to fit our space. You can make this bench without creating a gravel space, so those supplies are optional. The following are all the supplies we used to create our custom outdoor bench.
DIY Bench Material Needed:
(6) 2x8x8
(8) 2x4x8 stud
(6) 4x4x8 douglas fir
5lb box deck screws (2 1/2” long)
Optional Supplies:
Weed Barrier (we use 3′ x 100′)
3 yards red/gray granite pebbles
How to Make an Easy DIY Bench
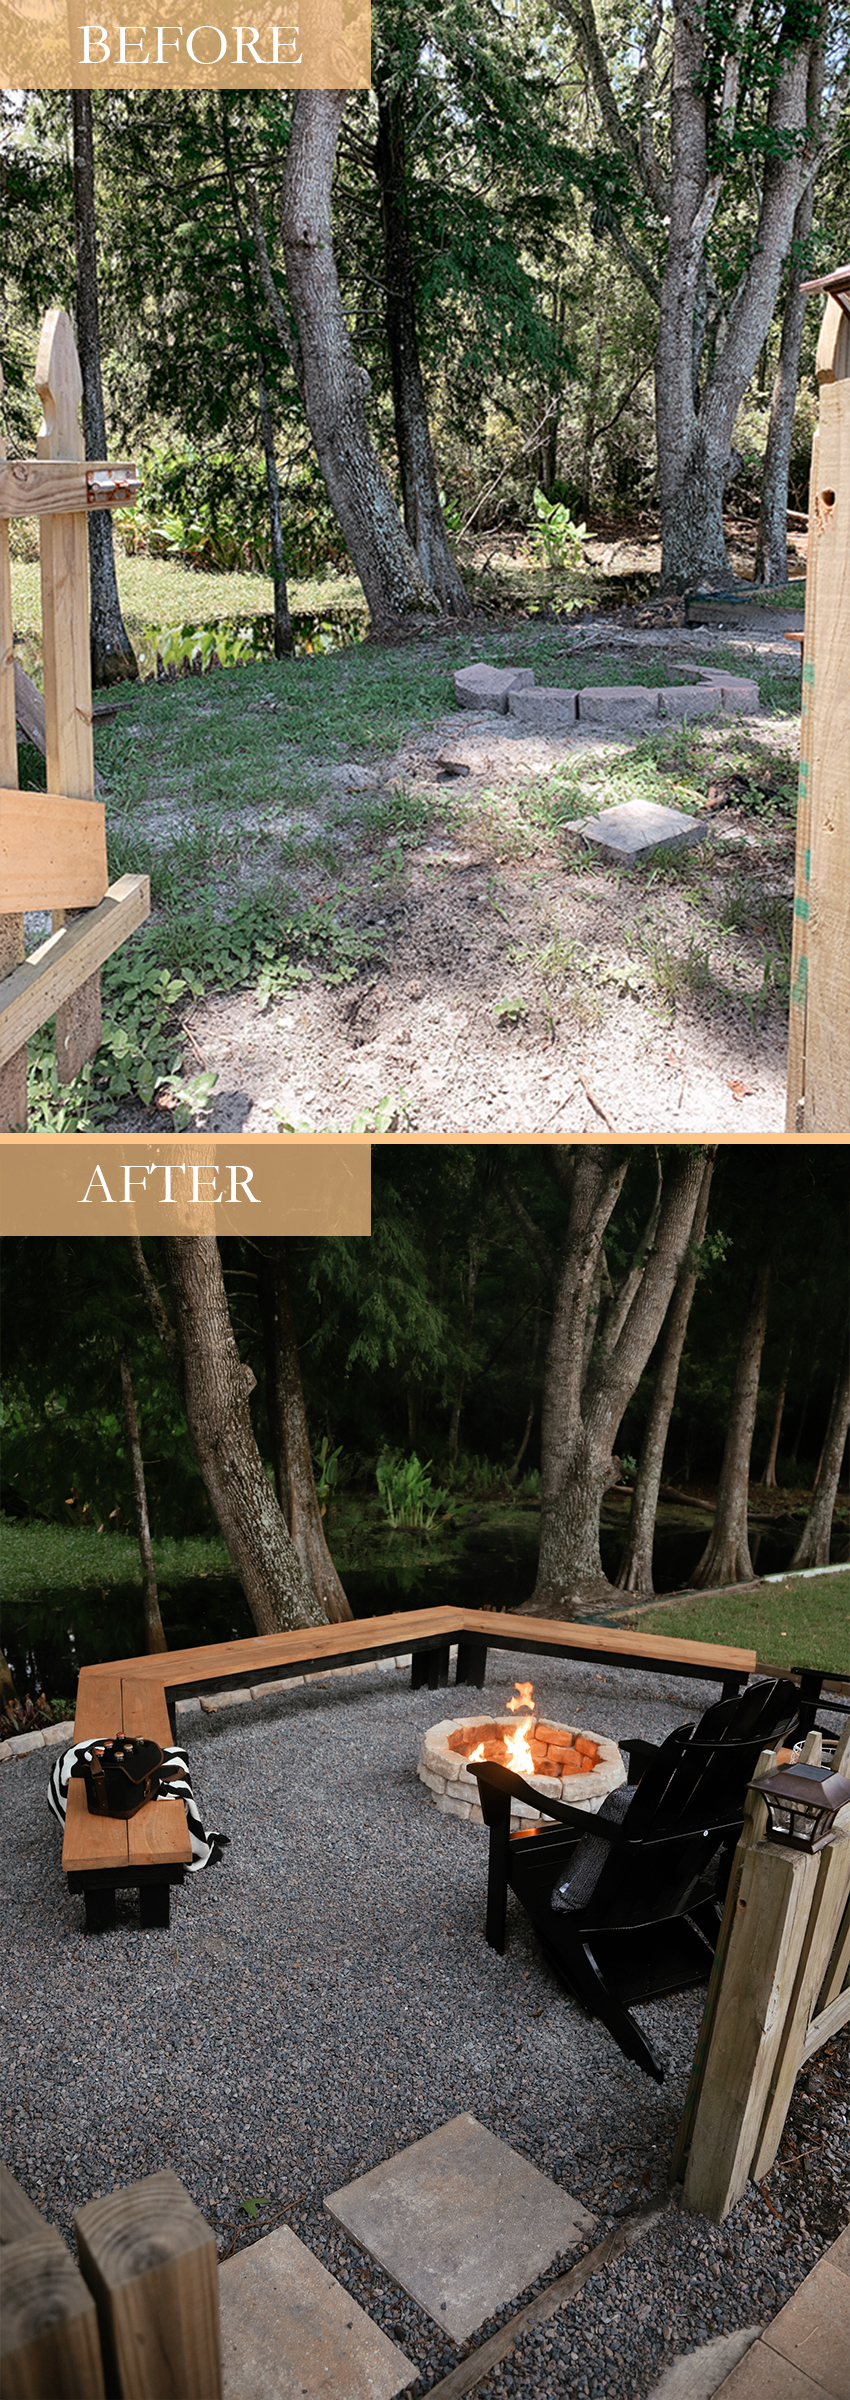
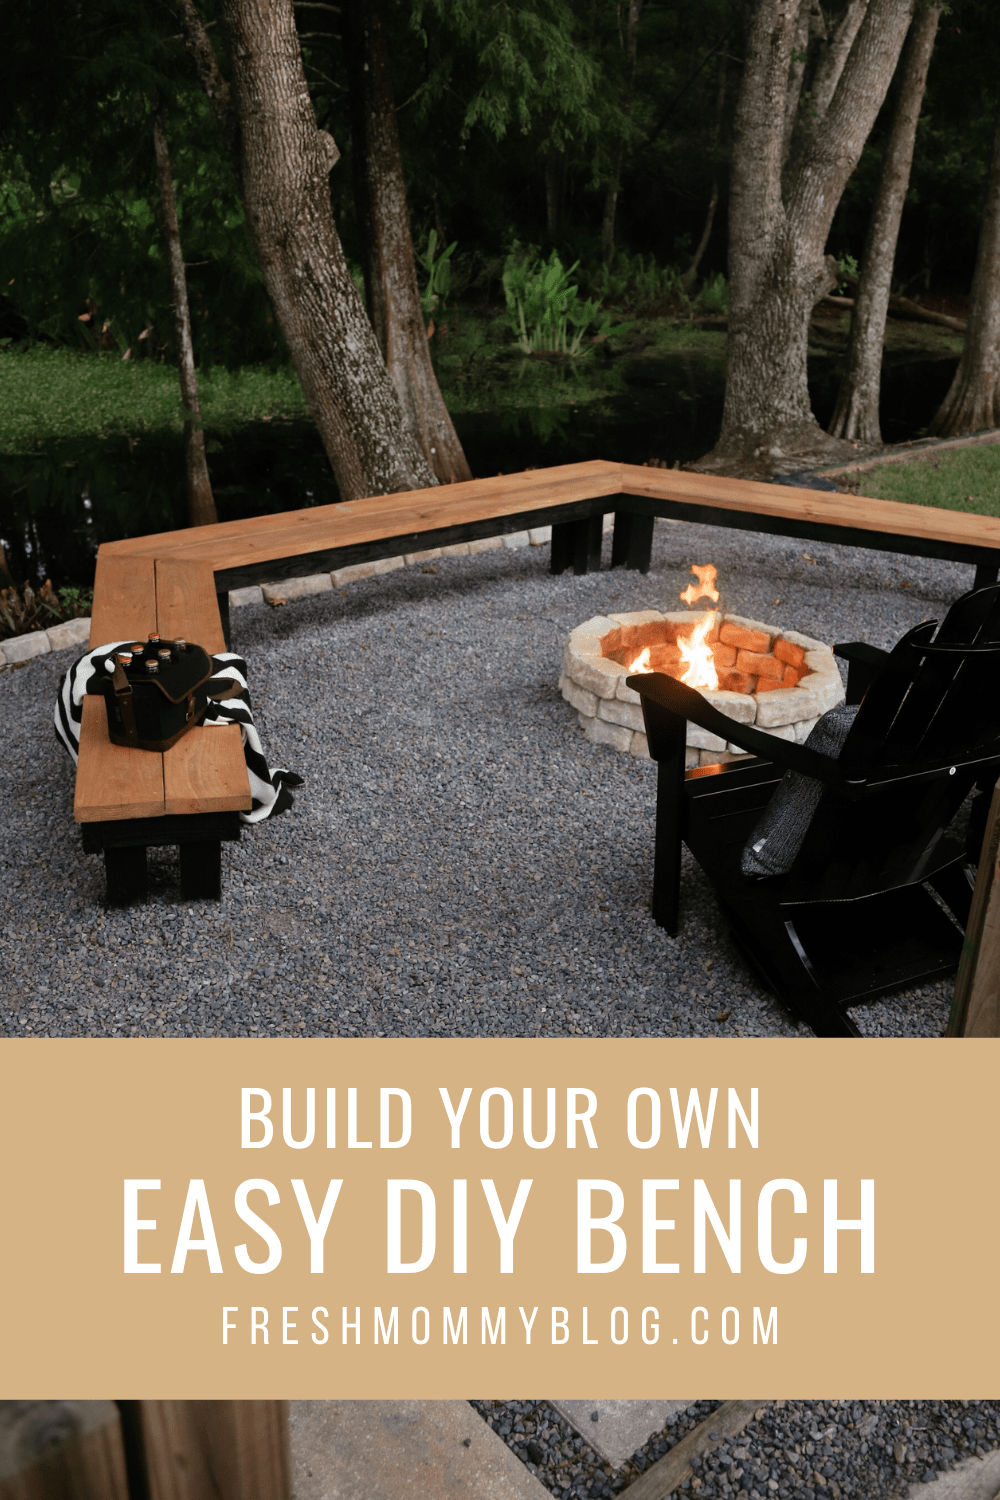
When we thought about “how to make an easy DIY bench,” we wanted it to be durable, low cost, and look good in our space. Since we had created a circular homemade fire pit, we wanted a semi-circle bench.
Essentially, we created our DIY bench with 3 parts to create the circular shape.
How to Make the Center Bench Base:
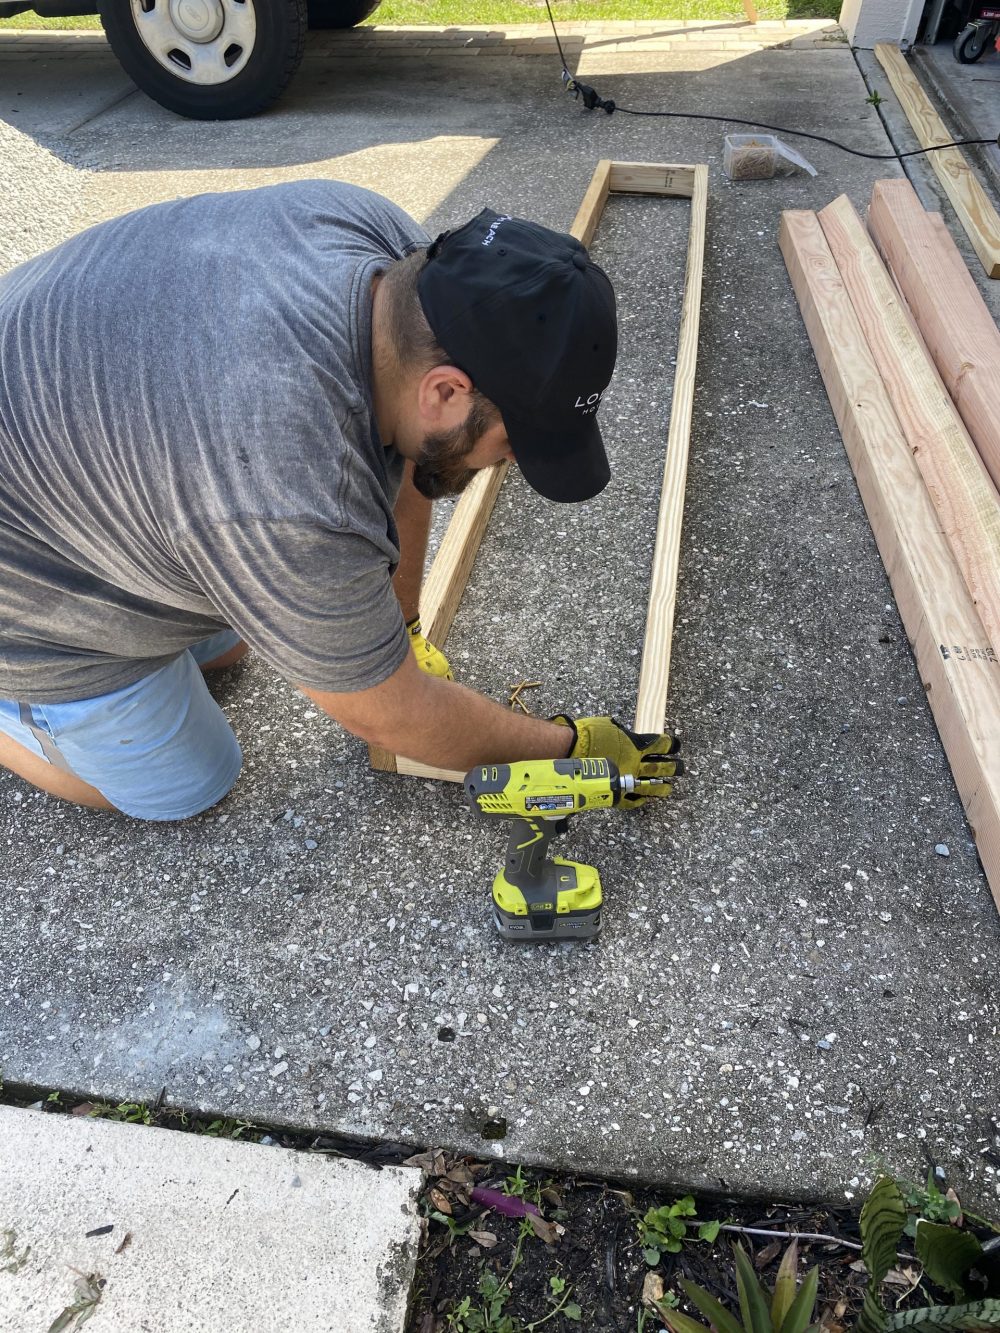
The center bench frame measures 7’L x 13”W.
- Cut (1) 2x4x8 into 10” pieces to use as studs centered at 16” on center.
- Cut (2) 2x4x8 to 7’ (84”)
- Begin by placing one 10” piece at 90 degrees at end of 7’ board. (Lay them out so the broad 4″ side of the board will be facing out of the standing bench) Add two screws to attach.
- Sandwich the 10″ board with the other 7’ stud to the opposite side. (This creates a “U” shape)
- Go to the other end and repeat the process with another 10″ board to complete the rectangle.
- Measure 16 3/4” from one end and make a pencil mark. Measure 16” from that mark and make a pencil mark. Continue every 16” until you can’t do it anymore.
- These will be your center marks for your remaining 10” pieces. Place a 10” cut (between the 7′ boards) centering them on your pencil marks. Attach them on each side with two screws.


How to Make the End Bench (Same/Mirrored for Both Sides)
- Cut (4) 2x4x8 down to 6’ each (you may make them longer if you need to, this is the length we used)
- Cut (1) 2x4x8 at 10” each piece
- Similar to creating the center bench, begin by placing one 10” piece at 90 degrees at end of 6’ board. (Lay them out so the broad 4″ side of the board will be facing out of the standing bench) Add two screws to attach.
- Sandwich the 10″ board with the other 6’ stud to the opposite side. (This creates a “U” shape)
- Go to the other end and repeat the process with another 10″ board to complete the rectangle.
- Measure 16 3/4” from one end and make a pencil mark. Measure 16” from that mark and make a pencil mark every 16” until you can’t do it anymore.
- These will be your center marks for your remaining 10” pieces. Place a 10” cut (between the 6′ boards) centering them on your pencil marks. Attach them on each side with two screws.
How to Make Bench Legs
- Cut (4) 4x4x8 into 3’ pieces
- Place cut pieces flush to the top of the base frames inside each corner and attach with 2 1/2” screws.

How to Install Your Outdoor Bench
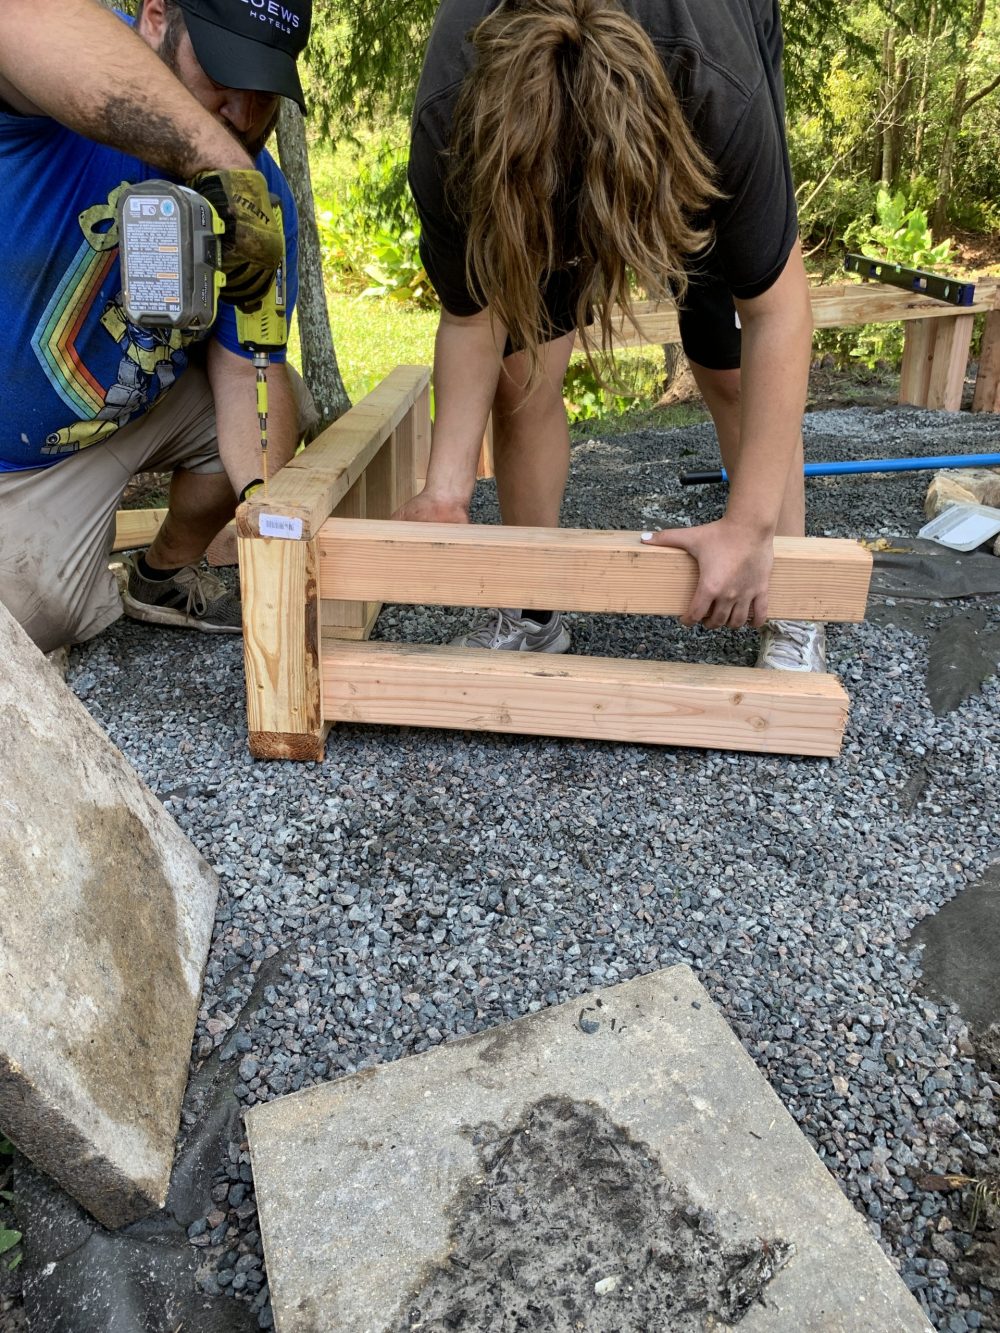
- Choose your bench arrangement and place the bench bases at desired angle/shape.
- Once you have the desired location you can mark it with paint or a jab from your shovel
- At your markings, use a post hole digger to dig holes approx 12″ deep. (Depending on the grade of the ground you may need to vary the depth.)
- Fill each hole with 2” of dry quick cement (do not pre-mix). Moisture from the ground will harden your cement to form a foundation.
- Place bench legs into the holes and make sure bench is level. Use a level to find the right balance from left to right and front to back.
- Backfill the holes.


How to Create the Bench Tops
- Place (2) 2x8x8 douglas fir or pine boards on the center bench base so the boards meet to create a centerline. Find your desired angle. (ours was 45 degrees)
- Cut your 2x8x8 board starting at the longest outside edge (7′) and angling in at your desired angle.
- Repeat this process for the side benches to match the angle, so all the top boards meet flush to create a continuous “semicircle” bench shape.

Our Final Thoughts on Making an Easy DIY Bench
We were able to make this easy DIY bench (and fire pit space) in a day once we had all of the materials. So, this makes a great weekend warrior project and adds some serious value to your outdoor space.
Ours turned out great.
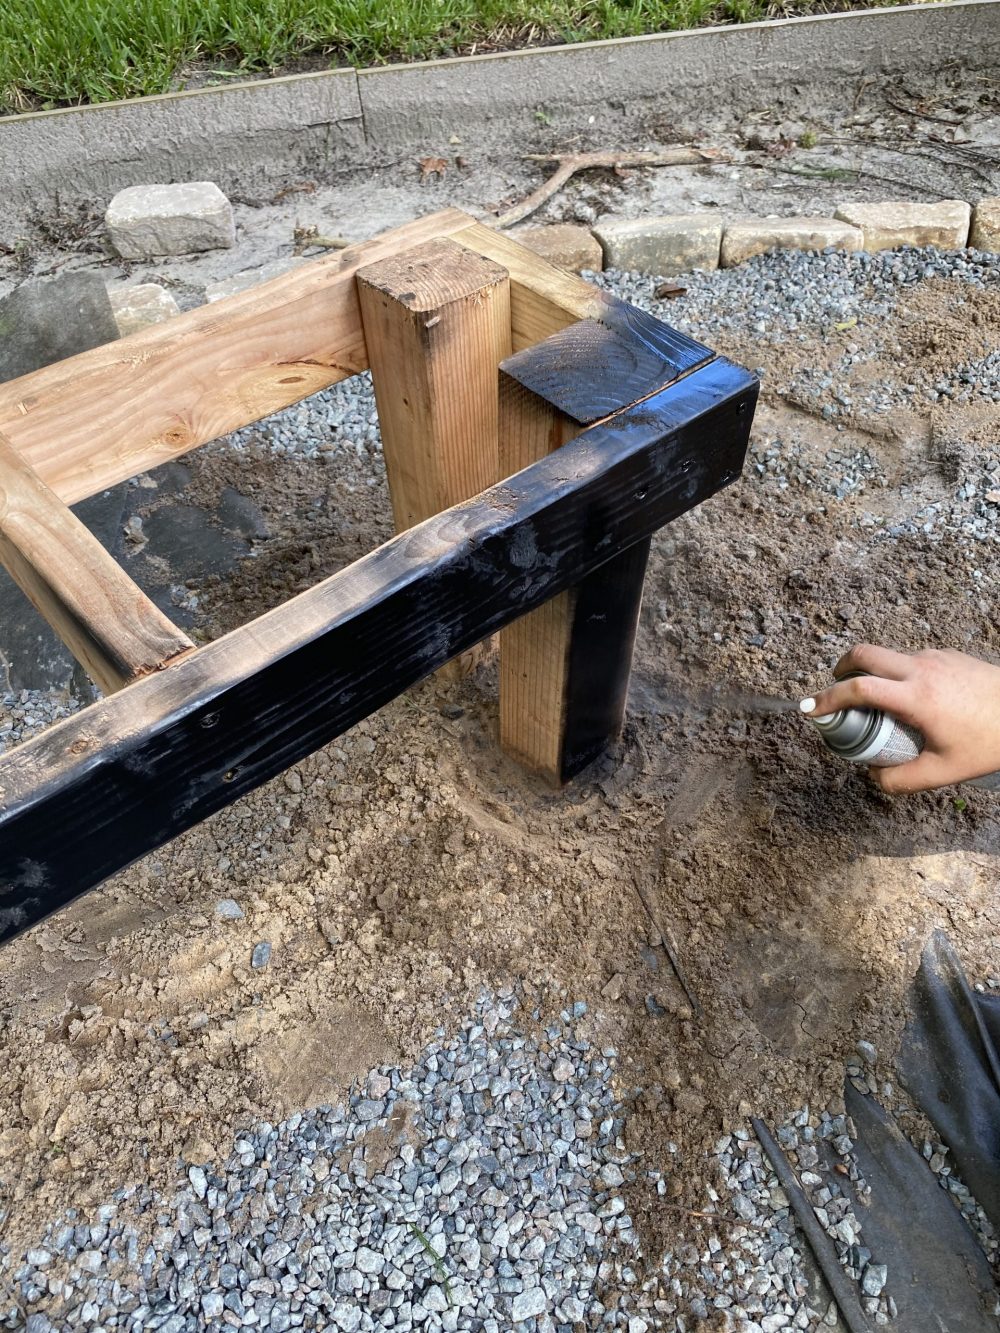
We used black spray paint on the base once we had it in place, but left the top stained for a cool two-tone look. You can use polyurethane, lacquer, or stain on the top for a more finished look.


If you like this post then you will definitely want to check out how we did our homemade fire pit and our post of great tips to make your fire pit space look amazing on the cheap.

Easy DIY Bench for the Weekend Warrior
Materials
- Gray Granite 3 yards
- (6) 4x4x8 post
- (6) 2x8x8 pine (top of bench)
- (4) 2x4x8 pine (bench frame)
- Box of 2 ½ “ deck screws
- 45 retaining wall blocks
- 2 cans black spray paint (legs of bench)
- bag of quick cement
Tools
- Hole digger
- Ratchet Drill
- Rags for staining
- Circular saw
- Level
- Palm Sander
Instructions
- Measure desired height of bench off the ground and add 12”. The added 12" accounts for the depth of your post holes and is needed for cut length. Also, allow for 1 ½ “ added for top pieces.
- Using a circular saw, cut 4x4 posts to the desired length (height). You'll need 4 posts per bench. For our three-section bench, we used 12 posts.
- Measure and cut sixteen 10“ sections of 2x4 – cross pieces for the bench frames.
- Measure and cut four 6’ sections of 2x4 – 2 per bench for the frames for the side benches.
- Measure and cut two 6’ sections of 2x4 – 2 per bench for the middle section frame.
- Attach shorter cuts flush to one side of 4x4 using deck screws. (these create the bench ends)
- Attach longer cuts flush to each side of posts to create a rectangular frame using deck screws. (Long side of frame)
- Layout location of bench and mark where post holes should be dug.
- Dig post holes (4 for each section) 12” deep.
- Fill each hole with 2” of dry quick cement (do not pre-mix). Moisture from the ground will harden your cement to form a foundation.
- Place 4 legs from each section into the post holes. Measure your distance from the ground to the top and use a level to adjust as needed. Fill in holes to remain level, and then backfill holes completely.
- Paint the entire frame black.
- For a three-section fire pit bench, cut four of your 2x8 boards to a 6’2” length (74”) - 2 boards per outer bench (we aren't cutting the top boards for the middle bench seat yet.
- Attach two cut 2x8 boards to the top of each outer bench using deck screws, allowing for 1” overlap on each end.
- Lay your remaining, uncut 2x8 boards across the top of the middle bench and mark where your angle cuts need to be to line up with the outer benchtops.
- Cut these remaining two boards and attach them to the top of the middle bench using deck screws.
- Sand your bench seats thoroughly with a palm sander and apply stain to top pieces of the bench.











Rona says
Hi there, Wondering how big your firepit area is? Also, Is there ever any issue with embers flying onto the wood benches? Or to the trees behind your firepit area?
Tabitha Blue says
We haven’t had any issues with embers. It does help having the rocks underfoot.
Lostlife says
I love this DIY bench idea! It’s perfect for my weekend projects and the step-by-step instructions make it super easy to follow. Can’t wait to get started and add my own personal touch to it. Thanks for sharing!
TUbIdY says
I loved this DIY bench tutorial! The step-by-step instructions were super easy to follow, and I appreciate the tips on selecting materials. Can’t wait to try this project this weekend! Thanks for the inspiration!
Y89 Slots says
I absolutely love this DIY bench idea! It’s perfect for adding some extra seating to my backyard. The step-by-step instructions look so easy to follow, and I can’t wait to make it this weekend. Thanks for the inspiration!
hiwin says
I love this DIY bench project! It looks so simple yet stylish. I can’t wait to try it out this weekend. Thanks for sharing such clear instructions and beautiful pictures!
DM WIN says
I absolutely love this DIY bench idea! It’s so simple yet looks incredibly stylish. I can’t wait to try making one for my backyard this weekend. Thanks for sharing such a great project!