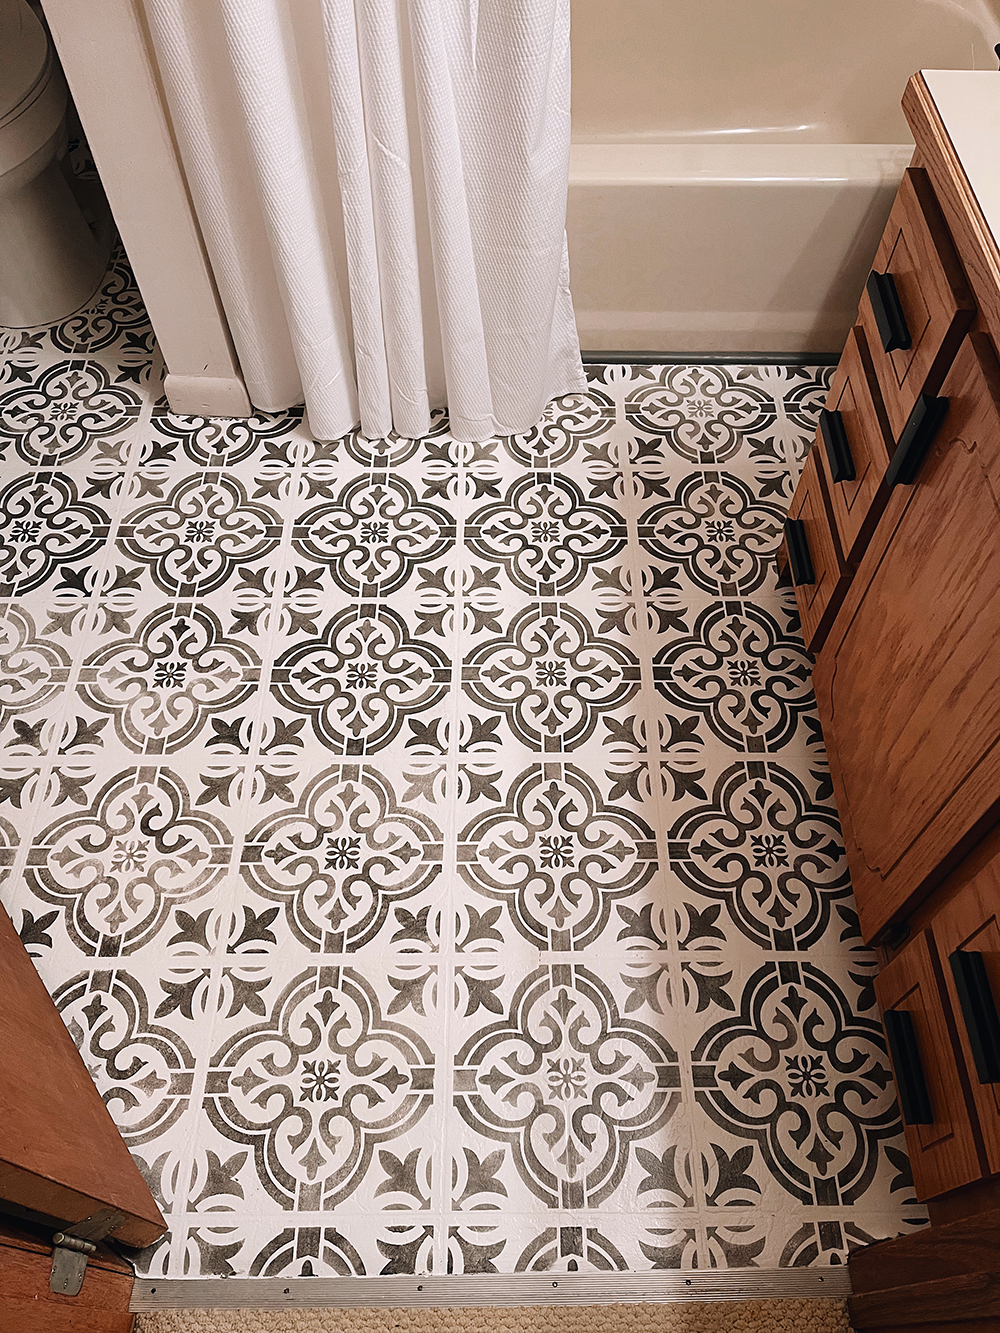
Have you ever seen those linoleum floors that look like tile? You know, the faux-tile linoleum floors with all the cool patterns that are making a comeback in homes and businesses everywhere? Well, I’m here to tell you how to paint linoleum floors without sanding!
This was such an inexpensive project that took very little time, I am so pleased with how it turned out and can’t wait to tell you all about DIY stencil painting linoleum floors. Our mountain cabin bathroom update (and more info) at the end of this post!

Table of Contents
How We Painted Linoleum Floors
No Sanding! As you might imagine, there’s typically a lot of sanding involved in painting floors. But there’s an easier way that saves SO much time! With the right products, a good cleaning is all you really need to get started. Then a base coat, stenciling and sealing. If you want to know how we painted our linoleum floors with no sanding, read on for full instructions and tips.
Why We Painted
When we bought our cabin in Andrews, North Carolina, one of our first projects was a bathroom update. I won’t quite say a remodel yet, because we have a whole list of more updates coming… hello gorgeous green walls and vanity makeover!
But since we’re renting the cabin out on AirBnb already and are taking the remodel process a little at a time –DIY style and out-of-pocket – this was the first big update.
By saving both a TON of money and time by painting the floor instead of ripping out the linoleum, repairing and prepping the floor, laying tile, grouting, cleaning, and sealing; we were able to purchase and install a brand new washer and dryer. That is a huge win in my book!
Eventually, we probably will replace the flooring in this bathroom/laundry room, but with the long list of projects we have planned for our Mountainview Lodge, putting MORE money into this floor isn’t on the priority list right now.
Since I’ve painted a laundry room cement floor with great success before, I wasn’t scared to get this project done, either!

Easy-to-Follow Steps on How to Paint Linoleum Floors (It’s not as hard as you think!)
Before you paint, make sure you have all of your materials, such as painter’s tape, brushes, roller, stencils, tray, and drop cloths.
The first step is making sure your floor is exceptionally clean. After sweeping and a quick first clean, you can use a product to aid in the prep, like … or find a kit that has the cleaner with it!
I’ve had a lot of questions about what paint we used in our cabin bathroom renovation, and I’m happy to share that it was , which includes a heavy-duty floor cleaner, the base coat, and a seal coat.
There are plenty of paint lines available at most hardware stores now that can make things easier for DIY home improvement projects like painting cabinets and linoleum floors, and this is a great example! I just added a , and ordered !
Once the floor is prepped and ready, it’s time to tape around the perimeter of the room or other areas you’d like to protect from the floor paint. I have a pretty steady have and have been used to cutting in wall paint for quite some time – plus we’ll be repainting the walls soon, so I opted not to tape off the floorboards. BUT we did just install a brand new toilet, so I added painter’s tape to the base of that to protect it.
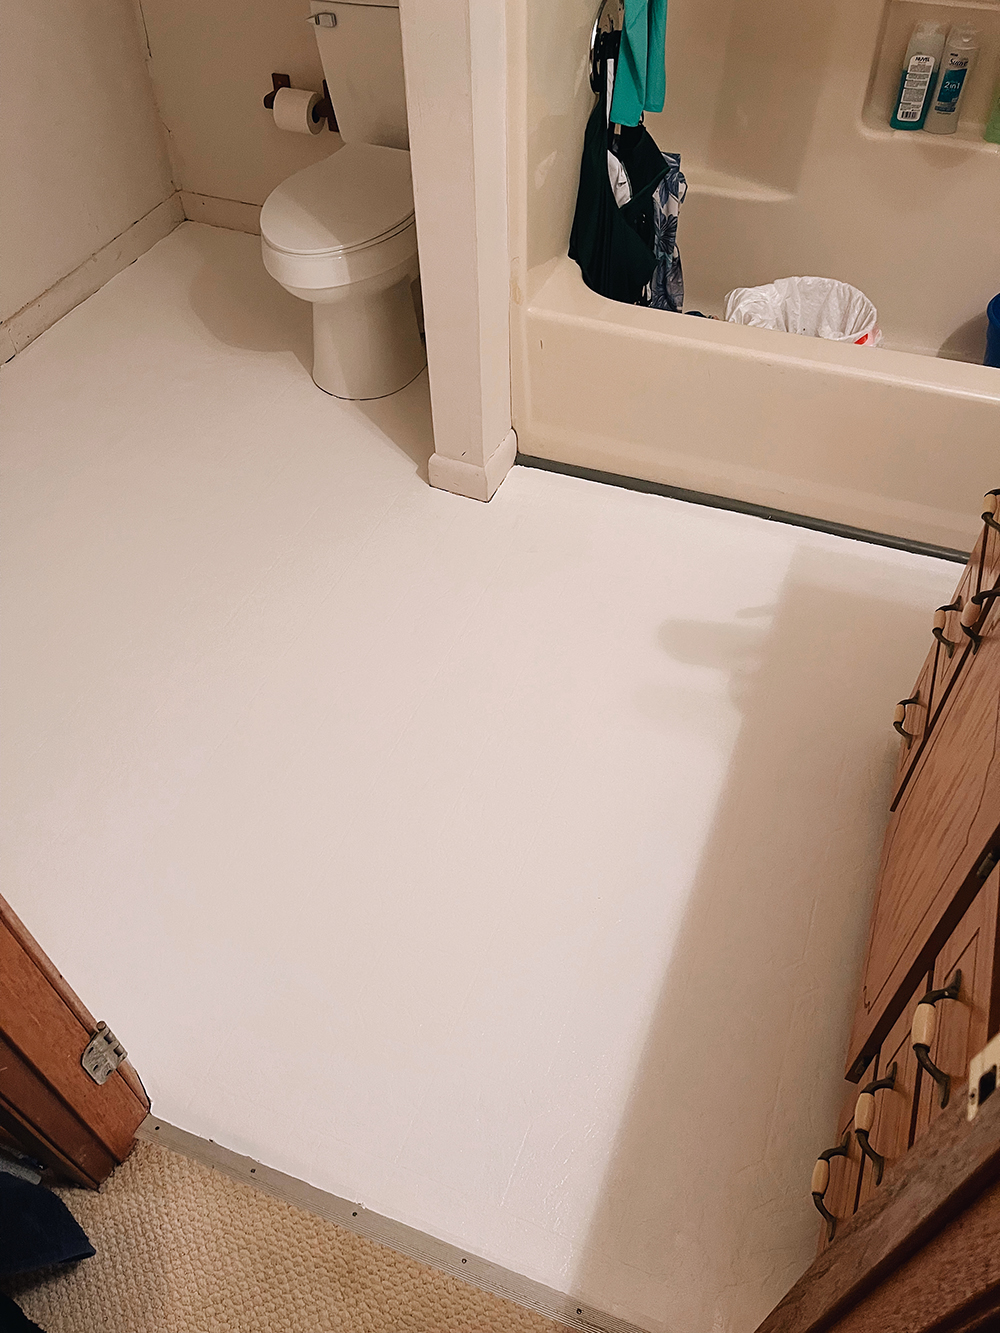
I painted the perimeter of the room and any areas that needed “cutting in” with a brush first and then rolled two layers of the base color (allowing for dry time between the two coats).
If you’re going for a solid color, you can stop there and just add the seal coat! But you know I wasn’t done quite yet. It was time for a tile pattern!

Let’s Talk Stencils
For our laundry room makeover when I painted a cement floor while 8 months pregnant with TWINS, I had only ordered one large stencil. The stencil worked out great, but it did become more and more difficult towards the end of the project when we had to bend it all kinds of ways to finish the edges.
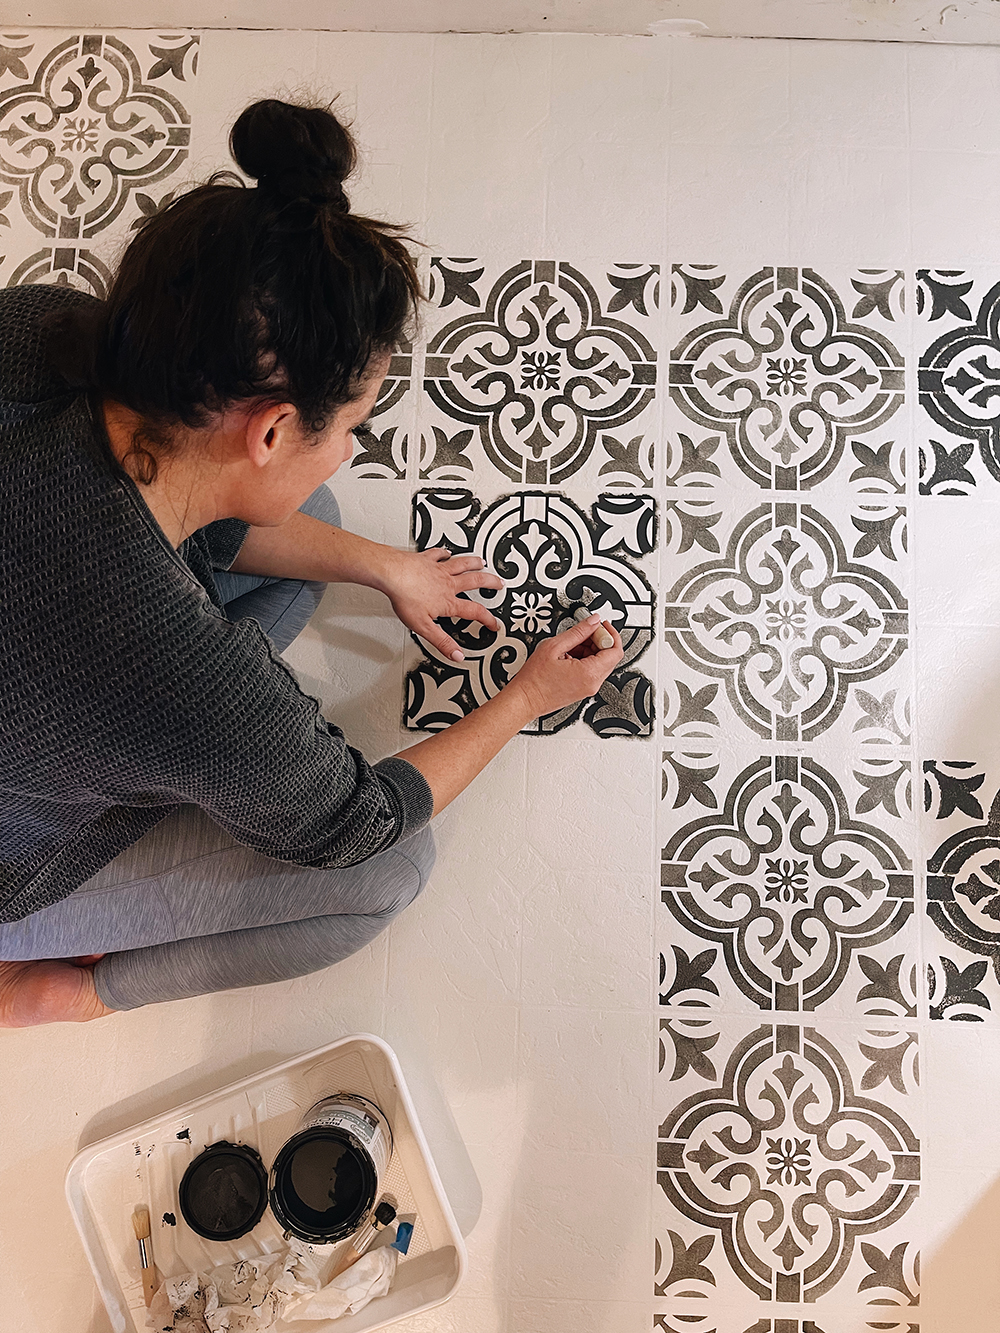
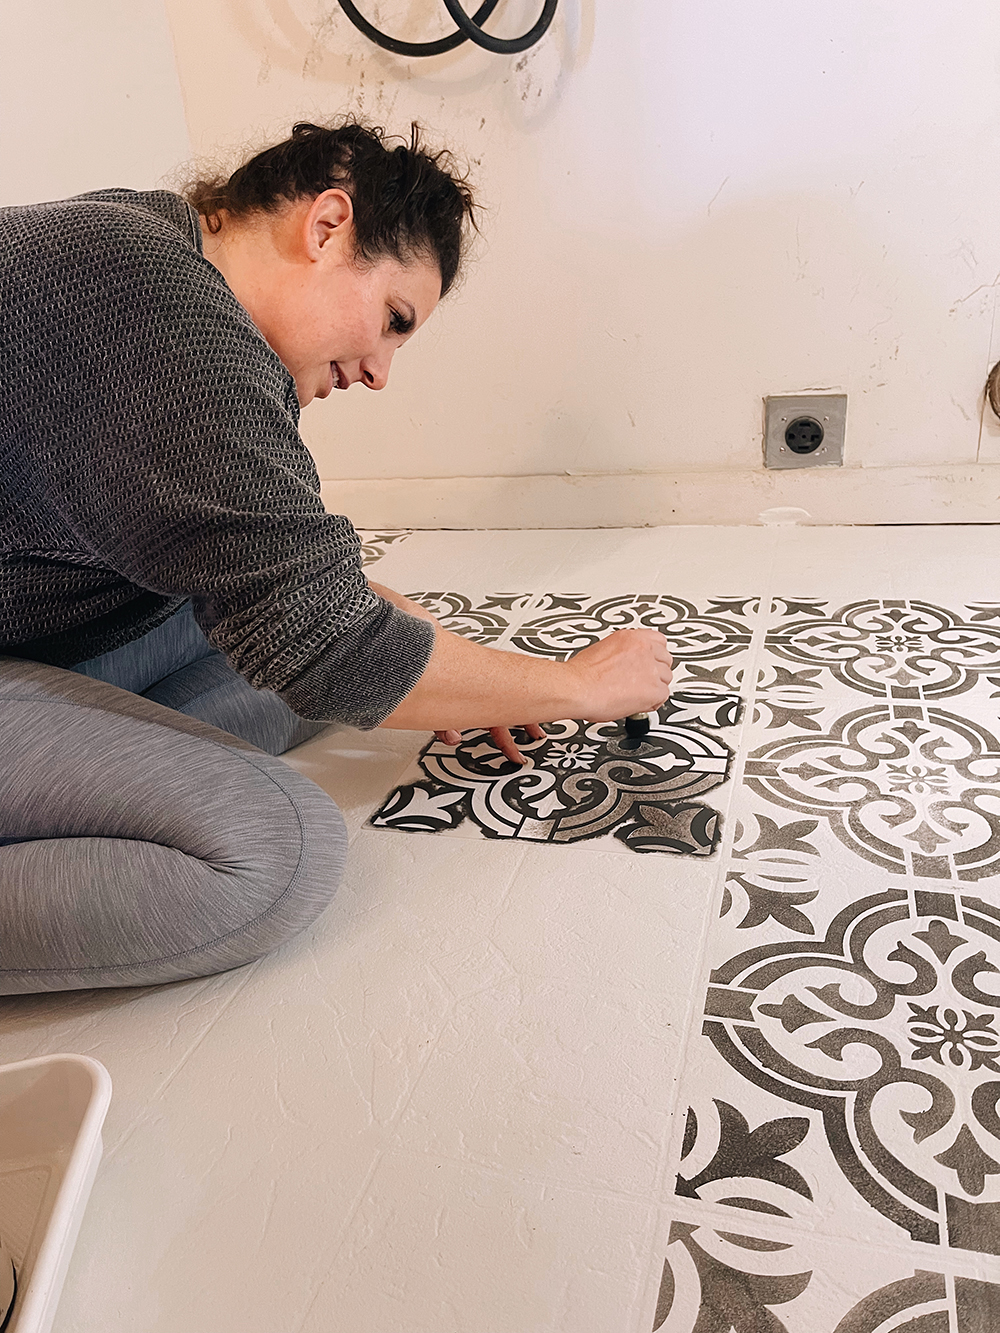
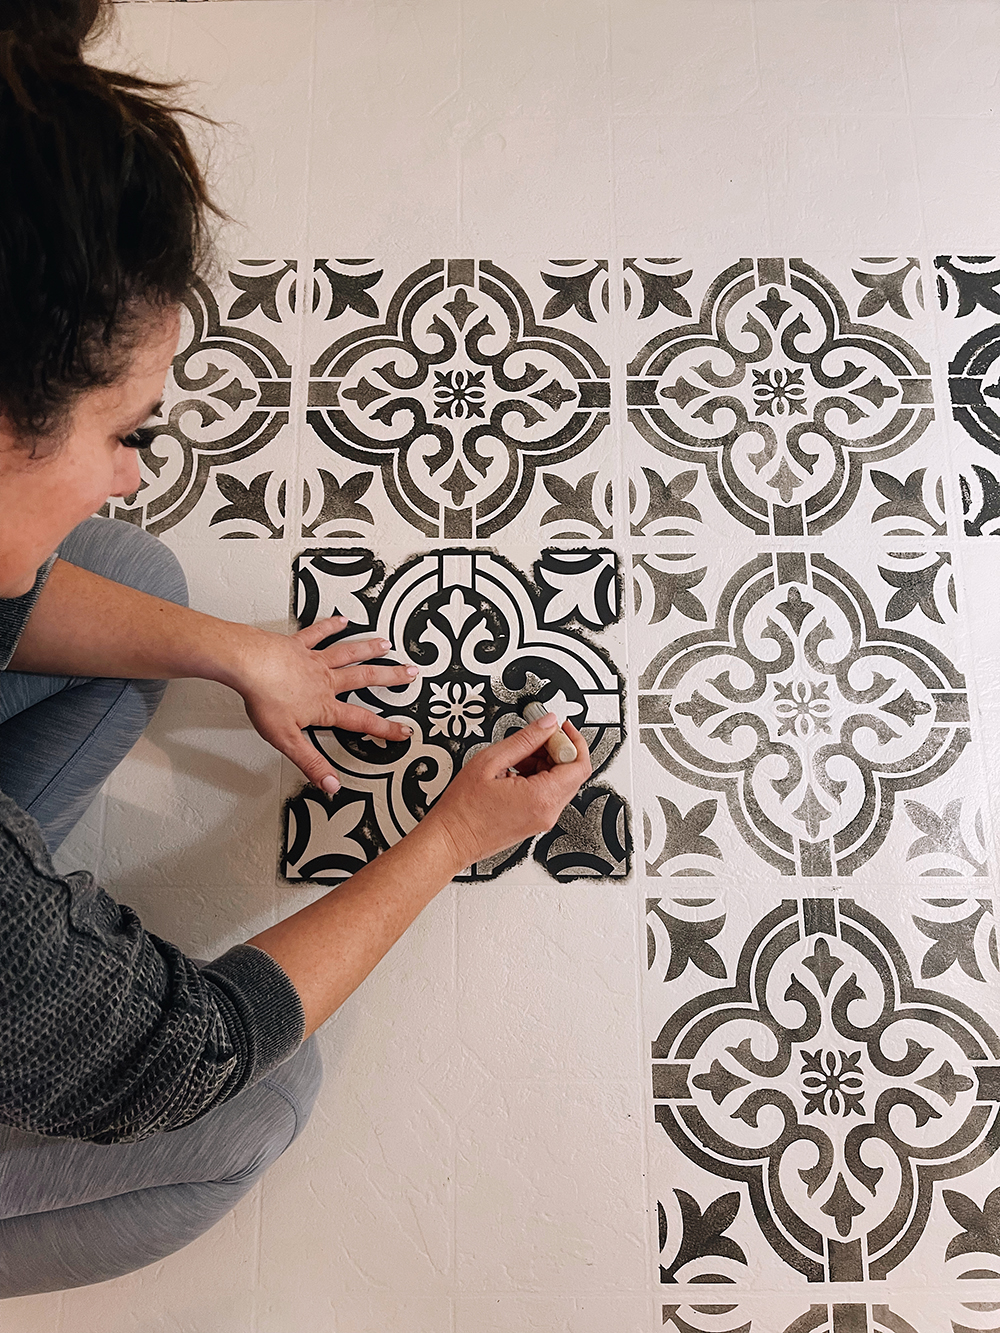
For this project of painting the linoleum floors, I ordered and it made SUCH a difference! For one, I had help! My sis-in-law crawled around the bathroom floor with me and made the task all the more fun. But also, we both rotated between stencils and we were able to get it done faster this way.
When it came to the edges and around corners, we also cut a couple of the stencils to get better lines than if we were to bend the stencil to fit. All around, best idea!

How to Stencil Paint Linoleum Floors
With the very first stencil, we taped the edges down and tried to use a thicker coat of paint since I knew that a second coat of the stencil color really wouldn’t be feasible. Well, the paint bled through (especially because the linoleum had texture) and it was a mess.
I painted the base color over that first try and we decided to start it over again.
The second time went MUCH more smoothly. We used a , and there was minimal to no bleeding! Now, I will say, the stencil color wasn’t a thick, solid color… with this technique, the overall look is a little more of a rustic look, although the lines were clear and defined (no bleeding).
Another technique I’ve heard has great results is to apply the stencil paint color. I haven’t tried this myself, but it seems you get a more concentrated paint color without the bleed. I would just practice outside on cardboard before trying on the floor to get the hang of it!
Our Mountain Cabin Bathroom Update
We’ve been working on little updates off and on since we purchased our cabin in the fall, this bathroom update being one of them. In fact, the lower-level bathroom in the cabin also houses the laundry. So along with a “new” painted linoleum floor, we installed the brand new washer and dryer, new toilet, updated mirror, faucets, shower curtain, and accessories. The before and after of this mountain cabin bathroom update is crazy to me, with just a little time, paint and accessories… it’s already feeling like a new space.
But of course, there is still more to come!
Ready to see that before and after again?












898a Games says
I loved your step-by-step guide on painting linoleum floors! It’s so inspiring to see how a little creativity can transform such a dated surface. Can’t wait to try this in my kitchen! Thanks for sharing your tips!