
A bedroom should be an oasis of peace and serenity, away from the world and all its distractions and headaches. Whether you live in the middle of the city or you’re headed to a cabin in the mountains, I believe a bedroom should reflect tranquility and peacefulness.
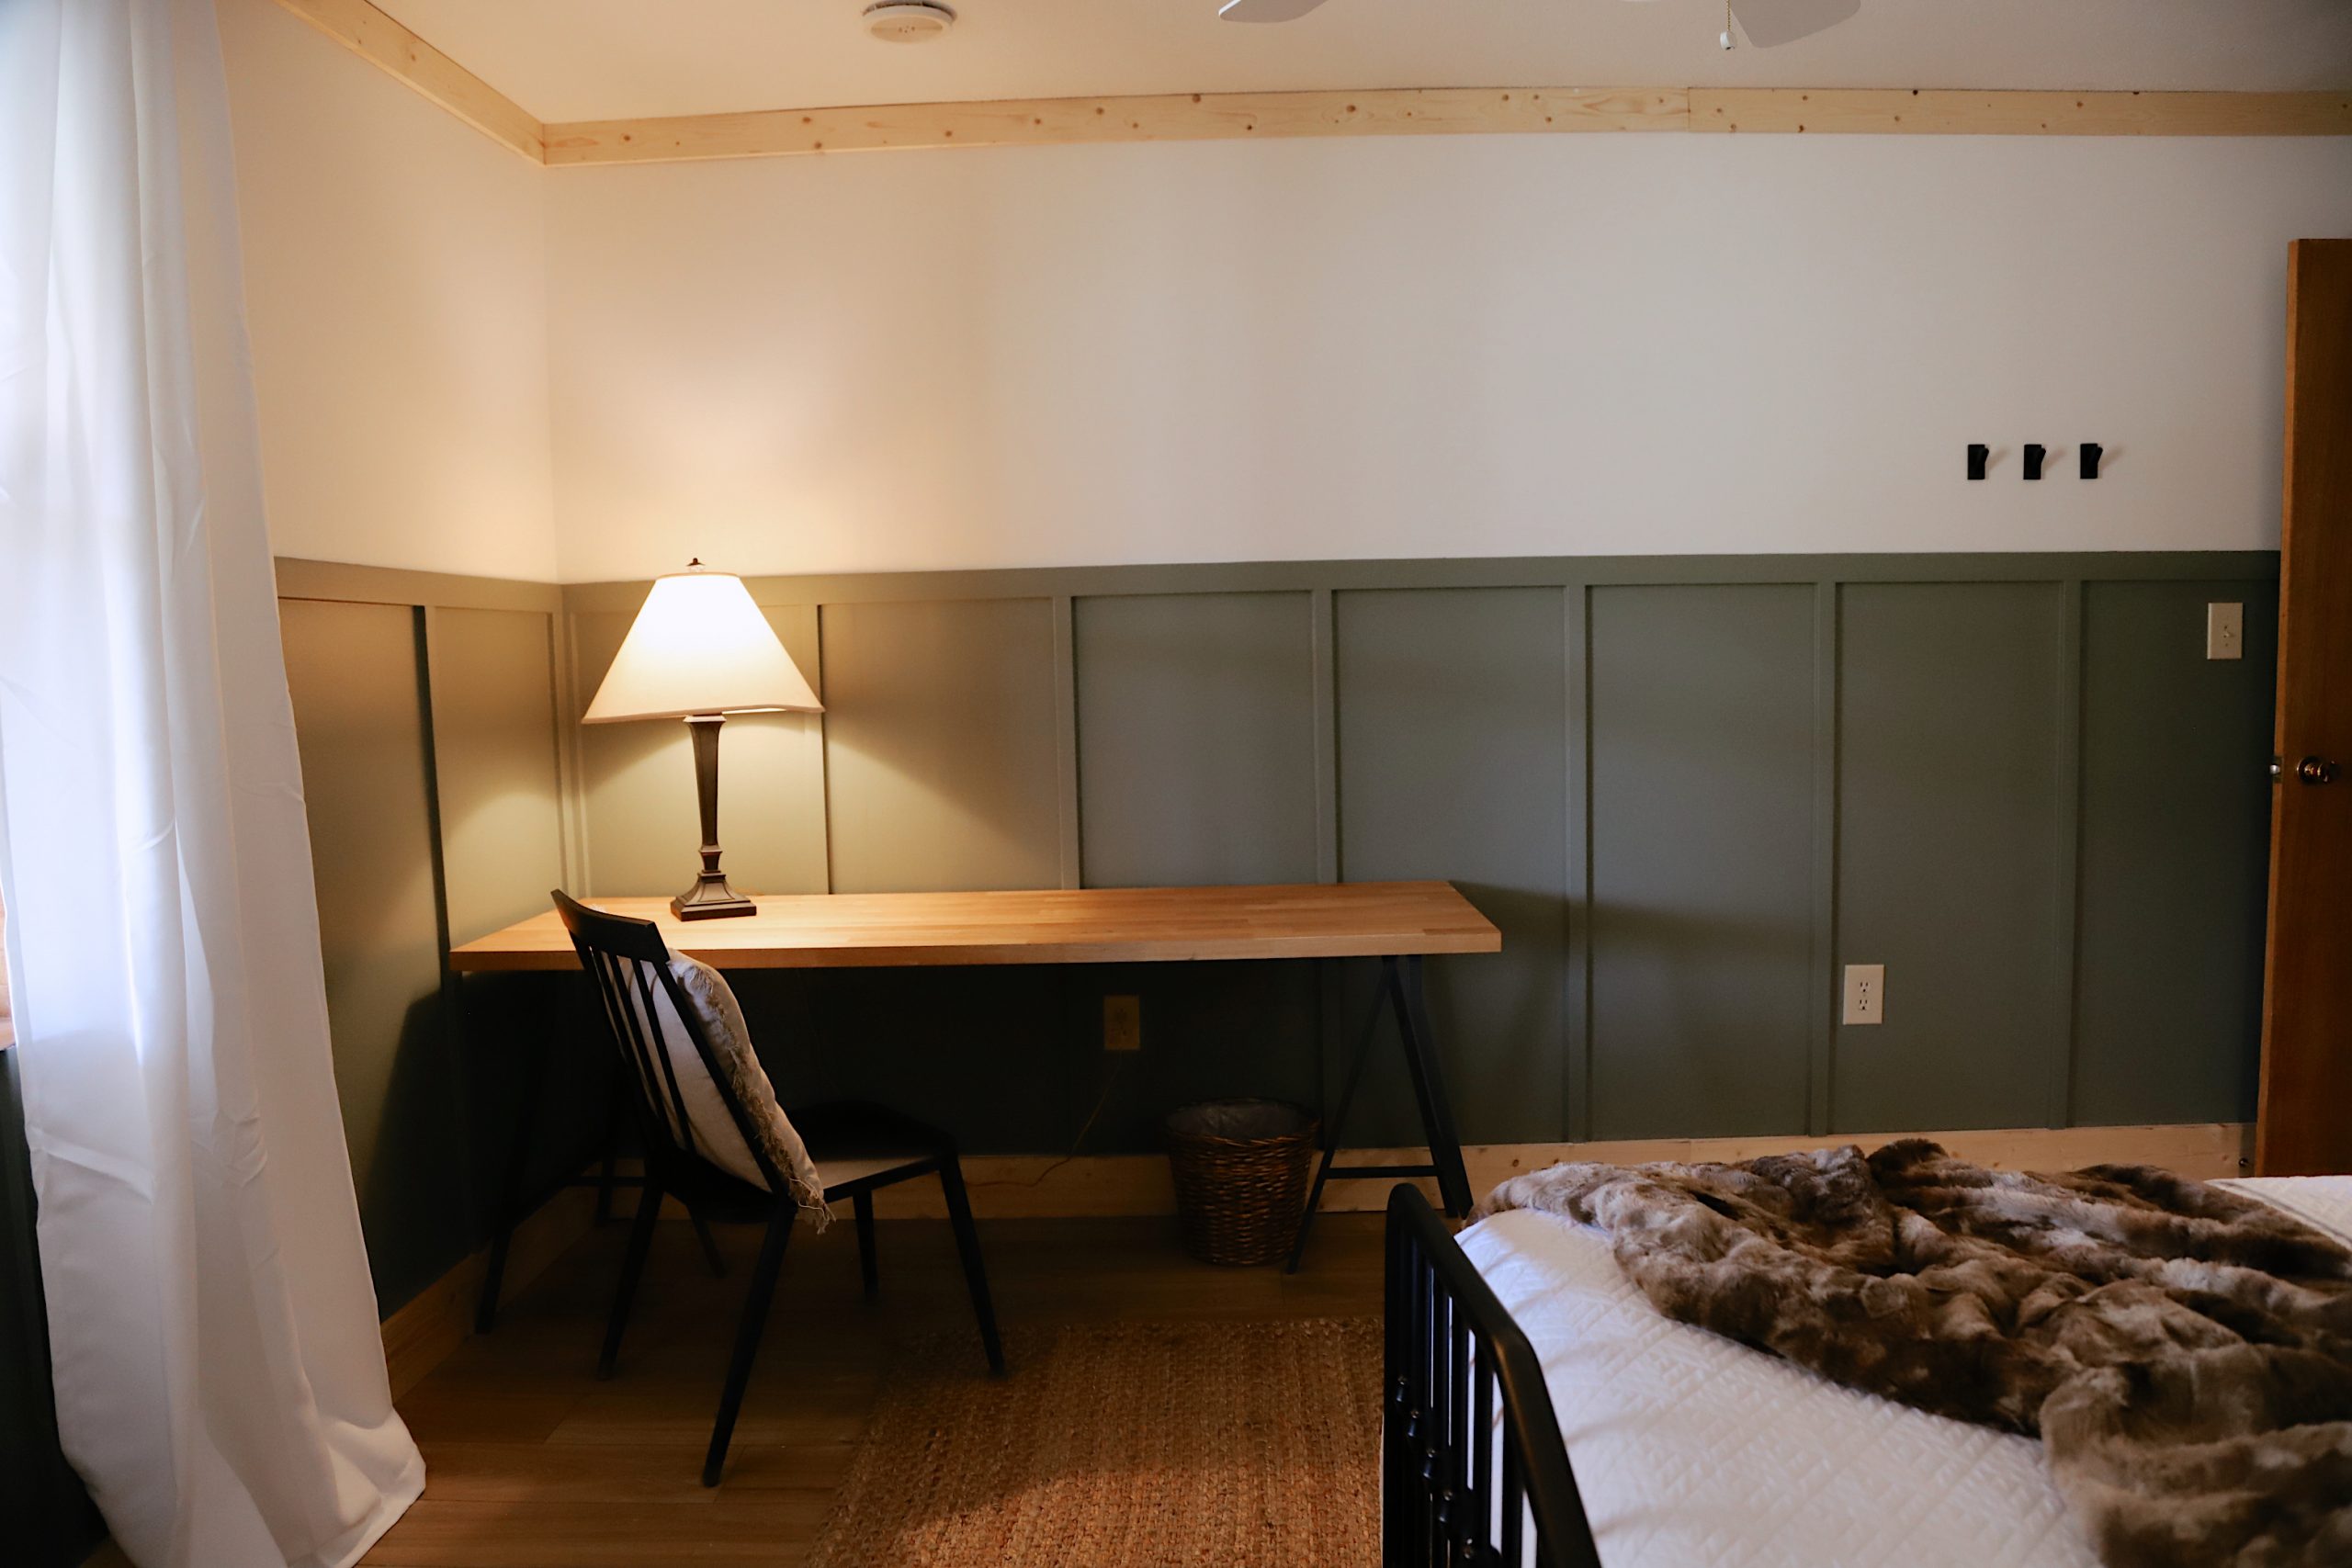
For our scenic mountain view cabin, there is one bedroom that has a smaller window and isn’t quite facing those grand views we’re known for. We decided to bring some of the outside in with a cozy green mountain cabin bedroom makeover while maintaining those tranquil, cozy vibes.
And believe me, this room needed it!
Cabin Bedroom Before and After –


Tada!! But we’re still not done! Read to the end for our last REALLY BIG PLAN to make a big splash in this cabin bedroom. The ceilings are just 7′ tall with that one window (that looks out to the mountain view but under a top floor addition outside), making the room a little darker (and harder to take photos too!). But we still wanted to add in the cozy pop of color with Valspar Fields of Green on the new DIY Board and Batten walls.
In this blog post, I’ll take you through the entire cozy green mountain cabin bedroom makeover process we’ve gone through so far, from the mood board and inspiration to the final reveal of the entire room transformation with lots of before and after photos! We hope you find our story and tips helpful as you embark on your own makeover project, whether it’s a cabin bedroom, an entire room, or even just one wall!
The Beginning
With our Mountain Cabin Pinterest board as a jumping-off point, we started brainstorming ways to incorporate a few favorite elements of mountain cabins into this cabin bedroom: clean wood floors, moody green walls, scenic mountain views, and cozy furs and textures.


Cozy Green Cabin Bedroom Mood Board
Whether you call it a mood board, inspiration board, or style guide, there’s a lot of value in pulling together images that are relevant to your project or aesthetic. A mood board is essentially a collage of images that helps you capture your inspiration and vision for a space.
As a starting point, it’s important to use real images of objects that you like or find inspiring. Pinterest is great for finding ideas, but I also love creating a board out of items that I already have or want to order for the room… for example, a few items that I had saved in my cart on Amazon were first on our mood board to see if I liked it in the space. Another plus? It can also serve as an organizing tool.

Isn’t that mountain forest wallpaper mural gorgeous? That’s our next room update and I can’t wait to share it with you!
See also Cabin DIY: How to Easily Paint Linoleum Floors in your Bathroom – No Sanding!
Opening Up The Room
When we first stepped into this space, the room felt small, even though most of the surfaces were a lighter color. There were two closets in the room, which this cabin not being our primary residence and a rental when we’re not there, the closets weren’t a necessity. There was also a built-in desk and beautiful but large furniture which felt heavy in the room.
To open up the room, we took the words of Scott McGillivray from Vacation House Rules to heart and decided to get rid of the closets.
Renters don’t need to move in, they just need a place for their suitcases.

Removing the closets was the best idea to open up the room and make it look and feel SO much larger! We also knocked down the popcorn ceiling, removed the old carpet to lay waterproof vinyl plank flooring and replaced the bulky bed.
As you can see from these mood boards, though, I wanted to bring it outside even more with a foresty feel. Lucky for me, my husband agreed! Here are some shots of what we did.
The Board and Batten Wall DIY
An accent wall is one of the first things I do when renovating a room, be it with a fun wood design, wallpaper, or a punchy color.
The board and batten technique, which is traditionally used on exterior walls to enhance their appearance, has moved its way into interior spaces. With a little creativity and effort, you can turn an ordinary wall into a statement piece. First, create as many battens as you want from thin pieces of wood (we found them at our local hardware store). Next, use a pneumatic nail gun to attach these thin strips of wood in rows on your wall.


Materials for Board and Batten DIY
1x2x8 Primed MDF Board
We used 13 boards x $7.29 ea = $94.77. Cut in half to 4 feet makes 26 legs, which we spaced evenly on the three walls.
1x3x8 primed MDF Board
We used 5 boards x $9.01 ea = $45.05. These are the horizontal pieces that attach to the wall above the legs.
TOTAL = $139.82
Added Materials (some we already had on hand) if needed:
1 Gallon Eggshell Paint (Valspar Fields of Green) = $31.98
Minwax Wood filler = $6.98
Caulk = $3.18 ea
Shop the materials


The Finishing Touches
It doesn’t take much to turn a room into a relaxing retreat. You can add pops of color with throw pillows and window curtains, or create depth with monochromatic textures—your style is your call. And if you’re worried about being too cold, just keep extra blankets on hand for when you’re feeling chilly (and it’s fun to add in lots of extra blankets!).
To balance out light walls, use darker shades on furniture like end tables and nightstands and vice versa.
For some of the finishing touches on this green mountain cabin bedroom, we attached to the headboard area, modern black wall hooks near the entry door, a simple wood desk for a cozy workspace, spray-painted a lamp base black, and plenty of texture with a , , and .


SHOP THE ROOM
More to Come For Our Cabin Bedroom Makeover
Since we’re making over this property a little at a time as we’re there, we’ve been working on this room in stages. First, we simply cleaned it out and removed extra items. The next time, we knocked down the popcorn ceiling, removed the closets, and replaced the carpets with wood flooring. The last time we were there, it was all about those board and batten walls, and those little decor changes and touches!
The NEXT BIG THING, and really the inspiration for the entire room, will be to add a FULL mountain forest mural to the last wall to really bring the outside and in and the mountain feel to life in this cabin bedroom. I can’t wait!
We’ve also got a few finishing touches up our sleeves… and I’m itching to get back there to finish it up.









Leave a Reply